
The Local Firewall Control Policy for macOS helps you enforce and modify the behavior of a local firewall. A firewall protects your devices against malicious or unnecessary network traffic.
To create a macOS Local Firewall Controls policy:
![]()
Important:
If your data is stored outside of the US, check which login URL you should be using depending on your region. If your organization uses LDAP, RADIUS, or requires firewall allow list configuration, the Fully Qualified Domain Names (FQDNs) will also be region specific. See JumpCloud Data Centers for the URLs, FQDNs, and IP addresses.
- Log in to the JumpCloud Admin Portal.
- Go to Device Managements > Policy Management.
- Under the All tab, click (+).
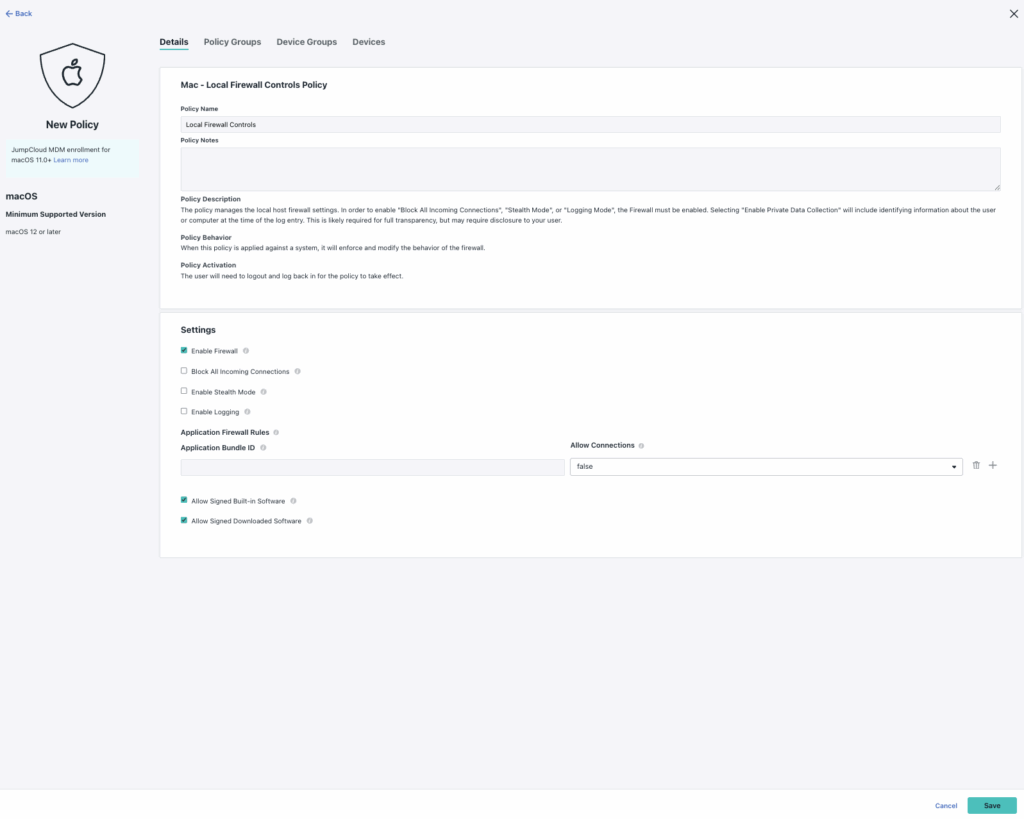
- On the New Policy panel, select the Mac tab.
- Select the Local Firewall Controls policy from the list, then click configure.
- (Optional) In the Policy Name field, enter a new name for the policy or keep the default. Policy names must be unique.
- (Optional) In the Policy Notes field, enter details like when you created the policy, where you tested it, and where you deployed it.
- Select Enable Firewall to configure the firewall. You must select this field to enable any additional fields.
- Select Block All Incoming Connections to block all new incoming network requests and to enable Stealth Mode.
- Select Enable Logging to create log files. This information is stored in
/var/log/alf.logand/var/log/appfirewall.logfiles. This field is available only for devices running macOS 12 Monterey or later.- (Optional) If you selected Enable Logging, select Enable Private Data Collection to identify private information about the user or computer at the time of the log entry. You might want to advise your users that private data is being collected.
- (Optional) If you selected Enable Logging, choose the type of logging you want to collect:
- Throttled - Log only the minimum data associated with events.
- Brief - Log a single line item for each firewall action with moderate detail.
- Detail - Send all details that are collected.
![]()
Tip:
This field is available only for devices running macOS 12 Monterey or later.
- Select Enable Stealth Mode to make it more difficult for other devices on your network, friend or foe, to locate your Mac. This setting can also be enabled via Apple’s System Settings > Privacy & Security.
- Enter the app’s unique Bundle ID in the Application Bundle ID and set the Allow Connections field to True to to authorize the system connections.
- Select Allow Signed Built-in Software to permit built-in applications to receive incoming connections. This feature is available on macOS 12.3 and later
- Select Allow Signed Downloaded Software to permit downloaded signed software to receive incoming connections. This feature is available in macOS 12.3 and later.
- (Optional) Select the Device Groups tab. Select one or more device groups where you'll apply this policy. For device groups with multiple OS member types, the policy is applied only to the supported OS.
- (Optional) Select the Devices tab. Select one or more devices where you'll apply this policy.
- Click save.
- If prompted, click save again.
- After applying the policy, the user must log out and log back in on the device for the changes to take effect.
Back to Top