
Many Apple devices support using an encrypted transport protocol to communicate with a Domain Name System (DNS). JumpCloud supports using DNS over HTTPS and DNS over Transport Layer Security (TLS) services. DNS encrypts traffic and hides DNS queries from view.
JumpCloud provides four policies to control encrypted DNS settings for macOS and iOS devices. You’ll configure DNS servers to control the queries that can use DNS on the device by supplying Supplemental Match Domains, Server Addresses, and Server URLs or names.
These four policies let you use DNS to encrypt DNS traffic:
- Encrypted DNS over HTTPS:
- For macOS devices running macOS Big Sur and later.
- For supervised iPhones and iPads running iOS 14 and later. To learn more about supervised devices, see Understanding Supervised Devices and Supervised Policies.
- Encrypted DNS over TLS:
- For macOS devices running macOS Big Sur and later.
- For supervised iPhones and iPads running iOS 14 and later.
Create a macOS or iOS Encrypted DNS over HTTPS policy
- Log in to the JumpCloud Admin Portal.
![]()
If your data is stored outside of the US, check which login URL you should be using depending on your region. If your organization uses LDAP, RADIUS, or requires firewall allow list configuration, the Fully Qualified Domain Names (FQDNs) will also be region specific. See JumpCloud Data Centers for the URLs, FQDNs, and IP addresses.
- Go to Device Management> Policy Management.
- click (+).
- On the New Policy panel, select the Mac or iOS tab.
- From the list, search for Encrypted DNS over HTTPS, then click configure button next to it.
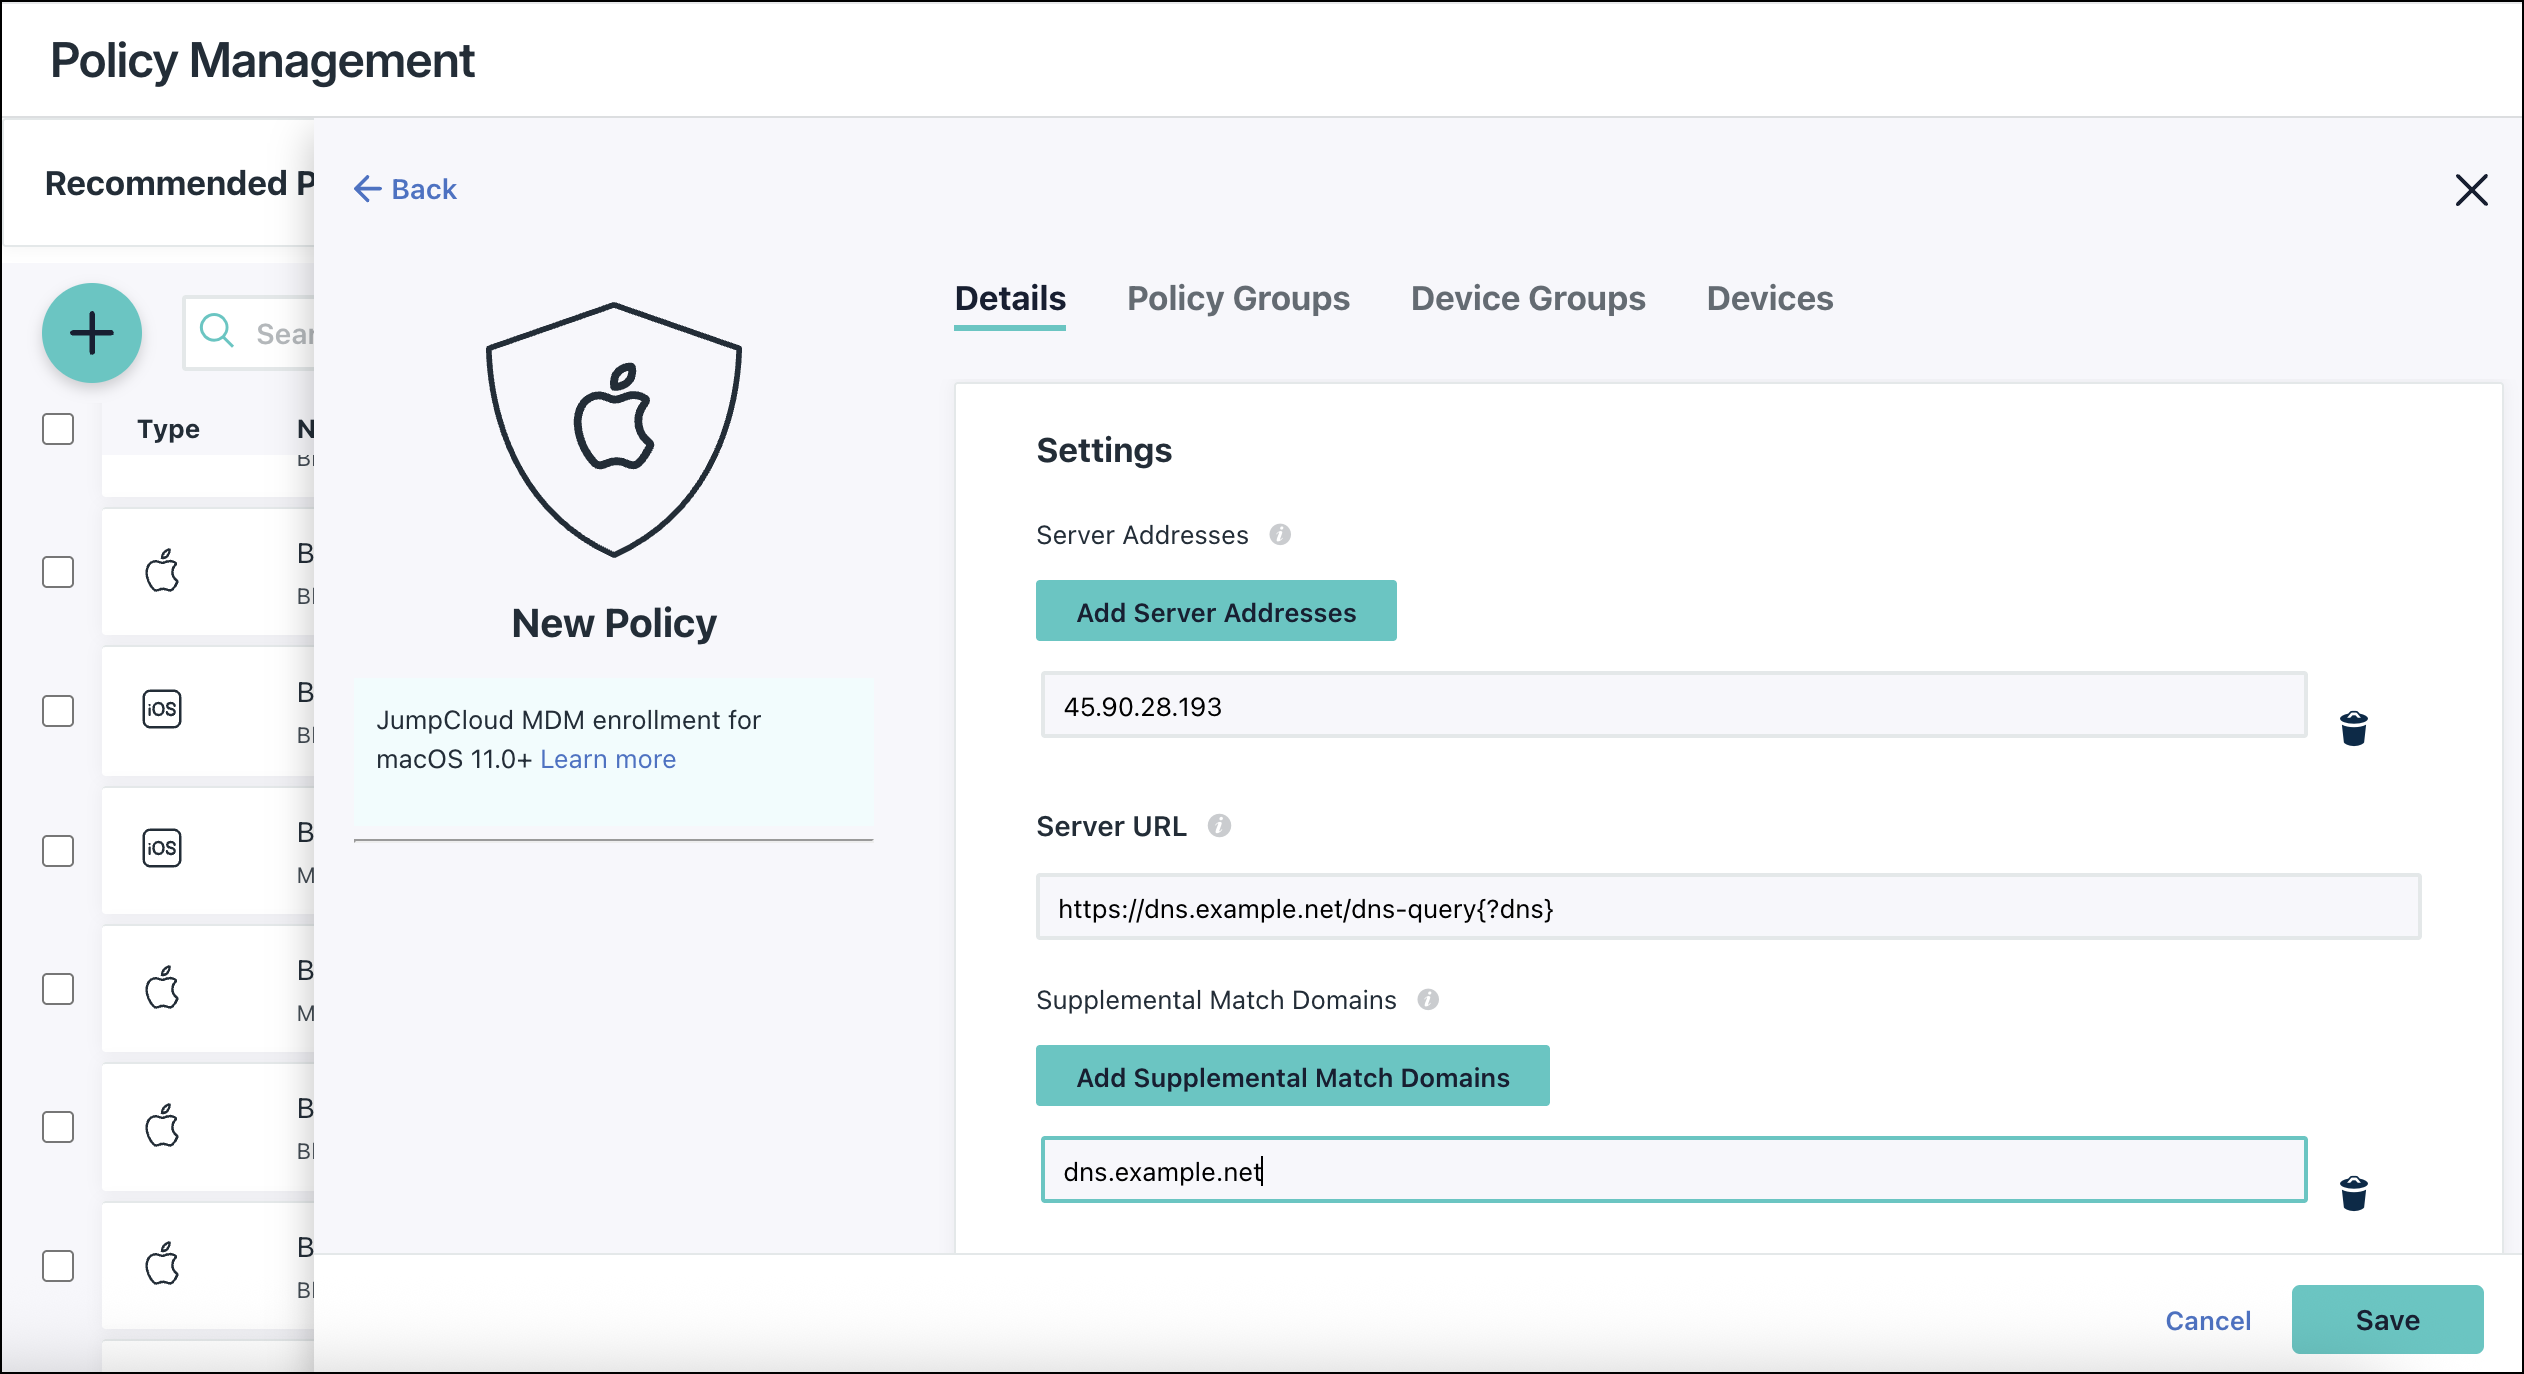
- Under Settings > Server Addresses, click Add Server Addresses.
- If your DNS servers have an IPv4 or IPv6 address, enter the address here. To add additional addresses, click Add Server Addresses. For example, 45.90.28.193.
- For Server URL, enter the server’s URI template. For example,
https://dns.example.net/dns-query{?dns}. - For Supplemental Match Domains, click Add Supplemental Match Domains.

- Enter a list of domain strings used to determine which DNS queries can use the DNS server. For example,
dns.example.net. If you don’t provide this, all domains will use the DNS server. A single wildcard * prefix is supported, but not required. - (Optional) Select the Device Groups tab. Select one or more device groups where you'll apply this policy. For device groups with multiple OS member types, the policy is applied only to the supported OS.
- (Optional) Select the Devices tab. Select one or more devices where you'll apply this policy.
- Click Save. If prompted, click Save again.
Create a macOS or iOS Encrypted DNS over TLS policy
- Log in to the JumpCloud Admin Portal.
- Go to Device Management> Policy Management.
- click (+).
- On the New Policy panel, select the Mac or iOS tab.
- From the list, select Encrypted DNS over TLS from the list, then click configure.
- For Server Addresses, click Add Server Addresses.
- If your DNS servers have an IPv4 or IPv6 address, enter all the addresses here. To add additional addresses, click Add Server Addresses. For example, 45.90.28.193.
- For Server Name, enter the server’s hostname of a DNS over TLS server. If there are multiple existing server names, click in the field to see those names. The hostname is used to validate the server certificate.
- For Supplemental Match Domains, click Add Supplemental Match Domains.
- Enter a list of domain strings used to determine which DNS queries can use the DNS server. For example,
dns.example.net. If you don’t provide this, all domains will use the DNS server. A single wildcard * prefix is supported, but not required. - (Optional) Select the Device Groups tab. Select one or more device groups where you'll apply this policy. For device groups with multiple OS member types, the policy is applied only to the supported OS.
- (Optional) Select the Devices tab. Select one or more devices where you'll apply this policy.
- Click Save. If prompted, click Save again.