
If your company uses Sharp printers with the Sharp MFP web-interface, you can connect them to allow for users to print items using their JumpCloud credentials via LDAP.
![]()
Note:
These steps were validated with Sharp MX-2651 printers, but should also apply to similar models.
To configure your Sharp MFP:
- Log in to the Sharp MFP’s web interface home page.
- Go to System Settings > Network Settings > LDAP Settings.
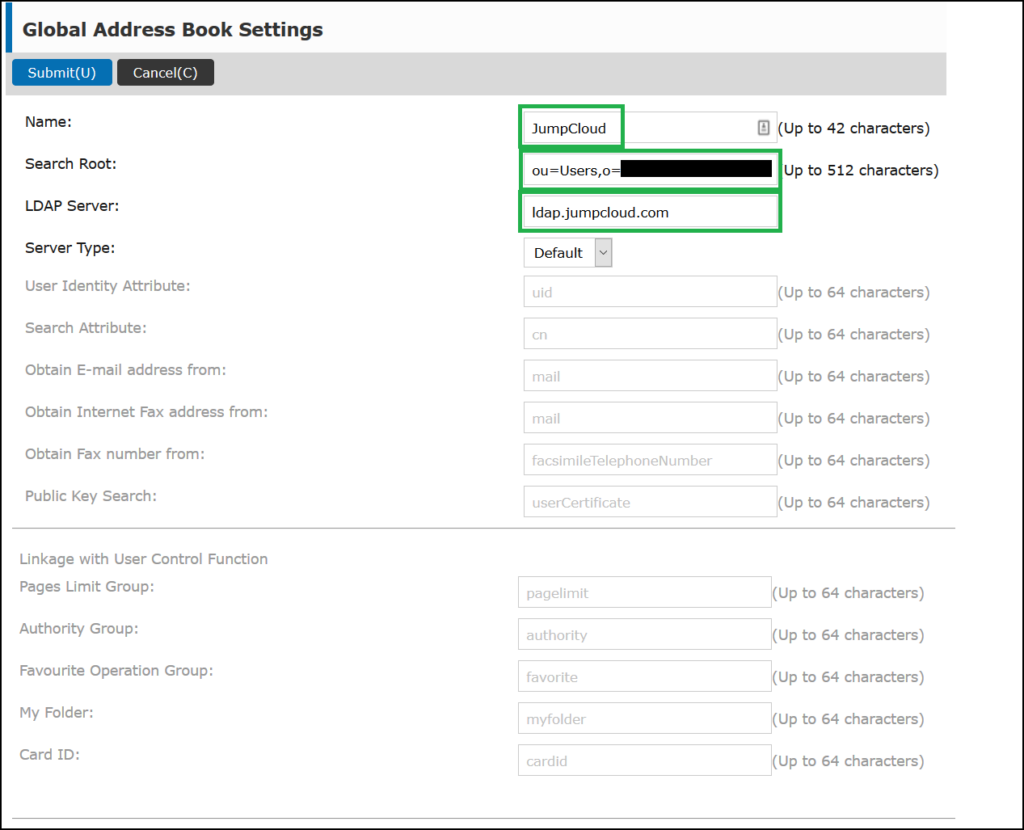
- Add a new Global Address Books List:
- Name: JumpCloud
- Search Root: ou=Users,o=YOUR_ORGANIZATION_ID,dc=jumpcloud,dc=com
- LDAP Server: ldap.jumpcloud.com
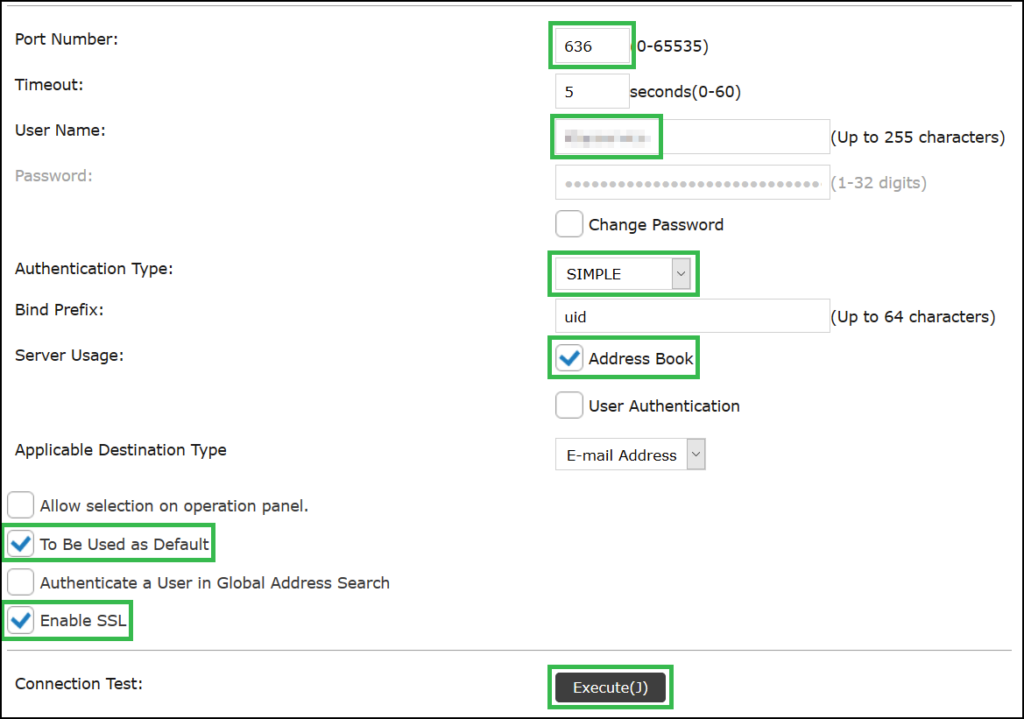
- User Name: YOUR_LDAP_SERVICE_ACCOUNT_USERNAME
- Password: YOUR_LDAP_SERVICE_ACCOUNT_PASSWORD
- Port Number: 636
- User Name: YOUR_LDAP_SERVICE_ACCOUNT_USERNAME
- Password: YOUR_LDAP_SERVICE_ACCOUNT_PASSWORD
- Authentication Type: SIMPLE
- Bind Prefix: uid
- Server Usage: Address Book and User Authentication
- Select To Be Used as Default.
- Select Enable SSL.
- Under Connection Test, click Execute, and then Submit to save.
![]()
Important:
Sharp recommends rebooting the MFP once the new settings are submitted.
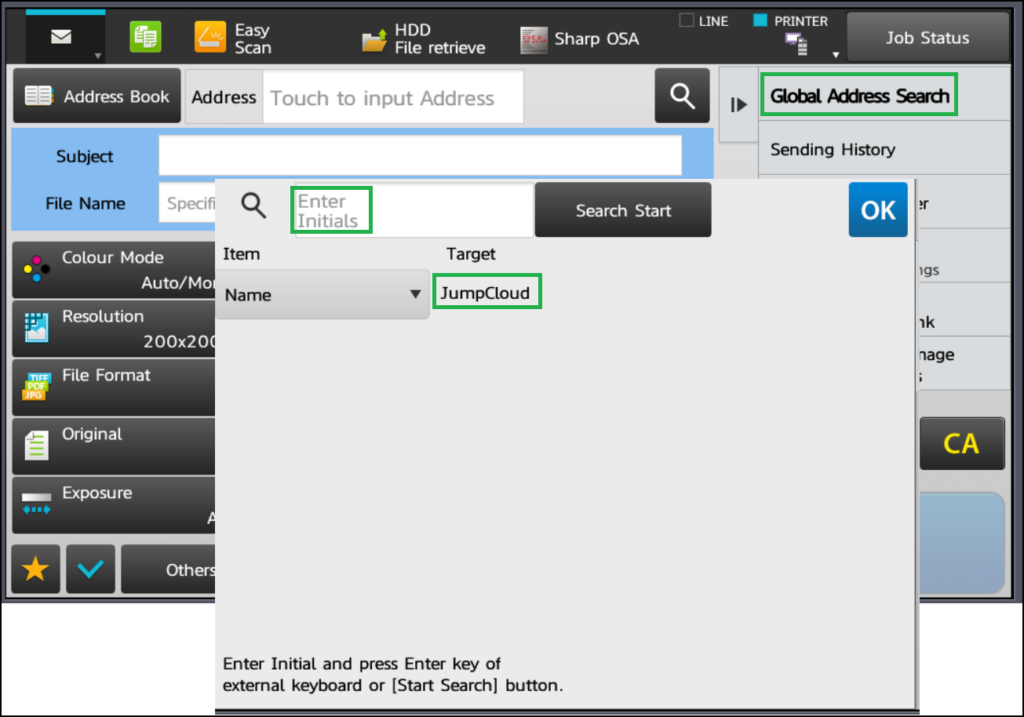
You can then configure the permissions on the printer(s) within the Sharp MFP web-interface. Consult Sharp's documentation and resources for their best practices and configuration steps for permissions. JumpCloud users can then be be found in Global Address Search within the MFP web-interface.
Back to Top