
A hostname uniquely identifies a device on a network for communication using Domain Name System (DNS). When you install the JumpCloud agent on a device, it sets the JumpCloud Device Name (or display name) to match the macOS Computer Name.
However, after this initial setup, changes to the local hostname on the device do not automatically update the Device Name in JumpCloud, and vice-versa. This can lead to mismatches, especially in environments using Automated Device Enrollment (ADE).
This article explains why this mismatch occurs and provides several methods to synchronize a device's local hostname with its JumpCloud Device Name.
Considerations:
- During initial agent installation, the JumpCloud Device Name matches the device's local hostname (macOS Computer Name).
- After initial installation, changes to the local hostname don't automatically update the Device Name in JumpCloud, and vice versa. To ensure they match, you must manually edit the Device Name in the Admin Portal or update it using PowerShell.
- Or you can use a JumpCloud Command to update a device's local hostname and the JumpCloud Device Name simultaneously.
Understanding Hostname and Device Name Mismatch
There are two primary scenarios that can cause local hostname and JumpCloud Device Name mismatches:
- Manual Hostname Changes: An administrator or user manually changes the device's hostname locally in macOS System Settings. JumpCloud does not monitor for this local change and the original Device Name is retained in the Admin Portal.
- Automated Device Enrollment (ADE) Timing: When a macOS device is enrolled via ADE, the JumpCloud agent often installs before the Setup Assistant prompts the user to create their local account. At this stage, macOS has a generic hostname (for example MacBook-Pro.local), which becomes the initial JumpCloud Device Name. Once the user creates their account, the local hostname updates to include their username (for example SunnyFay-MacBook-Pro.local), but the JumpCloud Device Name remains the old, generic one.
Aligning Names During ADE Enrollment
If your org is using ADE, you can prevent the mismatch from happening during ADE enrollment by requiring user authentication. This binds the JumpCloud user to the device from the start, ensuring the hostname and Device Name are aligned correctly.
To enable user authentication during ADE enrollment:
- Log in to the JumpCloud Admin Portal.
![]()
If your data is stored outside of the US, check which login URL you should be using depending on your region. If your organization uses LDAP, RADIUS, or requires firewall allow list configuration, the Fully Qualified Domain Names (FQDNs) will also be region specific. See JumpCloud Data Centers for the URLs, FQDNs, and IP addresses.
- Go to Device Management > MDM.
- In the Apple tab, go to Apple Device Enrollment Configuration > Configure macOS.
- Under Step 4 User Authentication, select Enable.
- When enabled, users must authenticate with their JumpCloud credentials during enrollment, creating a managed local account immediately and ensuring the final hostname and JumpCloud Device Name match.
- See Configure ADE to learn more.
Correcting Mismatches on Existing Devices
For devices that already have a mismatched hostname and Device Name, use one of the following methods to resolve the discrepancy.
Using a JumpCloud Command
This method uses a single command to update the device's local hostname and simultaneously instruct the JumpCloud agent to update the Device Name in the Admin Portal.
Prerequisites:
- To perform any of the following steps you'll need your API Key. To gather your API key, see JumpCloud APIs - Accessing your API Key.
![]()
See Get Started: Commands to learn more about commands.
To create the command in JumpCloud:
- In the JumpCloud Admin portal, go to Device Management > Commands.
- Click ( + ), then choose Command From Template.
- In the Configure New Command from Template aside, select the macOS tab.
- Search for the following command: Mac - Rename System HostName, LocalHostName and ComputerName from JumpCloud and then click configure.
- (Optional) Enter a custom name for the command (for example Rename Hostname for macOS).
- Under Command* find the API_KEY value and replace "YourReadOnlyAPIKey" with your API key.
- Go to the Devices tab to bind the command to a device, or the Device Groups tab to bind it to a group of devices.
- Click Save and then click Run Now from the Commands page.
- Upon successful execution of the command, a device restart is recommended.
Using the PowerShell Module
If you prefer to use PowerShell, you can update a single device or perform a bulk update for all your macOS devices.
Prerequisites:
- You must have the JumpCloud PowerShell Module installed. See Install the JumpCloud PowerShell Module to learn more.
Option 1: Update a Single Device:
- Open PowerShell and connect to your JumpCloud organization:
Connect-JCOnline - Enter your JumpCloud Administrator API Key when prompted.
- Verify the device's current hostname and mismatched displayName:
Get-JCSystem -hostname "CURRENT_HOSTNAME" | select hostname, displayName - Run the following command to set the displayName to match the
hostname:Get-JCSystem -hostname "CURRENT_HOSTNAME" | Set-JCSystem -displayName "CURRENT_HOSTNAME"
Option 2: Bulk-Update All macOS Devices
This script is ideal for fixing mismatched names across your entire fleet of macOS devices:
- Open PowerShell and connect to your JumpCloud organization with your API key:
Connect-JCOnline "Your_API_Key" - Run the following commands to export a list of all macOS systems:
$systems = Get-JCSystem -os Mac | Select-Object id, hostname, displayName | Export-Csv MacDev.csv - Import the CSV and update display names:
$csv = Import-CSV -Path ./MacDev.csv
foreach ($line in $csv) {
Set-JCSystem -SystemId $line.id -DisplayName $line.hostname
}
This updates the display names in JumpCloud without altering devices.
Changing the Hostname and Updating JumpCloud Manually
To manually update the hostname and device name, you need to change the hostname directly on the macOS device, and then update the Device Name in the JumpCloud Admin Portal to match.
Before changing the hostname, understand the three different hostname types used in macOS and how they relate to JumpCloud:
- LocalHostName: This name reflects the Local Bonjour Computer Name with '.local' appended. It is set during the initial macOS setup.
- ComputerName: This name maps to the 'Hostname' value displayed in the JumpCloud Admin Portal. It is generally the same as the LocalHostName upon the first time setup.
- HostName: The underlying macOS System hostname, adjustable via the Terminal. (A local 'hosts' file to override DNS is outside the scope of this article.)
Change the Hostname on the macOS Device
Change the hostname within macOS System Settings. The exact steps may vary depending on your version of macOS.
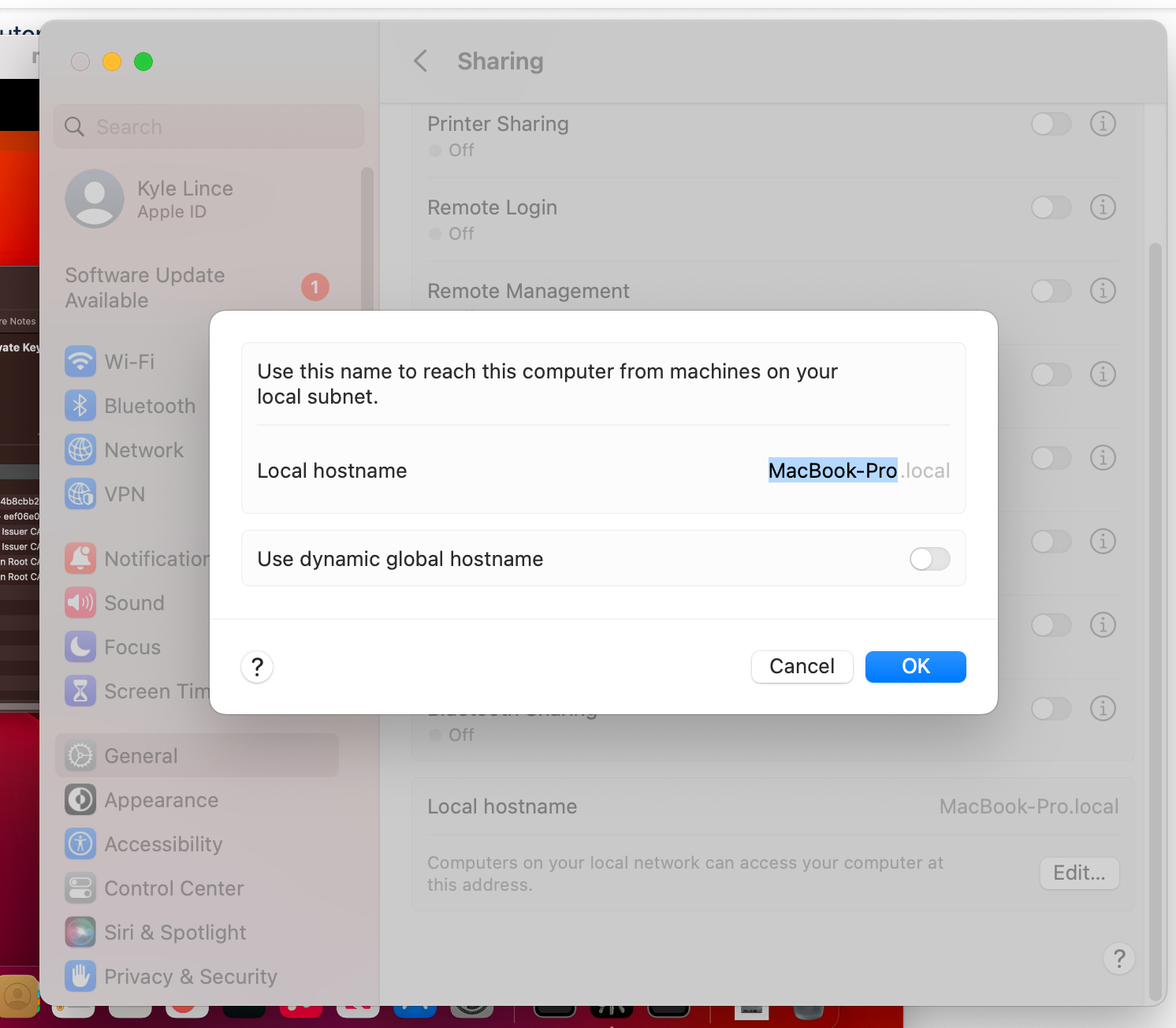
- Go to System Settings > General > Sharing.
- Click Edit to update the Local hostname.
- Enter the desired name and click OK.

Allow up to 30 minutes for the JumpCloud Agent to update the device’s information to the newly changed hostname.
To verify the device's hostname in JumpCloud:
- In the JumpCloud Admin portal, go to Device Management > Devices.
- Select the Devices tab.
- Locate the device in the list and select it.
- Go to the Insights tab and scroll down to Network to view the Hostname.
Update the Device Name to Match the Hostname in JumpCloud
After you have updated the hostname locally, you must manually update the Device Name in JumpCloud for it to match.
- In the JumpCloud Admin portal, go to Device Management > Devices.
- Select the Devices tab.
- Find the device in the list and select it.
- In the top left, click the pencil icon next to the current Device Name.
- Enter the new name to match the updated local hostname.
- Click Done.