This article was also contributed by Jared Cantwell, Chief Architect at JumpCloud
IT administrators know that procuring and deploying new devices for remote workforces takes additional time and resources, delaying onboarding of new employees and updating existing staff hardware.
In addition, security vulnerabilities and configuration needs for organizations limit how much self-service set up and installation is allowed and feasible for end users.
By integrating with Apple Business Manager (formerly known as Apple DEP) in JumpCloud’s Directory Platform, IT admins gain streamlined Zero-Touch Enrollment for Macs alongside powerful tools for enabling the configuration of the device, management of the user, and securing a new computer without ever having to touch the hardware themselves.
In this article we’ll dive deeper into the specifics of setting up your zero-touch enrollment processes, and give you a feel for what’s happening behind the scenes.
What is Zero-Touch Enrollment?
IT admins can automate MDM enrollment and device deployment by leveraging Apple Business Manager with JumpCloud MDM for Mac computers and workstations.
Using this process, Macs can be set up and configured automatically upon first bootup — eliminating the need for IT admins to handle each device individually prior to sending it to the employee who will eventually use it.
IT admins are no longer required to image a computer, bind it to the directory, and then allow users to login. When an employee receives a new laptop, all of the provisioning that needs to happen for them occurs at the first system login.
Simply put: zero-touch is a hands-off, scalable model that streamlines device and user onboarding for organizations.
Configuring of Zero-Touch with JumpCloud
Using JumpCloud MDM with Apple Business Manager allows IT admins to selectively enable Zero-Touch Enrollment for an organization. The following steps detail the configuration process:
- Link JumpCloud to Apple Business Manager.
- See Setting Up MDM
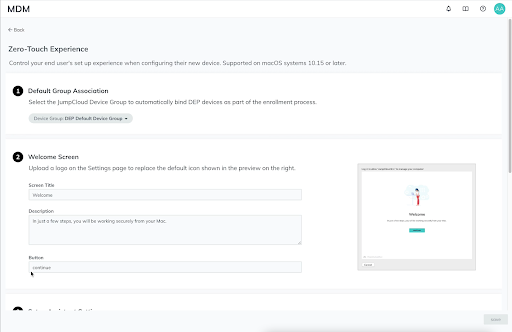
- Enable Zero-Touch by selecting “configure zero-touch experience” under DEP Configuration from the MDM section of the JumpCloud portal.
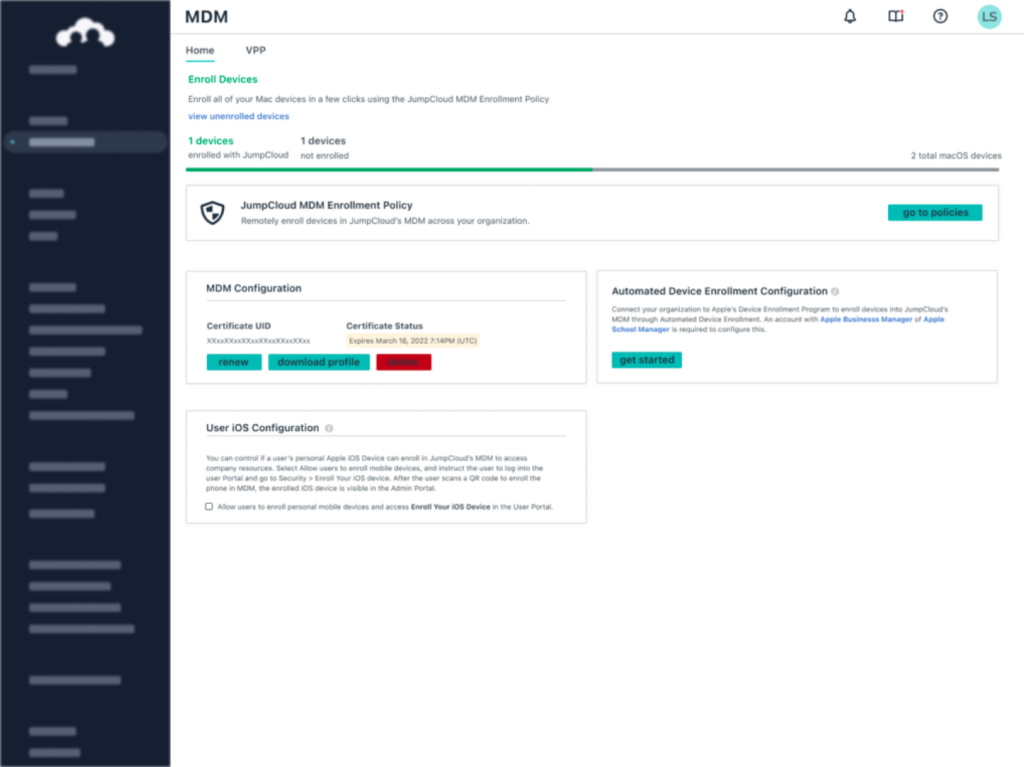
- Select the Default Group Association: This group will automatically place devices that go through Zero-Touch Enrollment into this device group, enabling automatic application of security policies.
- Welcome Screen: Add a custom welcome message and logo to display during the users first login.
- Setup Assistant Settings: Select the screens, options, and guided setup information you want to include and exclude during the devices setup process.
- User Authentication: Enable end user authentication to automatically bind the users account to the device during the enrollment process.
Zero-Touch Enrollment From IT’s Perspective
After completing a device purchase with Apple Business Manager, IT admins only need to complete the following steps to ensure enrollment success:
- Confirm the new device is registered in Apple Business Manager
- Check that JumpCloud is assigned as the MDM Server
- Verify the device is present in the JumpCloud Admin Portal’s DEP Devices list and synced with Apple
Though not required, it is recommended that admins activate “Force Password Change” on user login for increased security. This requires employees to select their own password directly in the device setup process and eliminates concerns about new employees missing that step.
Zero-Touch Enrollment From the End User’s Perspective
When the user receives the new device, the process of setup and configuration is simple and straightforward. The steps include:
- Unpacking the device and connecting it to a power source
- Booting up the device and waiting for the initial setup prompt
A new user just needs to follow the (likely familiar) steps to configure the device based on the options selected in the Setup Assistant Settings of the Zero-Touch configuration above. The only prerequisite for the end user is an internet connection; this must be enabled and connected in order for the device to complete the Zero-Touch Enrollment.
The following steps describe what the user will step through during the process:
Welcome Screen
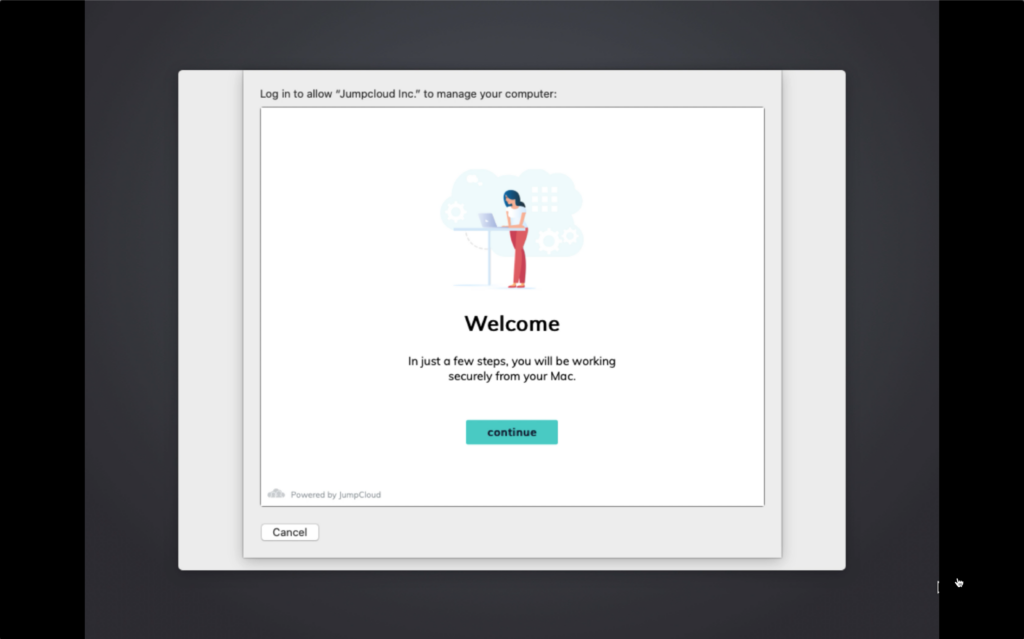
Once the device is synced into JumpCloud MDM, the device opens a web browser on first boot during the Automated Device Enrollment. This web browser will connect to JumpCloud’s servers to fetch a Welcome Screen that is customizable by the administrator.
Authentication
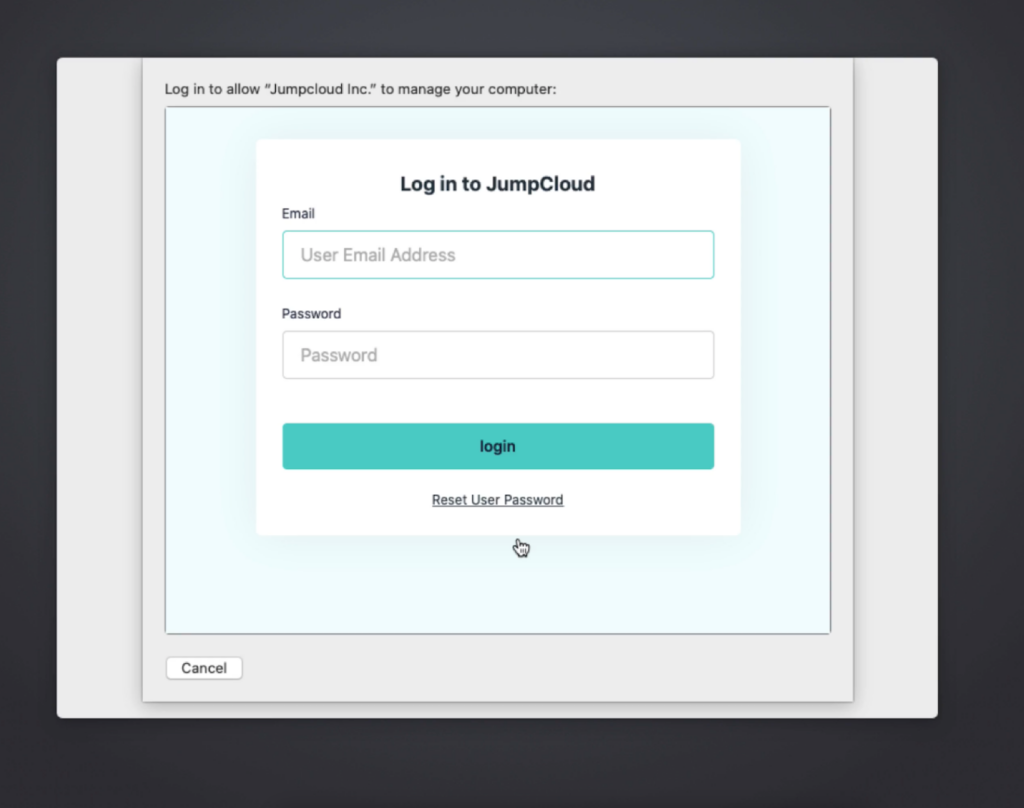
Once the user clicks ‘continue,’ the browser redirects to JumpCloud’s authentication page. The Zero-Touch Enrollment flow only supports password authentication, but combined with forced password changes the admin can ensure that a temporary password is changed before the device is even fully configured.
All of this leverages the existing JumpCloud user authentication process so the experience will look familiar to end users.
After successful authentication, the browser securely transfers the user’s identity to JumpCloud’s MDM servers to complete the enrollment process. A success screen is displayed letting the user know that authentication was successful and what to expect next.
Enrollment and Device Setup
Next, Apple’s MDM enrollment process takes over. JumpCloud returns an Enrollment Profile with the user’s identity securely embedded, so that when the device contacts our MDM servers we can associate this MDM device with the user that authenticated.
During Zero-Touch Enrollment, JumpCloud leverages DEP Profile configurations that allow us to pause the enrollment and securely configure the device before the enrollment completes:
- Create the user account: JumpCloud automatically creates an admin user account for the user that authenticated earlier in the process.
- Configure the hostname: To help the administrator identify whose machine is enrolling, we automatically set the hostname to uniquely identify the devices for each user.
- Notifications configuration: Receiving and responding to notifications from the JumpCloud Mac App (a native system tray app) is a critical part of maintaining a secure device. On enrollment, we install a profile that ensures your end users won’t miss or ignore important password notifications.
- Installation of the JumpCloud agent: Finally, we install the JumpCloud agent so that your device is securely configured and maintained for your organization from the very start, all before the user logs in for the first time.
Once the agent has been installed, it checks in with the JumpCloud servers and retrieves the list of users and policies that it should apply to the device. After completing this work, the agent signals that the enrollment can continue now that the user is properly configured and the device is being monitored by the JumpCloud agent.
Login
Next, the user sees a login screen where they can use their JumpCloud credentials to login.
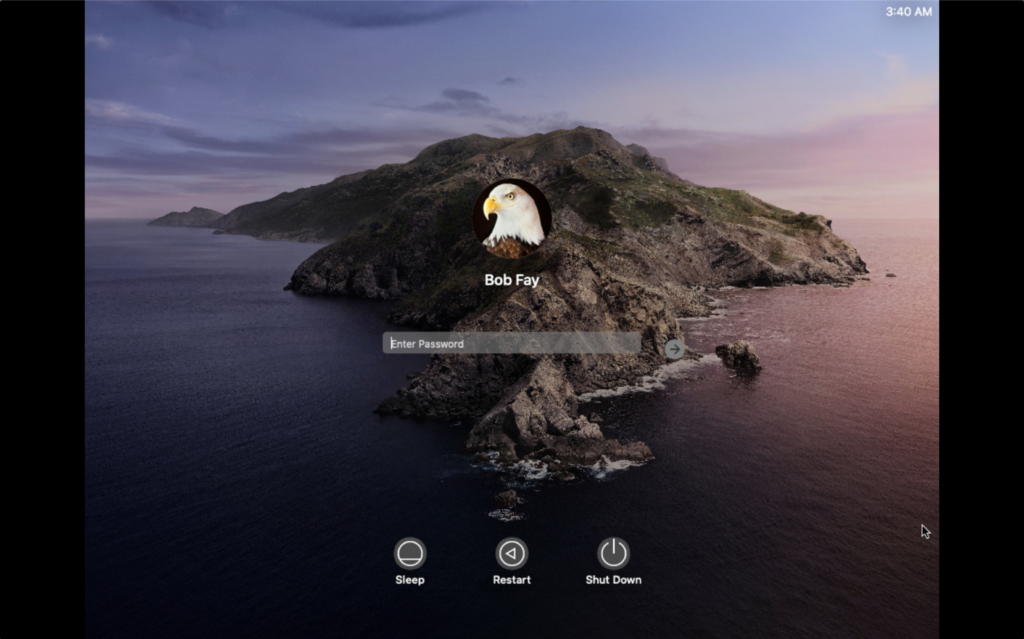
At this point, with no administrator intervention, the device is enrolled and securely configured, the user’s password is secure, the JumpCloud agent is managing the user on that device, and the JumpCloud Mac App is installed for secure password management.
Try Zero-Touch Enrollment for Free
Zero-Touch Enrollment in the JumpCloud Directory Platform will help you remotely onboard and manage Mac devices and give the device user access to authorized resources without you ever physically touching the machine first.
Unlike other solutions, JumpCloud gives you one place to control Apple MDM, identity management, and any Windows or Linux devices in your fleet so you can reduce your vendor footprint. The choice is yours.
If you aren’t already a current user of the platform, try it out for yourself: Set up a JumpCloud Free account in minutes to evaluate the full platform with up to 10 users and 10 devices. You’ll also have 24×7 premium chat support for your first 10 days in action as a JumpCloud Admin.


