Connect


Editor’s note: This tutorial was originally posted by Juergen Klaassen on his LinkedIn page.
Challenge:
I was looking for a secure option to acquire the connect key for the JumpCloud agent during a Task Sequence with MDT while imaging a Windows 10/11 with a custom ISO.
During the Task Sequence, the JumpCloud agent installer requires a connect key which needs to be passed as a parameter. As I don’t want to hardcode or store the connect key anywhere on the image within scripts or by using half-baked obfuscation techniques, I needed an approach which allows me to authenticate as an authorized administrator (or user).
There were of course several approaches to it. A simple one could have been to halt the Task Sequence, login to the JumpCloud Console, copy the key, and then paste it over to the installer and proceed – too many clicks and a little cumbersome as well because the Task Sequence is usually running in a low resolution. I considered options like password-protecting the installer including the connect key, but these methods are rather antiquated and do seldom cater for similar scenarios on deployed and provisioned systems as they often trigger false positives with EDR-solutions in place. I had to do some more research and start exploring vaulting solutions such as Vault by Hashicorp, AWS Secrets Manager or Azure Key Vault. All were considered here as they do have Powershell-modules available. I did choose Azure Key Vault as I didn’t have to sign-up for anything new and I’m using Azure for other purposes as well.
Requirements:
- Little-to-zero cost: Storing and acquiring secrets from a vault shall be extremely cheap and ideally it has no fees when idling around.
- Must be fully scriptable except the authentication sequence itself where the administrator is asked for credentials, ideally with MFA enabled.
- Deployable without any third-party software installations, i.e. tool to wrap the installer into a new binary or so
Solution:
Note: This is rather a quick solution right now and not perfect, but it’s confirmed working
Once you’ve setup your Key Vault on Azure, you’re ready to consume the secret within scripts:

This script which will be used within the Task Sequence (more about that later) doesn’t require a change of the Execution-Policy (this is by default elevated in a TS):
- Install-Module -Name Az.KeyVault -Force to install the respective module
- Import-Module Az.KeyVault to load the module
- Connect-AzAccount to auth against AAD and being able to retrieve the secret within this session (-Tenant and –Subscription are optional)
Connect-AzAccount -Tenant 'xxxx-xxxx-xxxx-xxxx' -SubscriptionId 'yyyy-yyyy-yyyy-yyyy
Account                SubscriptionName    TenantId                Environment
-------                ----------------    --------                -----------
[email protected]  Subscription1       xxxx-xxxx-xxxx-xxxx     AzureCloud'
$key = Get-AzKeyVaultSecret -VaultName 'MDT-creds' -Name 'JumpCloud-Connect-Key' -AsPlainTextto acquire the connect key and make it usable as a variable ($key)cd $env:temp | Invoke-Expression; Invoke-RestMethod -Method Get -URI https://raw.githubusercontent.com/TheJumpCloud/support/master/scripts/windows/InstallWindowsAgent.ps1 -OutFile InstallWindowsAgent.ps1 | Invoke-Expression; ./InstallWindowsAgent.ps1 -JumpCloudConnectKey $keyto download the latest JumpCloud Agent for Windows to the temp environment and run it with the just acquired connect key as a parameter (-JumpCloudConnectKey)
Install-Module -Name Az.KeyVault -Force
Import-Module Az.KeyVault
Connect-AzAccount

$key = Get-AzKeyVaultSecret -VaultName 'MDT-creds' -Name 'JumpCloud-Connect-Key' -AsPlainText

cd $env:temp | Invoke-Expression; Invoke-RestMethod -Method Get -URI https://raw.githubusercontent.com/TheJumpCloud/support/master/scripts/windows/InstallWindowsAgent.ps1 -OutFile InstallWindowsAgent.ps1 | Invoke-Expression; ./InstallWindowsAgent.ps1 -JumpCloudConnectKey $key
To run this script successfully within a Task Sequence you will need to make sure that the newly imaged installation has internet access. In some cases you need to ingest drivers before or give windows some time to detect the hardware and get the connection up.
There are multiple ways to ensure a connection before running the script, a simple one is to wait for a connection by using
do

 $ping = test-connection -comp 8.8.8.8 -count 1 -Quiet

} until ($ping){
…as this will halt the execution until 8.8.8.8 was pinged successfully.
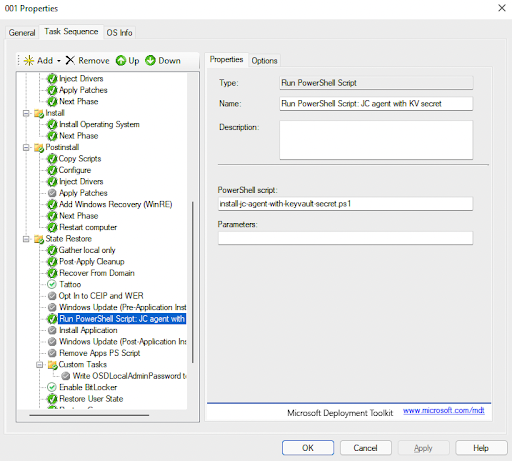
Usually you will run this script as one of the last steps within a Task Sequence under the section ‘State Restore’:
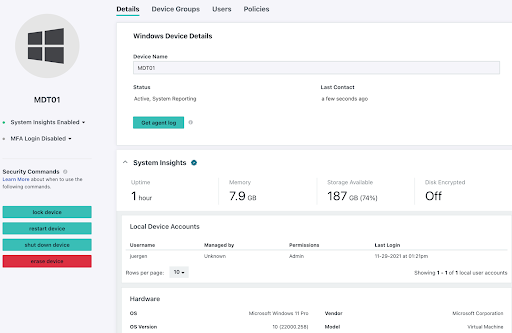
Once the script was successfully executed, the agent will register the newly imaged machine as a new device on the JumpCloud Administrator Console:
Notes:
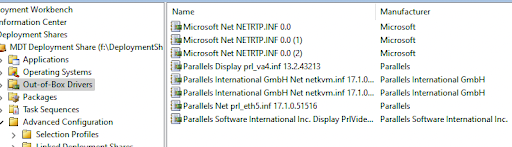
- The image for Windows 10/11 mentioned here is highly customisable. In this case I used a pre-patched and leaner WIM-file (some pre-installed Windows-Apps were removed).
- A forced clean-up of any installers is recommended once everything is done.
- Once the imaged device is registered to JumpCloud, you can proceed with various administrative tasks such as enforcing policies including BitLocker encryption, executing remote commands, assigning users etc.
- The script to acquire a secret from a vault can be used for various other purposes of course, i.e. if you have keys/identifiers to be used with installers/applications.
- During the prompt to authenticate while the script is running, you will be using your AAD-credentials. Ideally you can also use JumpCloud as an IdP for AAD. This can be particularly helpful if users (not admins) might re-image a laptop on behalf of an admin. Just make sure that the user has the respective rights on the Key Vault then.
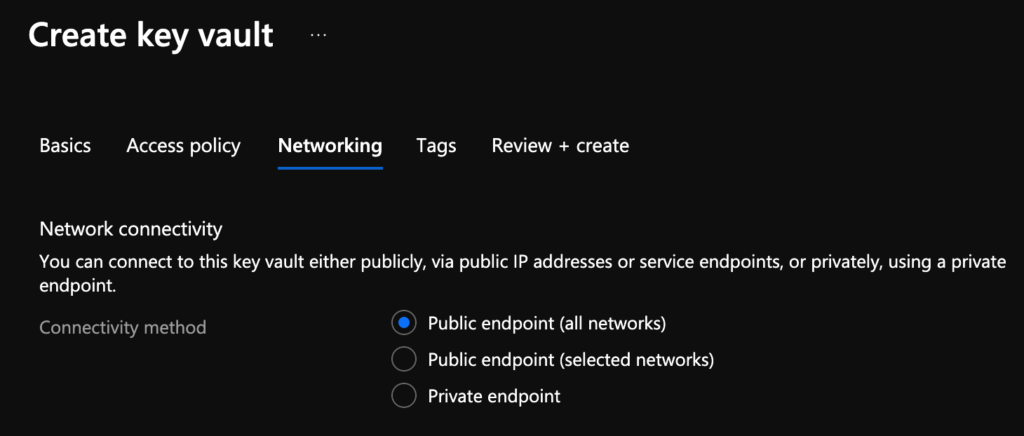
- If required, you can further lockdown the KeyVault to selected networks or private endpoints:
Thanks for reading!