
Connect


Contents
Rocky Linux, a community-driven and open-source enterprise operating system, has released version 9.4. Based on the extensive comments from the Linux community, this release is recognized as another significant milestone in the development of Rocky Linux to present a reliable and robust alternative to other enterprise Linux distributions. This version incorporates new features, enhancements, and security updates. This article explores the new features and provides examples to help you get started .
Some of the features in Rocky Linux 9.4:
- Enhanced Security and Compliance: This version includes OpenSSL 3.0 integration and improved cryptographic algorithms. It also carries updates to SELinux policies for increased security and more granular control over each policy.
- Performance Improvements: There are updates related to the kernel, network stack, and storage management, which affect the stability and performance of the system.
- Improved Container Support: New versions of tools related to container management and orchestration are here, including updated versions of Podman, Buildah, and Skopeo.
- Updated Developer Tools: Developers will have the opportunity to use an updated set of tools and libraries such as GCC, LLVM, and Python. Module streams are available for Ruby 3.3, PHP 8.2, and nginx 1.24 versions. The Git version control gained the new rebased version of 2.43 and Git LFS can be upgraded to version 3.4.1.
Let’s explore the steps after the installation of your Rocky Linux 9.4 version.
Step 1: Add a sudo user
Running commands as root can be very dangerous because root has unrestricted access to all commands and files on the system, so a better approach is to create a new sudo user which will maintain control, the system can log and audit the actions taken by users who have sudo privileges and also a non-root user cannot make changes that affect the whole system unless there are granted permissions.
First time, we will run commands as root so we can create a new user.
adduser jumpcloud
Next, we will set up a new password for our user. Make sure that you pick a strong password as a combination of letters, numbers, both lowercase and uppercase, and special characters as well for increased security. The output screen will also notify you if your password is shorter than 8 characters.
passwd jumpcloud
Now, we can simply add our newly created user to the wheel group where all sudo users are:
usermod -aG wheel jumpcloud
After this command, our user is capable of running the sudo command, and we can test this, first by switching to the new user.
su – jumpcloud
sudo whoami

If the new user has sudo privileges, this command will output ‘root’.
Step 2: Update system packages
If you have older versions of Rocky Linux such as Rocky Linux 8, this distribution does not offer an upgrade path from any version of Rocky Linux 8. If you are just starting with Rocky Linux, you can install the latest 9.4 version. If you are using earlier Rocky Linux 9.x versions, you can upgrade without issues to the 9.4 version by using the standard dnf command.
We can check the installed kernel version by running the following command:
uname -r

Now, we will make sure to update system packages to the latest versions.
sudo dnf update -y
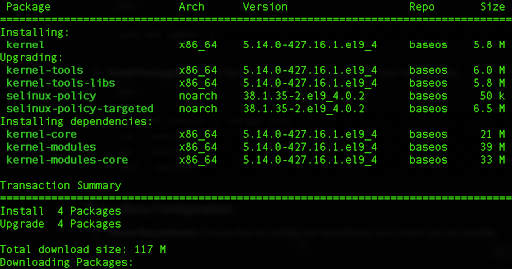
If you have some older version of Rocky Linux 9, you can update your system to the latest 9.4 version by running the following command:
sudo dnf -y upgrade
In our case, the output of this command will tell us that no action is needed.

Step 3: Install Tools (Optional)
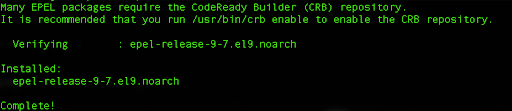
Rocky Linux includes numerous software development tools. Continue on with this tutorial if an overview would be helpful. Proceed by installing the Extra Packages for Enterprise Linux or EPEL, which holds various useful packages for development as well as system tools.
sudo dnf install epel-release -y
We can also install git to enhance our development workflow and version control.
sudo dnf install git -y
We can verify the latest 2.43.0 version by running the following command:
git –version

Rocky Linux 9.4 comes with Python 3.9 preinstalled. We can verify the version:
python –version

Since Red Hat Enterprise Linux 9.4 introduces the possibility to update to Python 3.12 same as Rocky Linux 9.4, we can install it additionally.
Next, install the Python 3.12 version as well as PIP, which is Python’s package manager.
sudo dnf install python3.12
sudo dnf install python3.12-pip
Python 3.12 and packages built for it can be installed in parallel with Python 3.9 but we can select which should be the default version.
sudo alternatives –install /usr/bin/pip3 pip3 /usr/bin/pip3.9.18 1
sudo alternatives –install /usr/bin/pip3 pip3 /usr/bin/pip3.12 2
Next, we can choose the option for Python 3.12 version
sudo alternatives –config pip3
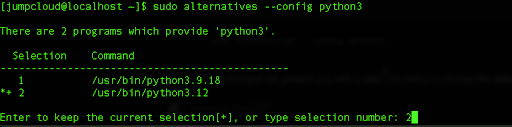
Type ‘2’ and then press Enter to confirm the choice. Once done, we can verify that we are using the latest version by running the command:
python –version

Step 4: Install and Configure Podman
Podman is a seamless container engine for developing, managing, and running OCI containers on a Linux system. This Rocky Linux 9.4 version came with various improvements related to Podman, so let’s explore it.
First, we will install Podman on our Rocky Linux by running the command:
sudo dnf install -y podman

Verify Podman installation by running the command:
podman –version

In our example, we will use Alpine, the lightweight, security-oriented Linux distribution designed for efficiency and simplicity. This image is around 5MB, which is perfect for containers since small size leads to faster downloads and improved performance. In this process, let’s pull the latest ‘alpine’ image from Docker Hub:
podman pull alpine:latest
This will download this light-weight image and we can proceed to run the container from the Alpine image and execute the command:
podman run –rm alpine:latest echo “Hello, Rocky Linux!”

We can also create a custom container image using the Alpine image as a base. Paste the following code in your terminal and press Enter:
cat <<EOF > Containerfile
FROM alpine:latest
RUN apk add –no-cache curl
CMD [“curl”, “–version”]
EOF
Now, build the custom image:
podman build -t custom-alpine:latest .

Run a container from the custom image that we have created:
podman run –rm custom-alpine:latest

When we run this command, Podman creates a new container based on ‘custom-alpine:latest‘ image. It includes setting up the necessary file system, network, and process namespaces. Then, based on the command we defined in our Containerfile, the curl –version is executed inside the container. This command checks the version of the ‘curl’ tool and outputs it to the terminal. Finally, we have the –rm flag that tells Podman to automatically remove the container after it has finished executing the command.
This process demonstrates how to install Podman as well as to create and use a simple custom container image, highlighting the benefits of efficient container lifecycle management.
Conclusion
This version of Rocky Linux offers a reliable, secure, and high-performance operating system that is well-suited for a wide range of enterprise and development environments. Whether you are a system administrator, developer, enterprise user, or just a Linux enthusiast, Rocky Linux 9.4 provides the tools and features to build and manage efficient and secure IT infrastructure.