Connect


Contents
Hypertext Preprocessor (PHP) is a powerful open source, server-side scripting language that’s primarily used for web development. PHP is a multi-platform language and is used to generate dynamic content.
PHP performs a wide range of tasks such as creating, opening, reading, writing, and deleting files residing on the server. In addition, it can collect form data, modify records in a database as well as manage access control by checking file permission and with access control lists.
It is free to download and use, and is compatible with popular web servers such as Apache, Nginx, and OpenLiteSpeed. At the time of writing this guide, PHP 8.2 is the latest stable PHP release. Check out the PHP 8.2 release notes for more information.
In this guide we will demonstrate how to install PHP 8.2 on Red Hat Enterprise Linux (RHEL) 9.
Step 1: Install EPEL Repository
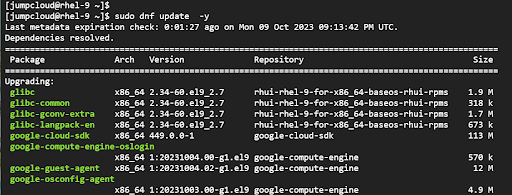
To start, log in to your server instance and update all the system packages.
$ sudo dnf update -y
To install PHP 8.2, we need to install it from the Remi repository which is a free Yum repository that provides the latest PHP versions. Always use the latest version of PHP.
To achieve this, we first need to install the Extra Packages for Enterprise Linux (EPEL) repository. EPEL is a community managed project and isn’t managed or supported by IBM in the Red Hat Enterprise Linux support agreement. The repository is hosted by the Fedora project and includes a set of additional packages not included by default in RHEL. Since EPEL falls outside the scope of RHEL, we need to add it in order to proceed with the installation or Remi repository.
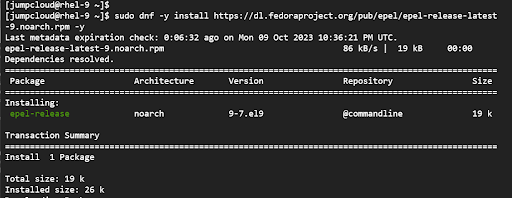
To add the EPEL repository on RHEL 9, run the following command:
$ sudo dnf install https://dl.fedoraproject.org/pub/epel/epel-release-latest-9.noarch.rpm
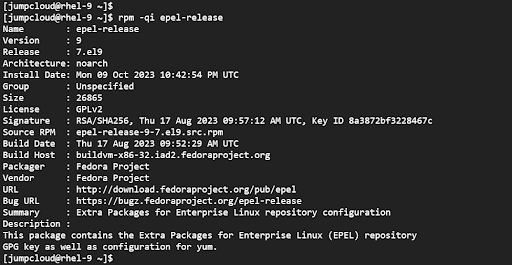
To confirm that EPEL has been added, run:
$ rpm -qi epel-release
The output provides detailed information about the package, including the name, version, release, and architecture.
Step 2: Install Remi Repository
Once the EPEL repository is added, the next step is to add the Remi repository. As mentioned earlier, the Remi repository provides the latest releases of PHP.
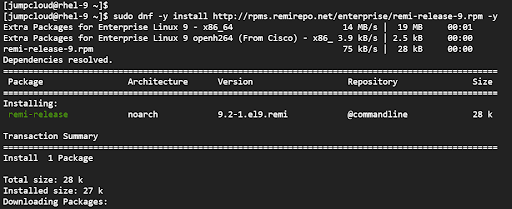
To add the Remi repository, execute the command below.
$ sudo dnf -y install http://rpms.remirepo.net/enterprise/remi-release-9.rpm -y
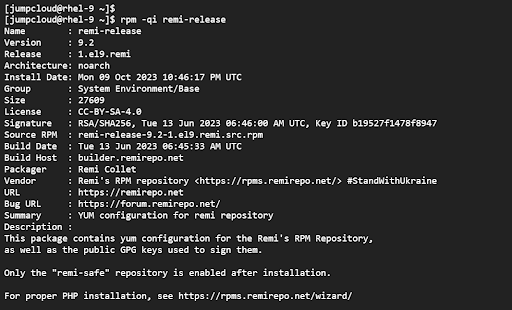
Once installed, you can confirm its installation as shown.
$ rpm -qi remi-release
Before installing PHP, we need to check the available PHP streams in the repository. To do so, run the following command:
$ sudo dnf module list php -y
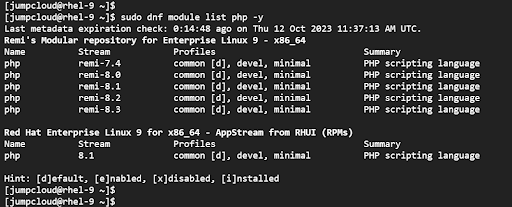
From the output, remi-8.3 is the latest stream in the repository. However, we will add the remi-8.2 release, which provides PHP 8.2 , the latest stable version of PHP.
The next step is to reset the default PHP module residing on the system.
$ sudo dnf module reset php -y
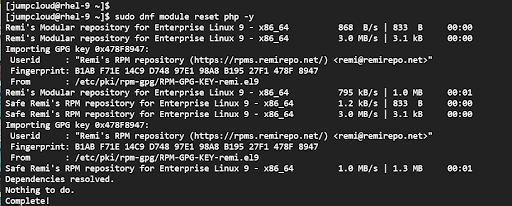
Next, enable the remi-8.2 stream by specifying the repository name and version number.
$ sudo dnf module enable php:remi-8.2 -y
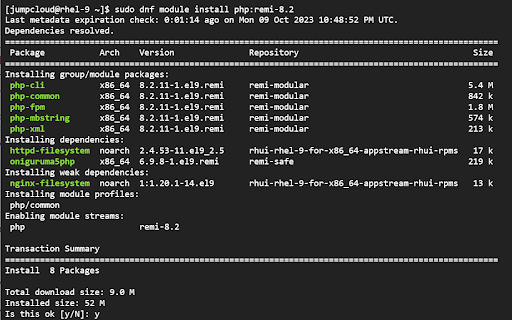
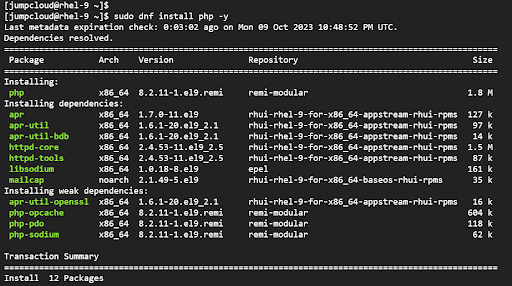
With the latest module stream enabled, proceed and install PHP 8 as shown.
$ sudo dnf install php -y
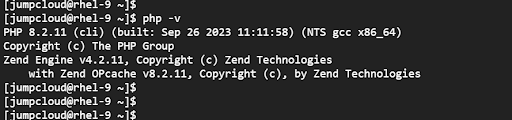
Once installed, confirm the version of PHP installed.
$ php -v
From the output, you can see that we have installed the latest version of PHP which is PHP 8.2
Step 3: Install Additional PHP Extensions (Optional)
PHP extensions play an integral part in the PHP ecosystem. A PHP extension is a compiled library that extends the functionality of PHP and meets the needs of various types of applications. For example, the php-mysql extension allows you to connect to a MySQL database, and php-zip enables you to unpack or create zip files. PHP provides over 150 extensions for various functionalities. Use these only as required and keep all code dependencies and third-party components up to date.
To install a PHP extension, use the following syntax:
$ sudo dnf install php-extension1 php-extension2
Additionally, you can use the following short form in case you are installing several extensions:
$ sudo dnf install php-{extension1, extension2, extension3}
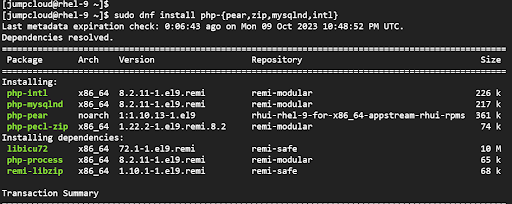
For example, to install php-pear, php-zip, php-mysqlnd, and php-intl, run the command:
$ sudo dnf install php-{pear,zip,mysqlnd,intl}
Step 4: Integrate PHP with the Apache Web Server
![]()
Note: Have a firewall enabled on your server and configure intrusion detection/prevention system (IDS/IPS).
PHP integrates seamlessly with the Apache web server via the mod_php module. The module parses PHP code and interprets PHP files. It is included with the Apache web server and integrates automatically with the web server.
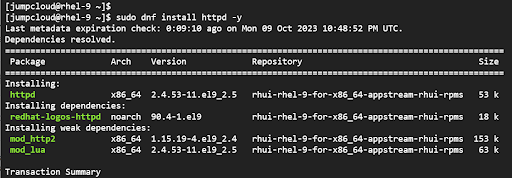
To demonstrate this, we will install Apache on our instance as shown:
$ sudo dnf install httpd -y
Once installed, start and enable Apache to start on system startup.
$ sudo systemctl start httpd
$ sudo systemctl enable httpd
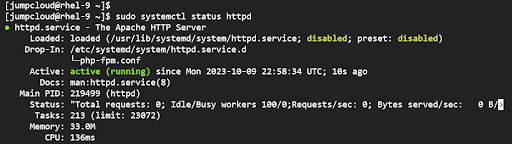
Be sure to ensure that Apache is up and running.
$ sudo systemctl status httpd
With Apache installed and running, let’s verify if the web server can parse PHP files. To do this, we will create an info.php file in the Document Root directory. The file, when accessed from a web browser, will display information about the installed version of PHP and other additional information.
Create the file as follows:
$ sudo vim /var/www/html/info.php
Add the following lines:
<?php
phpinfo();
?>
Save the changes and exit. Then restart the web server for the changes to take effect.
$ sudo systemctl restart httpd
Next, launch your browser and visit the URL shown:
http://server-ip/info.php
The PHP information page will be displayed as shown here.
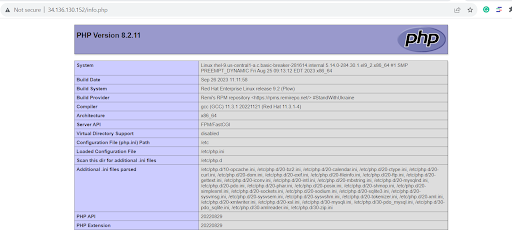
This shows that the web server can parse PHP files as expected.
![]()
Note: For security purposes, it’s recommended to remove the PHP file to prevent hackers from retrieving information about your web server and PHP installation.
To remove the file, run the following command:
$ sudo rm /var/www/html/info.php
Conclusion
In this guide, you have learned how to install PHP 8.2 on RHEL 9. In addition, you have seen how to install PHP extensions and how to confirm the installation of PHP on the command line and via a web browser. You can now parse PHP files on your browser and install any required PHP extensions without a problem.
If you’d like to learn additional RHEL skills, check out the following tutorials: