
Connect


Contents
Ubuntu, a popular Linux distribution, is known for its robust security features. There is always space for improvement once you install a fresh operating system, so in this article, we will guide you through the advanced techniques and features to enhance the security of the latest Ubuntu 24.04 version.
There are multiple layers of security that Ubuntu offers out of the box, but we can implement additional steps that can further protect your system from threats. We will focus on:
- Basic Security setup
- Network security
- Advanced User Management
- Application Security
- Data Encryption
By implementing these features, we can greatly increase the security of our Ubuntu system.
Step 1: Apply Basic Security Configuration
Before implementing some of the advanced techniques and features in your system, it is very important to keep your system updated.
Use the following commands to manage Ubuntu updates:
sudo apt update
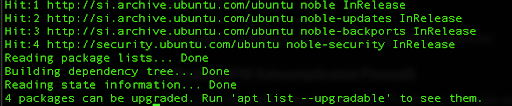
sudo apt upgrade
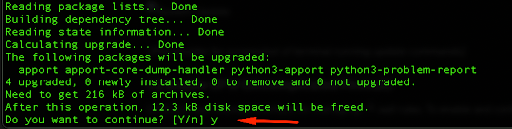
Type ‘y‘ and press enter to proceed with any pending updates.
Next, we want to take advantage of Uncomplicated Firewall (ufw) that comes with Ubuntu. If you have just installed your Ubuntu operating system there is a high possibility that it is not enabled by default. We want to check the current status by running the following command:
sudo ufw status

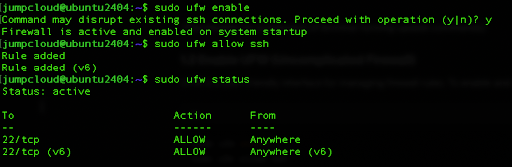
We can enable it with one simple command:
sudo ufw enable
Now we will allow SSH connections and also check the status:
sudo ufw allow ssh
sudo ufw status
If you want to take one step further, you can allow SSH connections only from specific IP addresses. To do that you can run the following commands:
sudo ufw allow from 192.168.1.100 proto tcp to any port 22
This command adds a rule to allow incoming connections from 192.168.1.100 to port which is the default port for SSH. Make sure to replace it with your IP address.
sudo ufw deny 22
This command will block all other incoming traffic to port 22.
Simple UFW syntax allows quickly adding or removing other ports and exposing applications to the public with ports 80 and 443. It’s a security best practice to setup a bastion server to reduce attack surface area and to protect your private network.
Step 2: Enable and configure AppArmor
AppArmor (Application Armor) is a Linux kernel security module that gives mandatory access to programs thus enhancing the security of the Ubuntu operating system. With Ubuntu 24.04, it comes as AppArmor 4 and brings improvements over an older version. It is mainly designed to restrict the capabilities of programs and limit their access to resources so this also helps with limiting the potential damage that could be caused by a compromised application. These security policies are defined using profiles and each profile will provide the appropriate level of permissions. These profiles can be either set in enforce mode or complain mode when AppArmor logs the violations without the enforcing process.
First, we will ensure that AppArmor is installed and enabled:
sudo apt install apparmor apparmor-utils
sudo systemctl enable apparmor
sudo systemctl start apparmor
Now we will use the aa-genprof command for the nano editor where we will restrict nano usage in a certain directory.
First we will create a new directory in the jumpcloud home directory:
mkdir ~/private
Next, we will run the aa-genprof command with appropriate arguments, and that starts the profiling in real time.
sudo aa-genprof nano
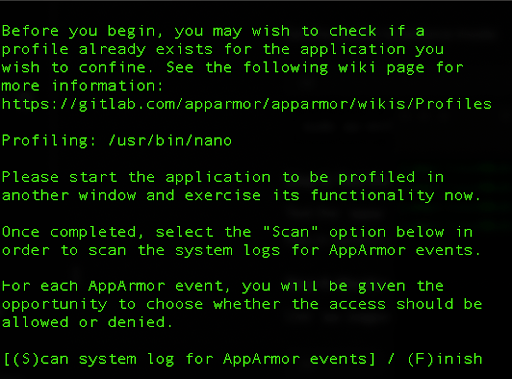
We will open up a new terminal and start editing a new file:
nano ~/tmp_file
Now, we can get back to our initial terminal and press ‘S’ for scanning for events, here we will need to press A to Allow each line that fills the information in the AppArmor’s config for the nano editor.
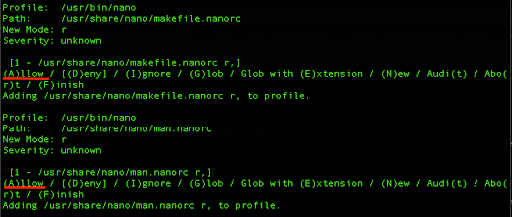
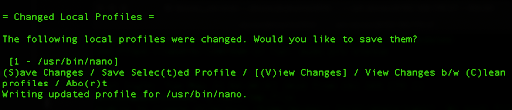
Add the end of the process we can press ‘S’ for saving changes.
Then let’s change this basic profile for the nano editor, by editing the following file:
sudo vi /etc/apparmor.d/usr.bin.nano
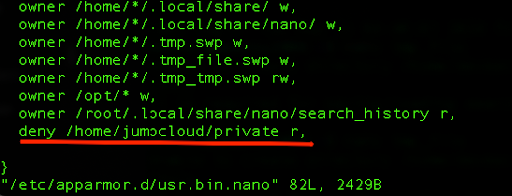
Near the end of the file we can add the deny directive for the specific directory:
deny /home/jumpcloud/private r,
After this action, and editing the profile, we need to reload it to apply the changes:
sudo apparmor_parser -r /etc/apparmor.d/usr.bin.nano
and then we will run AppArmor in the enforce mode:
sudo aa-enforce /etc/apparmor.d/usr.bin.nano
This will most probably cause additional permissions errors if you are trying to use nano somewhere, so it’s a good idea to run ‘aa-logprof’ command, and in the same way confirm the Allow directives.
sudo aa-logprof
Make sure to reload the profile again apply the changes and then start enforcing the profile.
sudo apparmor_parser -r /etc/apparmor.d/usr.bin.nano
sudo aa-enforce /etc/apparmor.d/usr.bin.nano
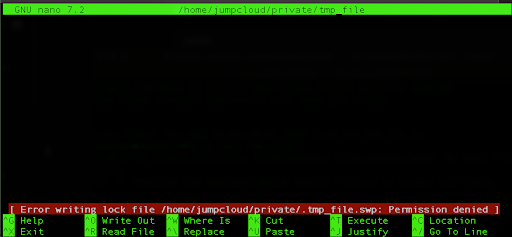
Now when you try to create a new file and start editing in our denied directory, the editor will report an error.
sudo nano /home/jumpcloud/private/tmp_file
Feel free to adjust your AppArmor profiles as it is very flexible and it can increase the security of your Ubuntu system.
Step 3: Set Unprivileged User Namespace Restrictions
Ubuntu 24.04 offers enhanced security features, including improved security restrictions on unprivileged users’ namespaces to provide additional security isolation for applications.
The main purpose of this feature is to minimize the attack surface within the Linux kernel by limiting the permissions within these unprivileged user namespaces. The new version of Ubuntu brings additional improvements compared to the older 23.04 version, bringing better default semantics and improved coverage.
The end result is that applications can better handle default restrictions while maintaining functionality, because trusted components can gain additional permissions within the sandbox.
First, let’s check if user namespaces are currently enabled:
sudo sysctl kernel.unprivileged_userns_clone

Based on the output we can see that unprivileged user namespaces are enabled currently, so we can disable them with the following command:
sudo sysctl -w kernel.unprivileged_userns_clone=0
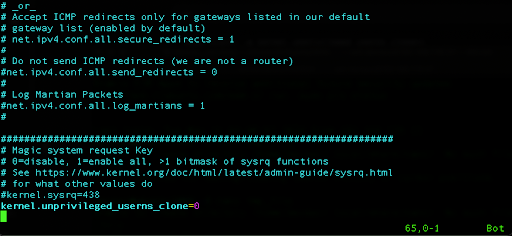
To make this change permanent we can edit the file /etc/sysctl.conf
sudo vi /etc/sysctl.conf
and add the following line:
kernel.unprivileged_userns_clone=0
Ubuntu 24.04 also allows setting default restrictions for additional permissions within unprivileged user namespaces so we can fine-tune our profiles.
To configure these default settings, use the following command:
sudo sysctl -w kernel.unprivileged_userns_apparmor_policy=1
In case we want to make it permanent, we can add the following line to the /etc/sysctl.conf:
kernel.unprivileged_userns_apparmor_policy=1
This setting makes sure that in cases where unprivileged user namespaces are enabled, applications cannot gain additional permissions within these namespaces.
Step 4: Test Binary Hardening
With the newest Ubuntu 24.04 version we have access to FORTIFY_SOURCE=3 macro that mainly protects the system from dangerous buffer overflows. This macro adds runtime checks to detect and prevent certain types of buffer overflows and other string-handling operations that can cause issues on your system. The latest version, level 3 set by default, provides even greater protection compared to previous versions.
We can create a simple C program that uses string handling to test the safety of a function that attempts to copy a string longer than the buffer can hold, causing a buffer overflow.
vi unsafe_program.c
#include <stdio.h>
#include <string.h>
void unsafe_function(char *input) {
char buffer[10];
strcpy(buffer, input);
printf(“Buffer content: %s\n”, buffer);
}
int main(int argc, char *argv[]) {
if (argc != 2) {
fprintf(stderr, “Usage: %s <input>\n”, argv[0]);
return 1;
}
unsafe_function(argv[1]);
return 0;
}
Next, we want to make sure we have gcc packages on our system:
sudo apt install gcc
After the installation process, let’s compile the program with FORTIFY_SOURCE level 3:
gcc -D_FORTIFY_SOURCE=3 -o unsafe_program_fortify3 unsafe_program.c
Run the program with a short string:
./unsafe_program_fortify3 “short”

Now try to extend the string size by typing more characters in the input:
./unsafe_program_fortify3 “verylongstringsize”

As we can see the FORTIFY_SOURCE=3 protection forbids the buffer overflow in our program and thus protects the system and its memory. Stack smashing occurs when a program writes more data to a buffer located on the stack than the buffer can hold. This kind of protection can save the system from crashing, arbitrary code execution, denial of service attacks, or data corruption.
Step 5: Encrypt the Home directory and Swap
In case that you installed your Ubuntu operating system without any encryption, then full disk encryption is not an option. We still can use Ubuntu’s command line tools for encrypting home directories and the swap space, which can contain some personal information and can be exploited in the process, so it is recommended that you encrypt the swap space as well.
Make sure to backup your data and also store your passphrases in a secure location, and evade any data loss in the process.
We will first make sure to install the necessary tools:
sudo apt install ecryptfs-utils cryptsetup
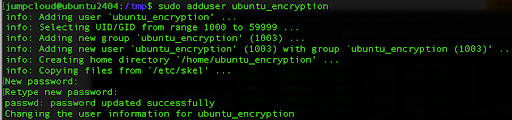
After the installation, we will add a separate user just for encryption. It is also important that this user has sudo permissions.
sudo adduser ubuntu_encryption
Make sure to get through the whole process including setting up the password for the new user.
Now, we will add this user to the sudo group:
sudo usermod -aG sudo ubuntu_encryption
Next, we will change our user and log in as ubuntu_encryption
su ubuntu_encryption
Once we are logged as our encryption user, we will encrypt the home directory for the user ‘jumpcloud‘. We can do so, by running the following command:
sudo ecryptfs-migrate-home -u jumpcloud

Here we want to enter the password for the user ‘jumpcloud‘ and that will start the encryption process. Once done, as an output, the instructions will be shown on the screen:
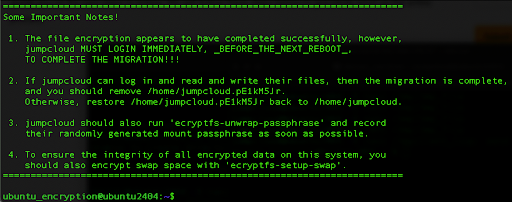
Change the user to ‘jumpcloud’ and also record their randomly generated mount passphrase.
su jumpcloud
Make sure you can read and write in your home directory. We will also create a new test file:
echo “this is a test” > test_file

Next, we will use the command to print out the passphrase on our command line.
ecryptfs-unwrap-passphrase
When prompted for a passphrase, enter your user’s account password, and this will show the randomly generated password which you need to store in a secure location.

In this process, as we have mentioned at the beginning of this step, it is important to encrypt swap space as well.
First, we will check whether we have a swap added to our system.
swapon -s

Next, we will use the command to encrypt the swap:
sudo ecryptfs-setup-swap
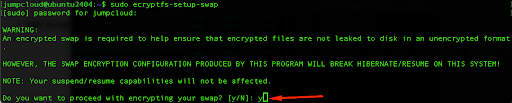
Confirm with ‘y’ and press Enter, which completes the process.
Finally, we can remove our encryption user and also the backup home folder that was created when the migration command.
sudo deluser –remove-home ubuntu_encryption

sudo rm -rf /home/jumpcloud.pE1kM5Jr
By using these techniques, you can greatly improve the security of your Ubuntu 24.04 operating system.