Connect


Contents
AppArmor, short for Application Armor, is a kernel security module for Debian-based Linux distributions that allows you to define per-application security profiles. These profiles restrict what system resources an application can access, effectively creating a sandbox around each application. This security mechanism helps prevent unauthorized access to sensitive data and reduces the risk of security breaches.
AppArmor uses a mandatory access control (MAC) system that adds an extra layer of security to your system by restricting the capabilities of individual applications.
There are key benefits when using AppArmor:
- Isolation: AppArmor helps contain security threats by isolating applications from each other and the rest of the system.
- Fine-grained control: You can specify what files, directories, and capabilities an application can access.
- Security compliance: Many Linux distributions, including Debian and Ubuntu, use AppArmor by default to enforce security policies.
For example, if you want to run a web server on your system, such as Nginx, you can use AppArmor to create a security profile for Nginx to ensure it can only access the necessary resources and deny access to other parts of the system. This minimizes the potential damage that a compromised Nginx server can do.
This guide will walk you through the process of configuring AppArmor on Debian-based systems to enhance the security of your environment.
Step 1: Update the System
In our tutorial, we are using Debian 11, but you are free to use any Debian version or Ubuntu.
First, it is a good idea to update your system so you can get the latest package versions including security patches.
sudo apt update
sudo apt upgrade
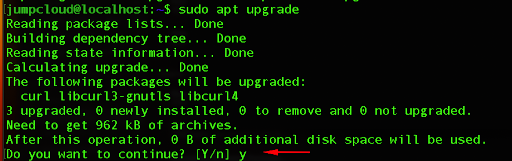
Press y and press Enter to continue with the upgrade process.
Step 2: Understanding AppArmor Service and Profiles
Next, we will check if AppArmor is installed on your system. You can do so by running the following command:
sudo aa-status
By default, AppArmor is installed on Debian and Ubuntu distributions and you can see the ordinary output in the screenshot below:
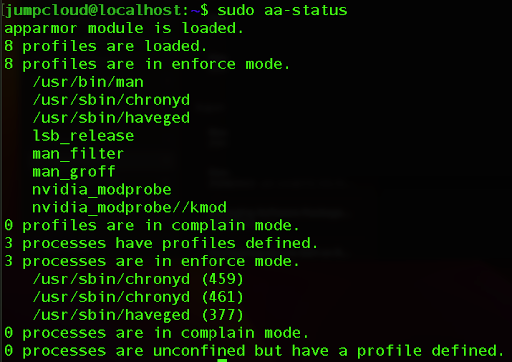
The output tells you how many profiles are loaded, the mode (enforce or complain) of those profiles, how many processes have associated profiles, and whether any processes are running without profiles.
In AppArmor, profiles can be in one of two modes: enforce or complain. Profiles in “enforce” mode actively enforce the security rules, meaning that the profile restrictions are in effect for the associated applications.
Profiles in “complain” mode do not actively enforce the rules but generate audit messages when violations occur. You can think of this as a “learning mode.” This line indicates that there are currently no profiles in complain mode.
AppArmor uses profiles to define the security rules for applications. These profiles are stored in the /etc/apparmor.d/.

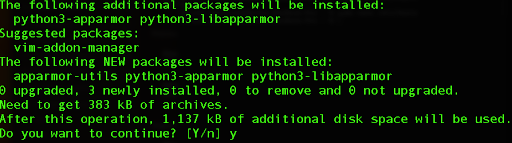
It’s necessary to install additional packages in order to use various AppArmor utilities:
sudo apt install apparmor-utils
Step 3: Creating Custom Profiles
For this example, we will first install the Nginx web server.
sudo apt install nginx
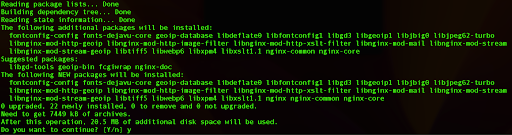
This will install Nginx alongside various dependencies and also start the service automatically.
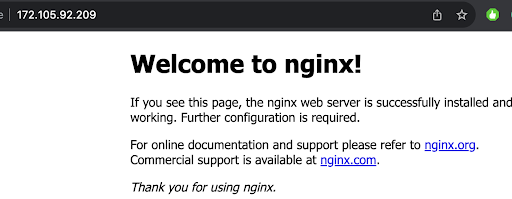
We can confirm that our Nginx is working by visiting the IP address of our server where you will get the default Nginx page.
We can check the current profiles for AppArmor in /etc/apparmor.d directory and verify if one exists for the Nginx web server:

By listing the directory we can see that there is no profile for Nginx, so we can create a new one.
We can do so by running the following command:
sudo aa-autodep nginx

We can check the default Nginx profile if we run the following command:
sudo cat /etc/apparmor.d/usr.sbin.nginx
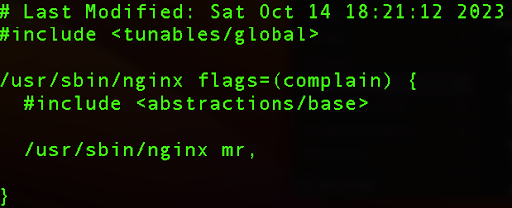
The line that consists of /usr/sbin/nginx mr, where m allows a file to be mapped into memory and r means read mode.
Now, we will activate the complain mode so that it doesn’t enforce the policy but produces a log each time it detects a violation of the security policy.
sudo aa-complain /usr/sbin/nginx
Next, we need to restart our Nginx service.
sudo systemctl restart nginx
Step 4: Enforcing the Profile
For this step, we will create a custom AppArmor profile, where we will need to write a profile definition for Nginx.
Use your preferred text editor to edit the file:
sudo nano /etc/apparmor.d/usr.sbin.nginx
Edit the file so that the new profile looks like this:
#include <tunables/global>
/usr/sbin/nginx {
#include <abstractions/apache2-common>
#include <abstractions/base>
#include <abstractions/nis>
#include <abstractions/web-data>
capability dac_override,
capability dac_read_search,
capability net_bind_service,
capability setgid,
capability setuid,
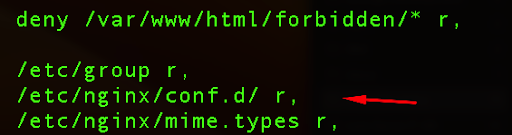
deny /var/www/html/forbidden/* r,
/etc/group r,
/etc/nginx/conf.d/ r,
/etc/nginx/mime.types r,
/etc/nginx/nginx.conf r,
/etc/nsswitch.conf r,
/etc/passwd r,
/etc/ssl/openssl.cnf r,
/run/nginx.pid rw,
/usr/sbin/nginx mr,
/var/log/nginx/access.log w,
/var/log/nginx/error.log w,
owner /etc/nginx/modules-enabled/ r,
owner /etc/nginx/sites-available/default r,
owner /etc/nginx/sites-enabled/ r,
owner /usr/share/nginx/modules-available/mod-http-geoip.conf r,
owner /usr/share/nginx/modules-available/mod-http-image-filter.conf r,
owner /usr/share/nginx/modules-available/mod-http-xslt-filter.conf r,
owner /usr/share/nginx/modules-available/mod-mail.conf r,
owner /usr/share/nginx/modules-available/mod-stream-geoip.conf r,
owner /usr/share/nginx/modules-available/mod-stream.conf r,
}
We are creating an AppArmor profile where Nginx will restrict access to the /var/www/html/forbidden directory.
Next, we can create the specific directory by running the command:
sudo mkdir -p /var/www/html/forbidden
Inside that directory we can create a simple html file:
sudo nano /var/www/html/forbidden/index.html
Now, just add a simple line of text:
<h1>This is forbidden.</h1>
After saving the file, we can load the new AppArmor profile by running the following command:
sudo apparmor_parser -r /etc/apparmor.d/usr.sbin.nginx
When you run this command, it loads the specified AppArmor profile into the AppArmor kernel module. Loading the profile means that the security rules and restrictions defined in the profile will become active, and they will be enforced when the associated application (in this case, Nginx) runs.
If you’ve made changes to the profile definition file (e.g., to customize the security rules for Nginx), using the -r option is necessary to apply those changes. This ensures that the updated profile is, in effect, enhancing the security of the associated application.
After loading the profile, you need to enforce it for the Nginx service. Use the aa-enforce command:
sudo aa-enforce /usr/sbin/nginx

In order to test if the profile is functioning correctly, restart the Nginx service.
sudo systemctl restart nginx
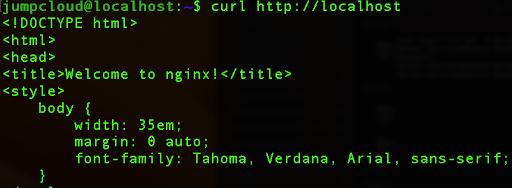
Now, if we run a simple curl command toward our localhost, we will see that the index page is still working properly.
curl http://localhost
However, if we run the curl command again, this time toward our forbidden directory, we will see that AppArmor blocked it.
curl http://localhost/forbidden/index.html
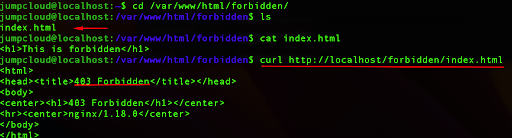
In the screenshot above we can see that the file exists and has real content in it, but due to security rules, it doesn’t allow us to access it.
Step 5: Debugging the Profile
If, after applying enforce mode to your AppArmor profile, some service doesn’t restart or work in an unexpected way, we can use the built-in log utility from AppArmor.
We can try to edit our Nginx profile again by running:
sudo nano /etc/apparmor.d/usr.sbin.nginx
So we remove the following line:
/etc/nginx/nginx.conf r,
After saving the file, we can apply new changes to the AppArmor parser:
sudo apparmor_parser -r /etc/apparmor.d/usr.sbin.nginx
We can try to restart our Nginx service:
sudo systemctl restart nginx
But that will fail, and we will not able to start it again.

For that reason, we will use a logging utility for AppArmor:
sudo aa-logprof
Based on the output, we can see that AppArmor doesn’t have a defined line related to the nginx.conf file that we previously deleted.
For that reason, we can press A to allow that policy, which will again add it to our AppArmor custom profile.
Next, press S to save changes.

This action will save the profile and we can try to restart our Nginx service again.
sudo systemctl restart nginx
If we run the status command, we can see that the Nginx is running again:
sudo systemctl status nginx

This way, each time you are in complain or enforce mode for AppArmor and receive any errors with the service, you can use the logging utility that will give you more insights about issues and the ability to add neecessary lines in your custom profile automatically.
![]()
Note: Consider deploying a logging utility to detect whether attackers are attempting to disable AppArmor to evade your defenses.
Conclusion
AppArmor is a useful tool for enhancing the security of your Debian-based systems. By creating and enforcing custom profiles, you can control the access and behavior of these services, making your system more secure against potential threats. It’s important to carefully design and test your profiles to find the right balance between security and functionality.