Connect


I have infrastructure at Amazon Web Services that I’d like to connect to a project I have over at Google Compute Engine. While it’s possible for me to shuffle some data back and forth over standard ssh or https connections, I’m doing enough that it would be simpler to be able to treat them as a single network. Now that GCE has released their (beta) VPN service, it’s a good time to try to get a VPN between the two providers.
Prerequisites
I’m assuming you already have a project at GCE, and on the AWS side you’ll need your infrastructure to be within a VPC. It’s also fairly important that the two networks have different IP ranges — this will help you immensely when routing between them.

JumpCloud and Google are the unified control plane for the future of work. Manage every identity (human, non-human, and agentic) with the same rigor.
Step 1 – Create a static IP in GCE
I’ll be configuring the Amazon side of my Virtual Private Network first, but one of the things I’ll need is an IP address on the Google side to point to.
In my project, under “Compute…Compute Engine..Networks” I click on “New static IP”.


Choose a name that will remind you what this static IP is used for. Grab the new IP address from the “Networks” screen once it’s done generating. We’ll be needing it for the AWS side of the configuration.
Step 2 – Create a “Customer Gateway” in AWS
The customer gateway is the representation, in AWS, of the far side of your VPN connection. This is basically the IP address AWS will be contacting. Think of as the gate into the GCE project’s network.
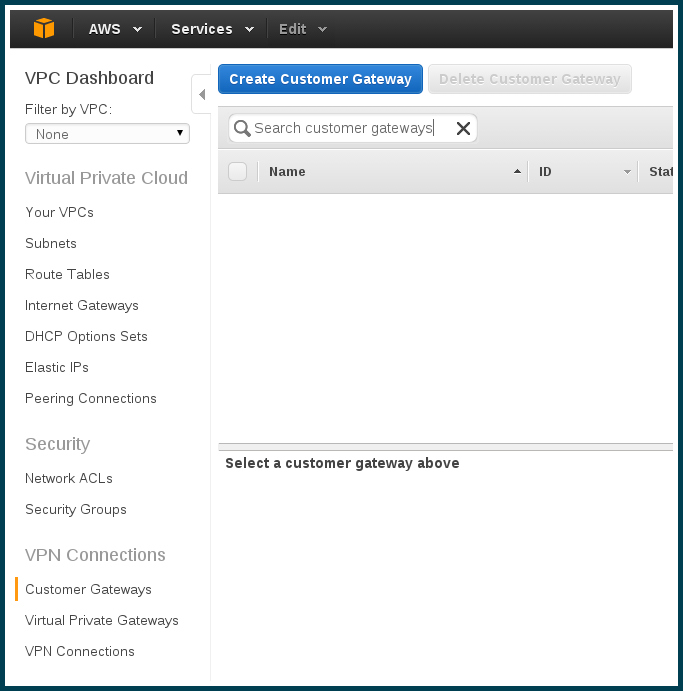
Maneuver into the VPC dashboard, and click on “Customer Gateways” to open up the screen.
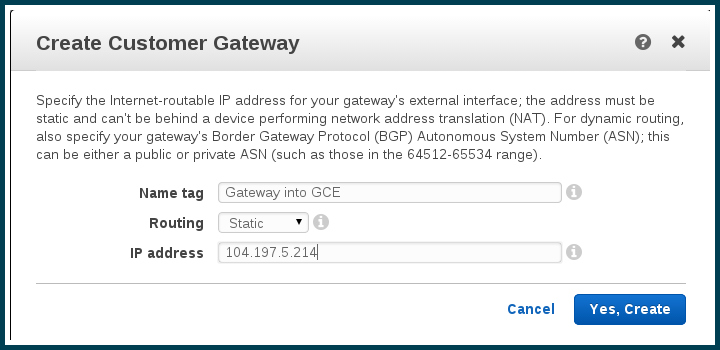
Click “Create Customer Gateway”. In the modal window, enter the name for your gateway, along with the static IP address you generated at GCE.
Step 3 – Create a “Virtual Private Gateway” in AWS
A virtual private gateway is the representation of a “VPN concentrator” in AWS. Think of it as the AWS side of the connection between the two networks — the gate out of the AWS VPC.
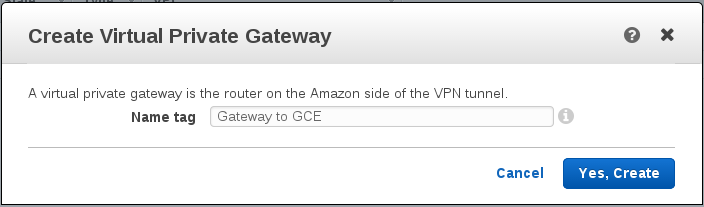
On the left again in the VPC dashboard menu, now we want to open up “Virtual Private Gateways”. Click on “Create Virtual Private Gateway” to open the modal, and choose some appropriate name.
Step 4 – Attach to the VPC.
We have a gateway now in AWS, but it’s not associated with anything.
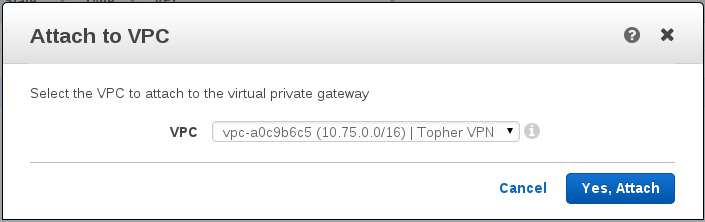
In the Virtual Private Gateway screen, select your new gateway and click “Attach to VPC”. The modal appears for you to select the VPC that you want to attach to. It spun for awhile for me before it acknowledged the ‘attachment’.
(Interesting in here, each VPC can only be connected to a single Virtual Private Gateway. What if I had multiple sites I wanted to connect to the VPC?)
Step 5 – Route propagation
Now let’s handle some routing. When I’m in AWS I want to be able to be routed to GCE machines, and vice versa
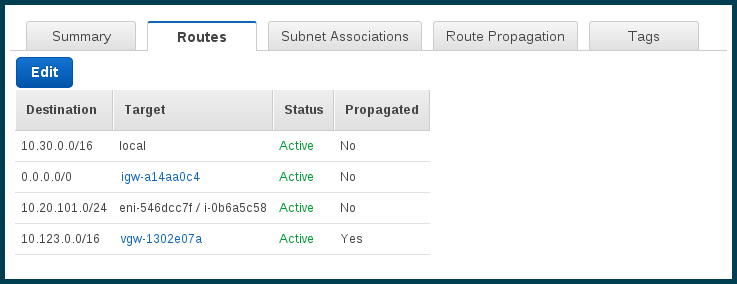
Open the Routes Tables screen from the VPC dashboard. Find the appropriate route table(s) for your VPC. Add the new route to the appropriate route tables for the VPC. Note that the destination IP range I’m adding matches the IP range of the network over in GCE, and the target is the Virtual Private Gateway I just created.
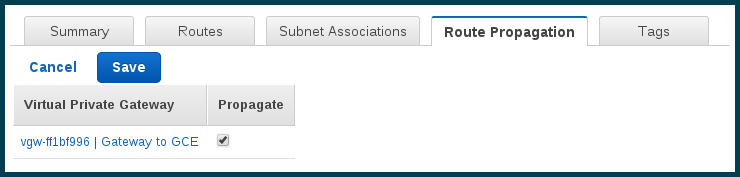
Also for each of the route tables, enable propagation for the gateway.
Step 6 – Create the “VPN Connection”
We’re ready to connect the two gateways.

Back (again) to the VPC Dashboard. Now all the way on the bottom open up the VPN Connection screen, and click “Create VPN Connection”
Choose your Virtual Private Gateway and the Customer Gateway. You’ll want static routing — enter the same IP range as your network in GCE.
Step 7 – Download the configuration from AWS
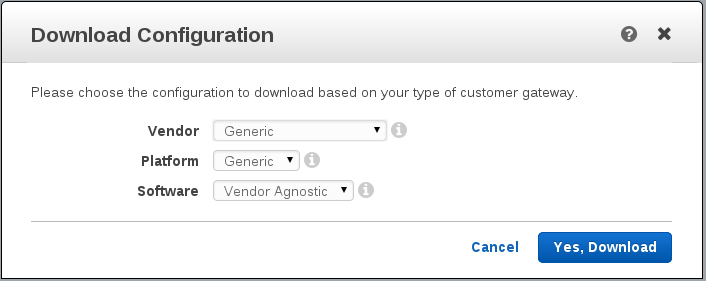
We’re going to need to download the configuration that AWS created in order to configure the GCE side of things. The button is available in the VPN connection screen when you select your VPN. You’ll want the ‘generic’ config.
Back to GCE
In your project in GCE, it’s time to build a new VPN. Under the “Networking” header on the left hand menu, you should now see “VPN” as one of the options. Open the VPN screen and click “New VPN”.
Step 8 – Create the VPN
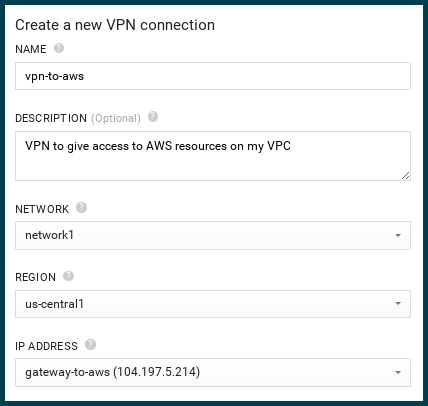
The first portion is pretty straight forward. Name your VPN, choose the network and region, and assign the IP address you statically allocated in the very first step.
Step 9 – Configure the tunnels
Before it will allow you to save the VPN you need to add a tunnel. You actually have TWO tunnels ready for you on the AWS side, so why not configure them both? There will be a “IPSec Tunnel #1” and an “IPSec Tunnel #2”, both in the configuration file you downloaded.
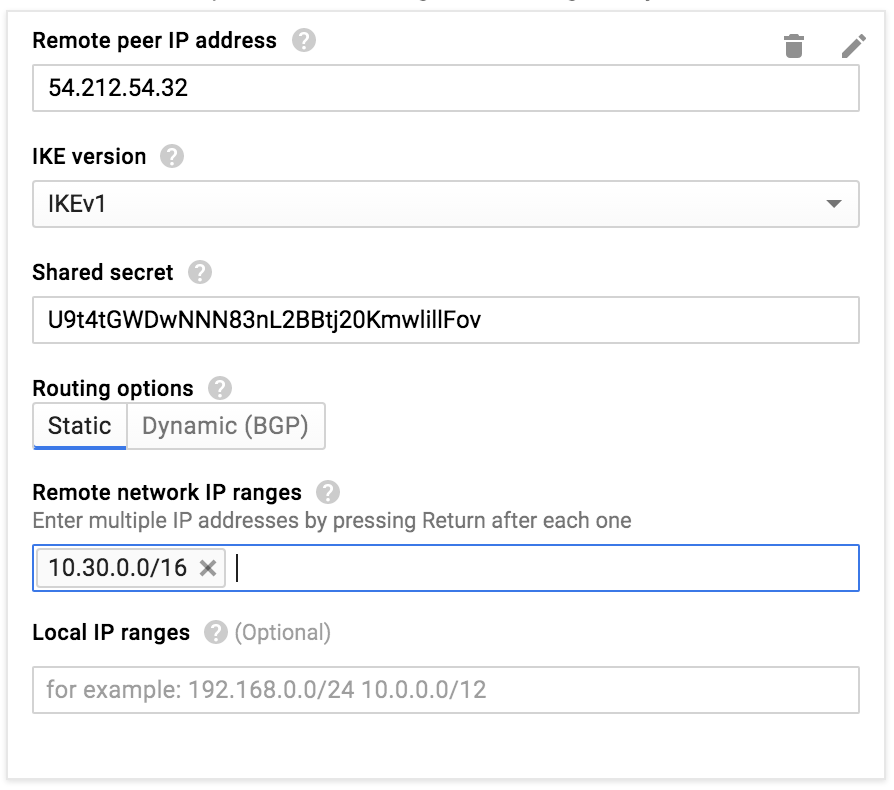
The “Peer IP Address” will be found in the configuration file under “Outside IP Addresses” as “Virtual Private Gateway”.
The “Shared Secret” is found in the configuration file as “Pre-Shared Key”.
The “Remote network IP range” is, well, just that. You can use this same range for both tunnels.
Once you have the first tunnel created, create a second one using the data for “IPSec Tunnel #2”
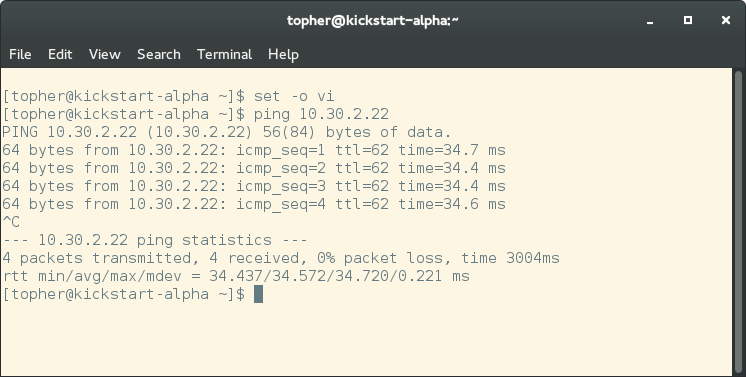
At this point the two gateways will start communicating and negotiating on your behalf. If all goes well, you will be able to ping across the VPN within a few minutes.
Step 10 – Add firewall rules
Finally, we need to make sure that the machines can talk to each other.
In GCE, I’m adding an appropriate firewall rule, taking into account the IP range of the AWS machines…
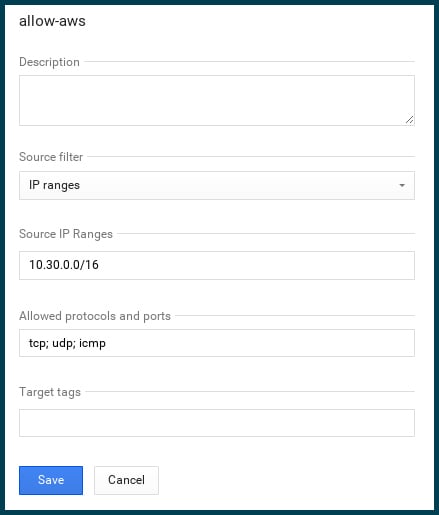
…and an equivalent security group in AWS.

Success!