Vault: Troubleshooting
If you experience an issue or errors when using Vault with JumpCloud, review these common resolutions.
I am receiving errors when rotating passwords for Windows Servers
Error: Response Code: This Problem…
Resolution: This error indicates a problem with the internal network of the computer. You need to verify the network and ensure it can connect to the Vault API.
Error: Active Directory user, access denied error in the script
Resolution: The script must be executed by a user with elevated (Administrator) permissions. If the user does not have elevated permissions, they need to have the "Reset Password" permission enabled specifically for this action.
Error: This credential doesn’t rotate because the version is different!
Resolution: This error means the password rotation could not be completed because the last attempt resulted in a version mismatch error. To fix this, go into your vault, find your credential, and click Actions > Synchronize password. Select the current password for the user and click Confirm.
Error: You need administrator privileges to continue using this script
Resolution: The password rotation script always requires administrative privileges to run. The user executing the script must have administrator permissions.
Error: Response Code: 429
Resolution: This error, a "Too Many Requests" message, is due to a large number of password rotation requests in a short time. You will need to wait at least one hour before trying again.
Error: Could not authenticate in Vault API
This problem can occur for any of the following reasons:
- The password rotation feature is not enabled for the credential in your vault
- The asset used for password rotation was changed or updated
- The authentication key in the vault was changed but not updated in the script
Resolution: Generate a new authentication key in Vault. On the computer running the script, delete the .passwordRotation file located in the directory %LOCALAPPDATA%\VaultOne\PasswordRotation\<user of the credential>. After deleting the file, restart the script to insert the new key.
Error: <user> not found. Please, ensure the user exists and try again.
Resolution: The specified user was not found on the local machine. Verify that the user exists in your Windows installation.
Error: <user> not found in your domain. Please, ensure the user exists in your domain and try again.
Resolution: The specified user was not found in the domain. Verify that the user exists within the domain where the computer is located.
I am receiving errors when rotating passwords for Linux/Unix
Error: Response Code: 401 – Could not authenticate in Vault API
Resolution: This error indicates a problem with the authentication key. It can occur if:
- The password rotation feature was not enabled for the credential in your vault.
- The asset used for password rotation was changed or updated.
- The authentication key in the vault was changed but not updated in the rotation script.
To resolve this, you must generate a new authentication key in Vault. Then, on the computer where the script is running, delete the .passwordRotation file from the directory "$HOME/VaultOne/PasswordRotation/<user credential>". After deleting the file, restart the script to enter the new key.
Error: Response Code: 000 – Fail to get new password in PAM
Symptom
The password rotation job fails on the Linux/Unix host and the log shows:
Fail to get new password in JumpCloud Vault Response Code: 000
Cause
000 is not an HTTP status. It means the rotation script never received an HTTP response at all, so the request did not complete. This is a network or TLS path problem on the host running the script.
Use the response code to narrow down where the failure is:
| Response Code | What it means | Where to look |
|---|---|---|
| 000 | No HTTP response received | Network, firewall, proxy, or TLS inspection on the host |
| 401 | Request reached the API and was rejected | Authentication key. See the 401 entry in this section |
| 404 | Request reached the API, endpoint not found | API URL configured in the installer |
| 429 | Request reached the API, rate limited | Wait at least one hour and retry |
The password rotation script calls the PAM API directly from the Linux/Unix host. It does not route through the Jump Server (Connector). Connector container logs will not show anything for this flow, so there is no need to collect them for this error.
What needs to be allowed
The host running the rotation script needs outbound HTTPS on TCP 443 to the PAM API host of your data center.
| Item | Value |
|---|---|
| Host Based on Data Centers | <your-organization>.api.vault.jumpcloud.com <your-organization>.api.vault.eu.jumpcloud.com <your-organization>.api.vault.in.jumpcloud.com |
| Port / Protocol | TCP 443 / HTTPS |
| Endpoint | GET /api/services/app/Credentials/GenerateSecurityPassword |
| Endpoint | POST /api/services/app/Credentials/ValidateSecurityPassword |
How to diagnose
Run the following on the Linux/Unix host, as root, on the same machine where the rotation script runs.
- Confirm the API URL configured by the installer:
grep '^VAULT_ADDR=' /tmp/JC_Vault_PasswordRotationInstaller.sh
- Test direct access to the API host:
curl -vI "https://<your-organization>.api.vault.jumpcloud.com/"- US Data Center Example, remember to change the URL to reflect the exact Data Center that you are using.
- If your network requires an outbound proxy, repeat the test through it:
export https_proxy=http://<proxy-address>:<proxy-port>curl -vI "https://<your-organization>.api.vault.jumpcloud.com/"
How to read the result
| Result | Meaning |
|---|---|
Completed TLS handshake and any HTTP status (200, 401, 404) | The network path is fine. The failure is elsewhere |
Connection reset by peer right after the TLS ClientHello | A firewall or proxy is intercepting or dropping the TLS session |
| Timeout with no response | Outbound 443 to that host is blocked |
curl: (60) certificate error | TLS inspection is re-signing the connection |
| DNS resolution failure | The host cannot resolve the API FQDN |
Resolution
- Allow outbound HTTPS on TCP 443 from the Linux/Unix host to your PAM API FQDN.
- Exclude that FQDN from SSL/TLS inspection (decryption). The rotation script validates the certificate chain and an intercepted session will fail.
- If an outbound proxy is mandatory in your environment, set
https_proxyin the environment the job actually runs under.sudostrips proxy variables by default, so a proxy exported in a user shell will not be visible to a job running as root. - Re-run
curl -vIand confirm you get a completed TLS handshake before moving on. - Run the installer again.
The installer needs to run twice. The first run only stores the authentication key on the host. The second run is the one that calls the PAM API and performs the rotation. A single run will not rotate the password.
If it still fails
Collect the following before contacting JumpCloud Support:
- The complete output of
curl -vIagainst the API FQDN, including the TLS handshake lines. - The rotation log for the affected credential:
/root/JumpCloudVault/PasswordRotation/<credential-username>/JumpCloudVault-Password-Rotation-Output.<YYYY-MM>.log
- If that path does not exist, locate the log with:
find /root /home -path '*JumpCloudVault/PasswordRotation*' 2>/dev/null
Error: <user> not found. Please, ensure the user exists and try again.
Resolution: The user specified for the rotation was not found on the local machine. Verify that the user exists in your Linux/Unix installation and that the username is entered correctly.
Error: Response Code: 429
Resolution: This error, a "Too Many Requests" message, is due to a high number of password rotation requests. You will need to wait at least one hour before trying again.
Vault accesses the website, but the login isn’t completing automatically
Vault accesses the website, but the login isn’t completing automatically
Find and copy the unique CSS selector for the website’s login button
- Access the website link directly (outside of Vault).
- Right-click on the Login or Sign In button.
- From the context menu, select Inspect to open your browser's developer tools.
- In the developer tools, you will be directed to the HTML tag for the button you inspected.
- Right-click on this tag, select Copy, then Copy selector.
Paste the element selector into Vault
- In the Vault platform, click Websites. A list of all available websites is displayed.
- Click the name of the website you want to configure. The Edit Website window is displayed.
- Go to Autofill Parameters.
- Paste the selector you copied in the previous section into the Login Button Selector field.
- Click Save.
Vault accesses the website, but login fields are not automatically filled
Vault accesses the website but login fields are not automatically filled
If you're trying to access a website via Vault and the username, email, or password fields are not being filled automatically, you can use the following steps to configure the auto-fill feature:
Find and copy the unique CSS selector for the website’s field
- Access the website link directly (outside of Vault).
- Right-click on the Login or Sign In button.
- From the context menu, select Inspect to open your browser's developer tools.
- In the developer tools, you will be directed to the HTML tag for the field you inspected.
- Right-click on this tag, select Copy, then Copy selector.
Paste the Element Selector into Vault
- In the Vault platform, click Websites. A list of all available websites is displayed.
- Click the name of the website you want to configure. The Edit Website window is displayed.
- Go to Autofill Parameters.
- Paste the selector you copied in the previous section into the Username/Email Field Selector field.
- Click Save.
Error: Accessing Vault Resources Using HOSTNAME
Error: Accessing Vault Resources Using HOSTNAME error
Resolution: This is a common error that occurs when trying to access resources in Vault using a hostname instead of an IP address. While Vault does allow you to register resources with a hostname, access is managed through the Vault connector installed in your infrastructure.
Validate Hostname Resolution
- Open a terminal or command prompt on the machine where the Vault connector is installed.
- Run the following command to check if the connector can successfully resolve the hostname:
ping (HOSTNAME)
If the ping command fails, it indicates a DNS resolution issue within the connector's network environment.
Check the Full Hostname
If the error persists even after the first validation, you may need to check how the hostname is registered in Vault.
- Ensure that you are using the full hostname (e.g.,
companyx.network.local) instead of a simple nickname (e.g.,companyx). The Vault container might not be able to resolve a nickname, but it can often resolve the fully qualified domain name.
Error: ERR_CONNECTION_REFUSED, TIMEOUT, DENIED
Error: ERR_CONNECTION_REFUSED, TIMEOUT, DENIED
This error indicates a communication issue between your machine and the Vault Connector.
Resolution:
Confirm That Connector Containers Are Running
- Access the machine where the connector is installed.
- Use a ROOT user and run the following command:
docker ps -a - Check the output to ensure that the status of all four containers is "Up."
Check Your Firewall Rules
The error may be caused by a firewall rule that is blocking the connection:
- External Firewall - use an online tool, like
https://www.yougetsignal.com/tools/open-ports/to check if your port is open. If it's closed, you'll need to open it in your external firewall settings - Internal Firewall - contact your firewall administrator to validate if there is a block on the port you are using or any other specific rule preventing the connection
Perform a Telnet Test
Perform a telnet test from your machine to the connector machine to verify the connection:
- On your machine, type the following command:
telnet (IP or name of the machine where the connector is installed) (Port) - A successful telnet will show a positive connection response, confirming that the port is open and accessible.
Verify Your NAT Configuration
If you are using Network Address Translation (NAT) for the port that connects to the connector, the NAT configuration might be incorrect. Ensure that your NAT is correctly pointing to the Vault service and not to another service.
Error: You are Already Connected in the Database
Error: You are Already Connected in the Database
You may receive this error when attempting to initiate a new database connection while a previous session is still active. This often happens if you close the database viewing tab without properly ending the session, leaving the connection running in the background.
Resolution: Choose one of the following methods to terminate the existing session:
Option 1: Close the Browser Tab
If the browser tab where the database session was started is still open, simply close it. This will automatically end the active connection, allowing you to start a new session normally.
Option 2: End the Session from the Database Screen
- In the Database menu, locate the asset in question.
- Click the icon to the left of the asset name. A pop-up will appear with connection information.
- In this pop-up, hover over the user's name to display the Disconnect icon.
- Click the icon and confirm ending the session.
Option 3: End the Session from the Connectors Screen
- Go to the Administration > Connectors menu.
- Find the connector associated with the database asset.
- Click on Active connections.
- A pop-up will show all active sessions from that connector. Locate the correct session.
- Click the Disconnect icon and confirm ending the action.
Once the previous session is closed, the error will be resolved, and you will be able to connect to the database again.
If a user experiences network instability during a connection, the session may remain active on the connector even after the browser tab is closed. In this case, you must follow the instructions in Options 2 or 3 to manually terminate the session directly from the connector.
Error: Your Connection Has Been Ended
Error: Your Connection Has Been Ended
The "Your connection has been ended" error message, which you may encounter when attempting to access a computer or server, typically indicates an issue with the Vault connector installation.
Resolution: Reinstall the connector.
Reinstall the Connector
- Log in to the Vault platform.
- Navigate to Administration > Connectors.
- Find the specific connector that is causing the issue.
- Click on Actions next to that connector, and select Install.
Run the Installation Command
- A window will open with the installation command. Copy the command or download the installation script.
- Access the target machine (where the connector will be installed) with a root user.
- Enter the installation command you copied in the previous step.
- Authenticate with the user or email you use for Vault access.
Verify the Containers
After the installation is complete, you should verify that the connector's containers are running correctly.
- On the target machine, run the following command in the terminal or command prompt:
docker ps -a - Check the output to ensure that the four containers associated with the connector are all listed with an "Up" status.
If all four containers are running correctly, the connector is properly installed. You can now try to access the computer or server again.
Checking Jump Server (Connector) Container Health
Checking Jump Server (Connector) Container Health
If you're experiencing connectivity issues through the JumpCloud PAM platform, one of the first things to check is whether the Jump Server (Connector) containers are running correctly.
Step 1: Access the Linux server
Log in to the Linux server where the Jump Server (Connector) is installed, and switch to the root user:
sudo su
Step 2: Check container status
Run the following command:
docker ps -a
You should see five containers running, with their STATUS listed as "Up", as shown below:

If any container is not listed as "Up", the Jump Server (Connector) needs to be reinstalled.
Step 4: Reinstall the Jump Server (Connector)
- In the JumpCloud PAM platform, go to Administration > Connectors.
- Find the Jump Server (Connector) that needs to be reinstalled, click the Actions menu, and select Install.
- Choose the latest available version, and copy the installation command shown.
- Paste and run this command on the Linux server. This will reinstall the Jump Server (Connector).
How to Collect Platform and Jump Server (Connector) Logs
How to Collect Platform and Jump Server (Connector) Logs
If you're experiencing an issue and need to share diagnostic information with our support team, this section explains how to collect logs from two sources: the JumpCloud PAM platform itself, and the Jump Server (Connector) installed on your Linux server.
Collecting Platform Logs
The PAM platform records every action performed by users and services in the Audit Logs screen. These logs are useful for identifying failed operations, permission errors, and the exact time an issue occurred.
Step 1: Access Audit Logs
Navigate to Administration > Audit Logs.
Viewing Audit Logs requires the Audit Logs permission to be enabled for your user role. If you don't see this option, contact your organization's PAM administrator.
Step 2: Filter by date range and error state
By default, the Audit Logs screen shows results from the last 7 days. Click the filter icon to adjust this:
- Date Range: you can filter up to the last 30 days.
- Error State: select Has Error to show only failed operations, which helps narrow down the issue quickly.
Step 3: Review the log detail
Click the search icon next to any log entry to open the Audit Log Detail view. This shows:
- User Information: username, IP address, browser
- Action Information: service, action, timestamp, duration, error state, and, when applicable, the full exception/stack trace
This detail view is often enough to identify the root cause of a permission or configuration issue.
Step 4: Export logs to send to support
Click Export to File to download the filtered logs as a CSV file. Send this file to our support team along with a description of the issue you're experiencing.
Collecting Jump Server (Connector) Logs
Three containers generate logs relevant to troubleshooting: vo-core, vo-web, and vo-database.
vo-core: handles server access sessions (SSH, RDP, and other protocols). This is usually the first place to check when a user reports a connection error.vo-web: handles web application access sessions.vo-database: handles database access sessions.
Step 1: Extract the logs
As the root user, on the Linux server where the Jump Server (Connector) is installed, run the command for the container related to the type of access the user was trying to reach:
SSH, RDP, and other protocols:
docker logs vo-core
Web Applications:
docker logs vo-web
Databases:
docker logs vo-database
Step 2: Identify the relevant session
Each connection is handled by its own process, identified by a number shown right after guacd on every line, for example guacd[2923101]:. All log lines sharing this same number belong to the same session, from the moment the connection starts until it ends. Locate the session whose timestamp matches when the user reported the issue, and review only those lines.
Step 3: Look for warnings or connection failures
Within that session's log lines, look for WARNING or ERROR entries, and for messages indicating the connection was refused or closed. These often point to the likely cause of the issue.
For example, the log below shows a session where the RDP connection was closed due to a security negotiation failure:
guacd[2923101]: INFO: RDP server closed/refused connection: Security negotiation failed (wrong security type?)
This suggests a mismatch between the security protocol configured in the PAM platform (for example, TLS) and the one required by the target Windows server (for example, NLA). This is a strong lead, but not a confirmed diagnosis. Cross-check the security protocol configured for that resource in the PAM platform against the target machine's requirements before concluding the root cause.
If the cause isn't clear, save the relevant session's log lines to a text file and send them to our support team, along with a description of the issue.
Web Shield connection fails while waiting for the JumpCloud Go extension
Web Shield connection fails while waiting for the JumpCloud Go extension
When you connect to a website with Web Shield, PAM starts a remote browser on the Jump Server (Connector) and installs the JumpCloud Go extension so login can complete automatically.
That install requires the Jump Server (Connector) to reach the Chrome Web Store.
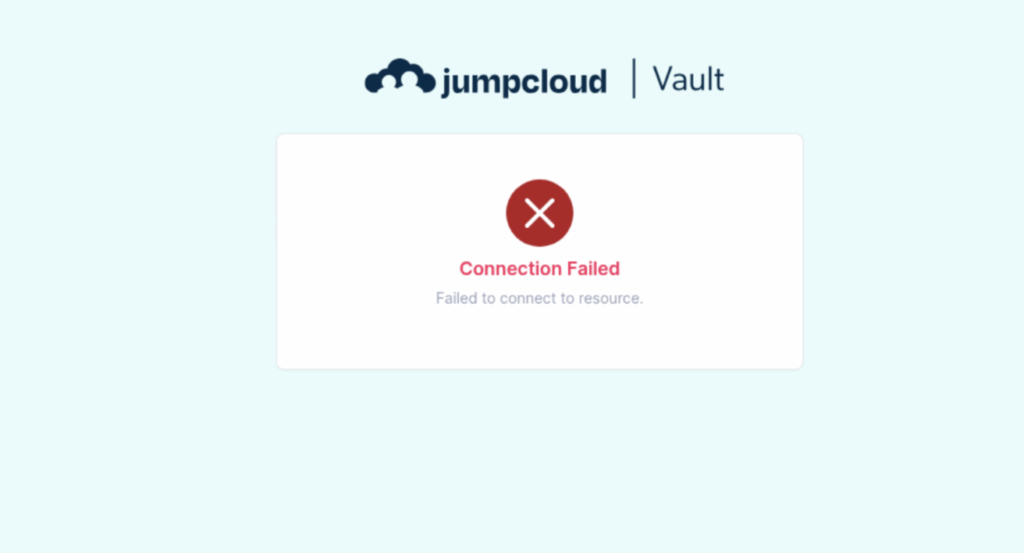
If the Jump Server (Connector) cannot reach the Chrome Web Store, the session may stay on Waiting for extension... and then fail with Connection Failed.

Why this happens
Web Shield downloads JumpCloud Go from the Chrome Web Store during session setup.
Outbound HTTPS from the Jump Server (Connector) to Google domains must be allowed.
Resolution 1: Allow Chrome Web Store access from the Jump Server (Connector)
- Identify the Jump Server (Connector) used by the website (Administration > Connectors, or the connector assigned to that resource).
- Ask your network/firewall team to review outbound HTTPS (TCP 443) from that Jump Server (Connector) host.
- Allow outbound access to at least:
chromewebstore.google.comclients2.google.com
- Confirm the block is not coming from a proxy, SSL inspection policy, or URL category that denies “Chrome Web Store” / “Google services”.
- Retry the Web Shield connection to the same website.
Resolution 2: Check for a local block on the Jump Server (Connector) host
Sometimes the domain is blocked on the Linux host itself (for example in /etc/hosts), not only in the firewall.
Step 1: Access the Jump Server (Connector) host
Log in to the Linux server where the Jump Server (Connector) is installed and switch to root:
sudo su
Step 2: Test Chrome Web Store reachability
curl -I https://chromewebstore.google.com
Expected result:
- Success: an HTTP response (for example
HTTP/2 200). - Failure: timeout, connection refused, or TLS errors — the server cannot reach the store.
Step 3: Check /etc/hosts for a local block
grep -E 'chromewebstore.google.com|clients2.google.com' /etc/hosts
If you see lines like 0.0.0.0 chromewebstore.google.com, the host is blocking those domains locally.
Step 4: Remove the local block
sed -i '/chromewebstore.google.com/d' /etc/hosts
sed -i '/clients2.google.com/d' /etc/hosts
Verify:
curl -I https://chromewebstore.google.com
You should get an HTTP response again.
Then retry Web Shield.
If /etc/hosts is clean and curl still fails, the block is almost certainly in the network path (firewall, proxy, or secure web gateway). Use Resolution 1.
What is Master Admin Permission?
Master Admin Permission is a special permission within the permission tree, found under Administration. It is not a role. It can be granted to any user through their individual permissions panel.
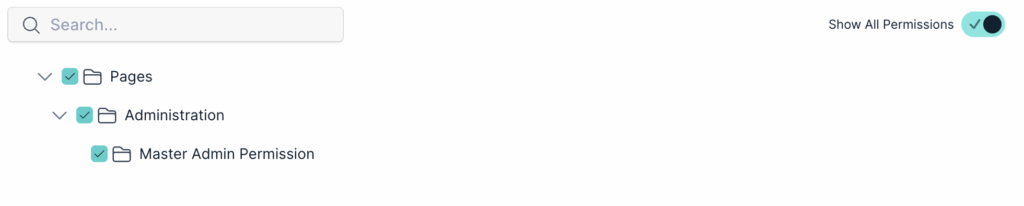
A user with Master Admin Permission gains two capabilities that go beyond standard roles:
- Access to all resources without explicit sharing Normally, a user can only see and connect to resources that have been explicitly shared with them. A user with Master Admin Permission can view all resources on the platform, even those where they are not listed in the sharing preferences. An Add me as Administrator button appears next to those resources, allowing the user to add themselves directly.

- Move Permissions The Master Admin Permission also enables the Move Permissions option in the user actions menu. This allows the administrator to transfer all resource access from one user to another in a guided three-step flow: select the resources to transfer, select the destination user, and review before confirming.
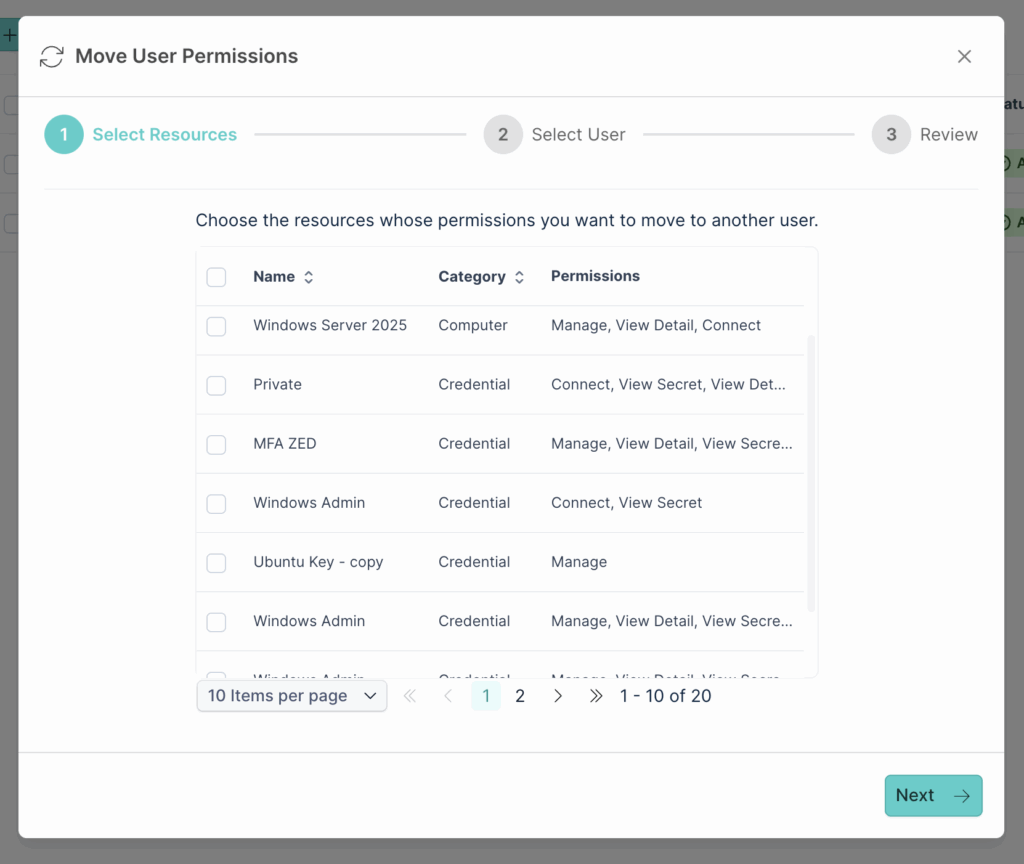
This feature is particularly useful during offboarding, when a departing user's access to servers, credentials, websites, and databases needs to be transferred to a colleague.
Master Admin Permission grants significant access across the entire platform. Assign it carefully and only to users who genuinely require it. Not every administrator needs Master Admin Permission.
Was this information helpful?