Record Website Sessions with JumpCloud Go™
JumpCloud Privileged Access Management (PAM) can record what a User does on a privileged website using only the JumpCloud Go™ browser extension. The session runs in the User's own browser, so a Jump Server is not required. When the session ends, you can watch the video and review the keystrokes in Session History.
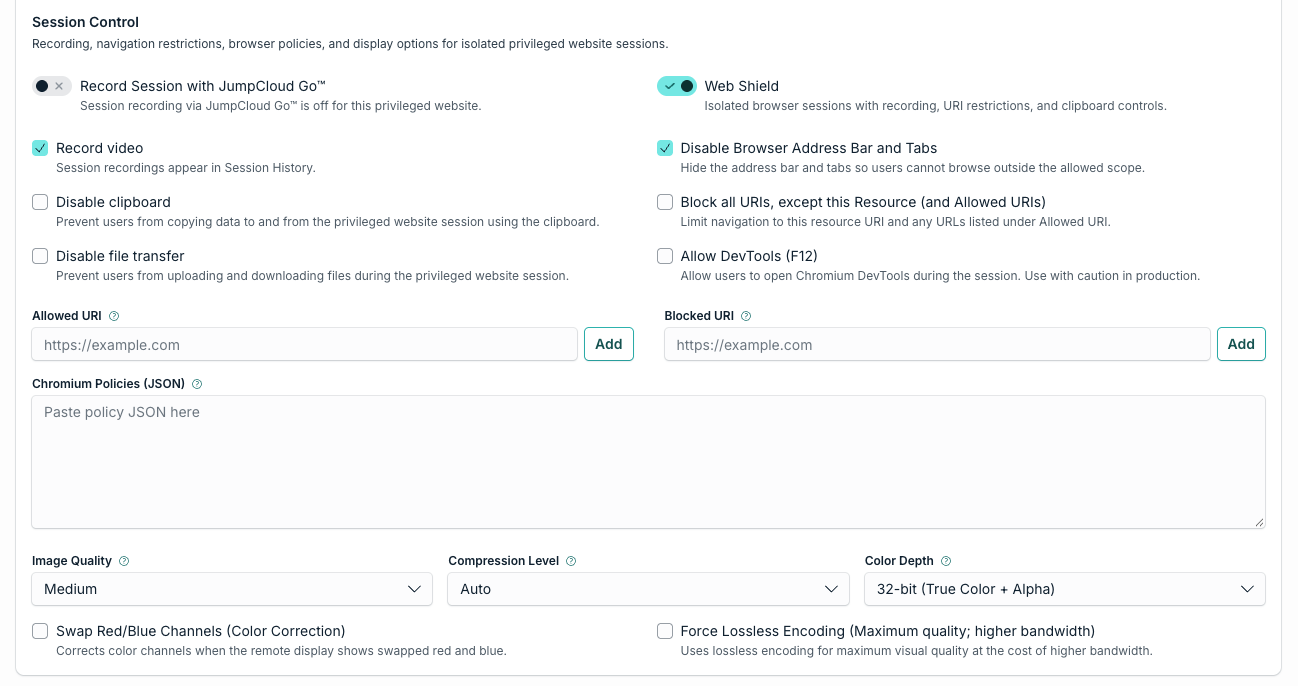
Recording with JumpCloud Go™ shows what the User did. It does not block clipboard, file transfer, URI, or DevTools actions. If you need those controls, use Web Shield instead.
Prerequisites
- Access to the JumpCloud Admin Portal.
- A privileged website resource exists in JumpCloud PAM, with a credential and Users assigned to it.
- Users have the JumpCloud Go™ extension in their browser, updated to version 3.0.0 or later. See Updating JumpCloud Go™ later in this article.
Considerations
- A website resource can use only one recording mode at a time. Turning one on turns the other off.
- Choose Record Session with JumpCloud Go™ when you want to know what Users did and keep a fast, normal browsing experience.
- Choose Web Shield when you also need to control what Users can do, for example block the clipboard or file transfers.
- If you switch a resource from Web Shield to JumpCloud Go™ recording, the Web Shield restrictions stop applying to that resource.
Choosing a Recording Mode
A website resource can use only one recording mode at a time.
| Record Session with JumpCloud Go™ | Web Shield | |
|---|---|---|
| Where the session runs | In the User's own browser | In an isolated browser on the Jump Server, streamed to the User |
| Jump Server needed | No | Yes |
| What is recorded | Video and keystrokes | Video and keystrokes |
| Clipboard, file transfer, URI, and DevTools controls | Not available | Available |
| User experience | Works like a normal browser tab | Streamed session |
Recording is not enforcement. JumpCloud Go™ recording shows what the User did. It does not block anything. If you switch a resource from Web Shield to JumpCloud Go™ recording, the Web Shield restrictions stop applying to it.
When Web Shield is on, Session Control also exposes isolation controls such as Record video, Disable Browser Address Bar and Tabs, Disable clipboard, Block all URIs, except this Resource (and Allowed URIs), Disable file transfer, Allow DevTools (F12), Allowed URI, Blocked URI, and related display options. Those controls are not available when you use Record Session with JumpCloud Go™ alone.
Updating JumpCloud Go™
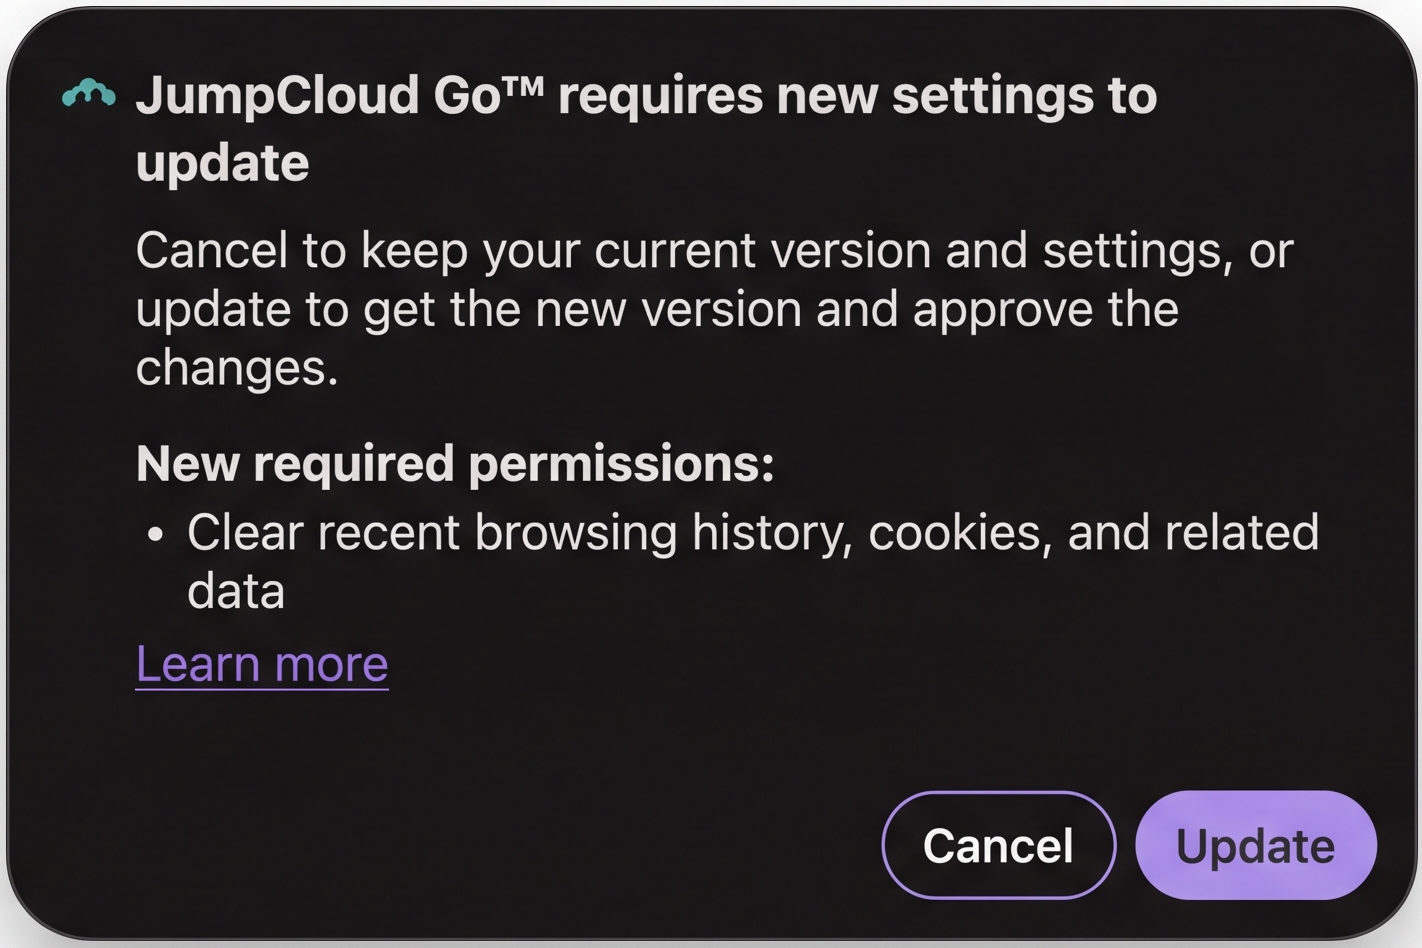
Recording needs JumpCloud Go™ version 3.0.0 or later. Users do not need to do anything special to get the update. The browser updates the extension on its own, then asks the User to approve new permissions.
The new required permission is:
- Clear recent browsing history, cookies, and related data
What Users see during an update
If Users already have JumpCloud Go™:
- The browser shows a prompt titled 'JumpCloud Go™ requires new settings to update'.
- The prompt lists the new required permissions.
- The User clicks Update.
Browser differences for that update prompt:
- Firefox: A warning is displayed for the new permission and asks for User approval.
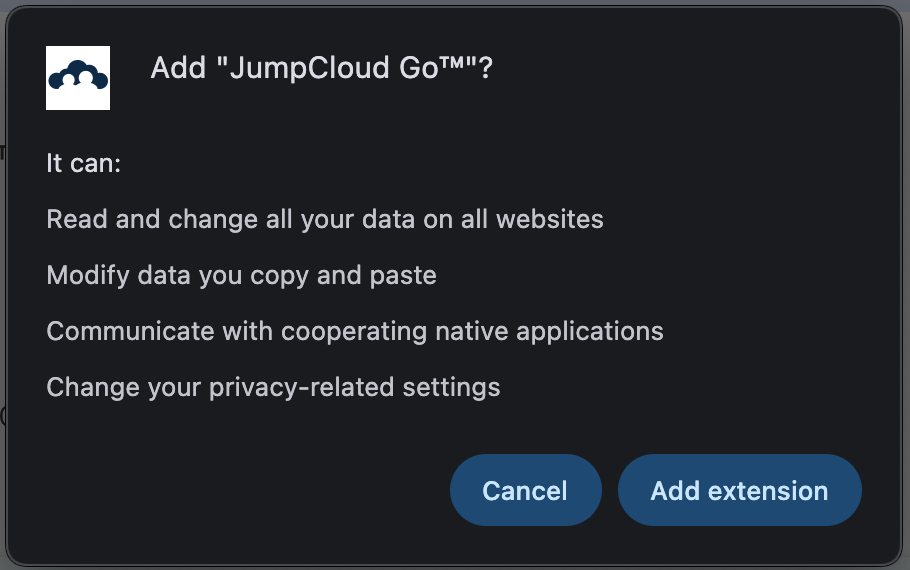
- Chrome: No warning is displayed for the new permissions.
If a User clicks Cancel, they keep the old version, and recorded website sessions will not work for them.
What Users see on a first-time install
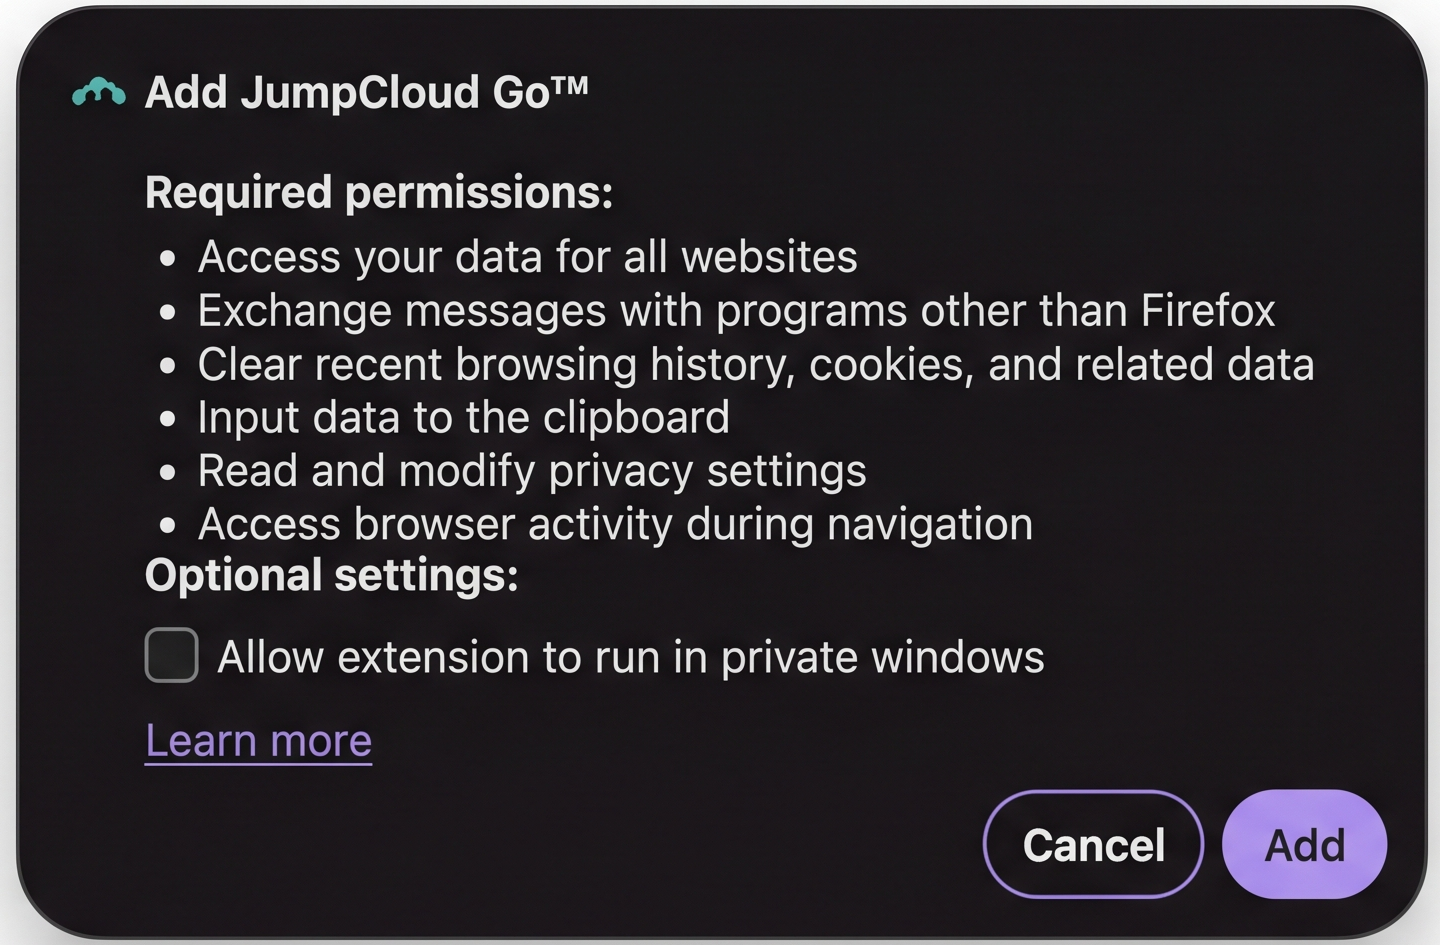
If Users install JumpCloud Go™ for the first time, the browser asks them to allow the extension. The User approves it.
Turning On Recording for a Website Resource
- Log in to the JumpCloud Admin Portal.
- Go to Access > PAM.
- Click the Privileged Resources tab, then open Privileged Websites.
- Click the website resource, or create a new one.
- Scroll down to Session Control.
- Toggle on Record Session with JumpCloud Go™. Web Shield turns off for this resource.
- Click Save.

Switching Back to Web Shield
- Open the website resource.
- Toggle off Record Session with JumpCloud Go™.
- Toggle on Web Shield.
- Click Save.
Connecting from the User Portal
Nothing changes in the User's day-to-day path. They connect from the JumpCloud User Portal as before.
- Log in to the JumpCloud User Portal.
- Click All Applications, then click the Privileged Websites tab.
- Click the website. The connect window opens.
- Read the Record enabled notice. It tells the User that this remote session has been marked to be recorded by the administrator.
- Click Connect. A new tab opens, signs the User in if Auto Login is selected, and recording starts.
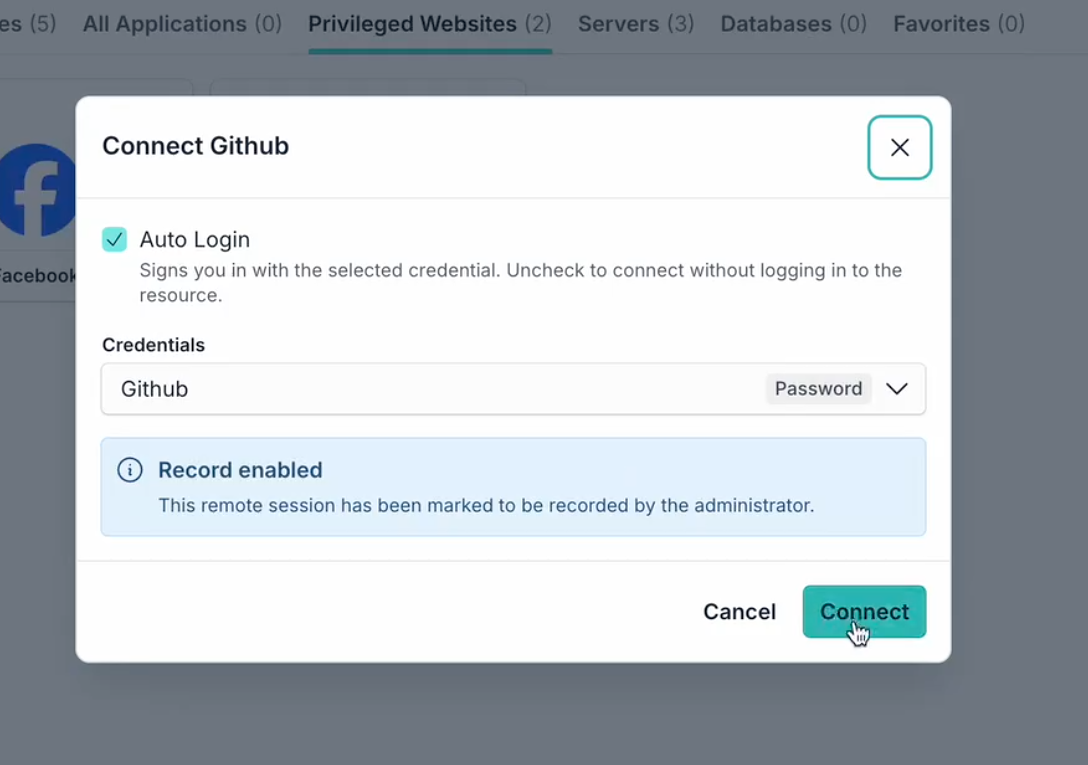
The connect window has no Jump Server field. This is expected, because this kind of session does not use a Jump Server.
If the User Opens the Website in a Second Tab
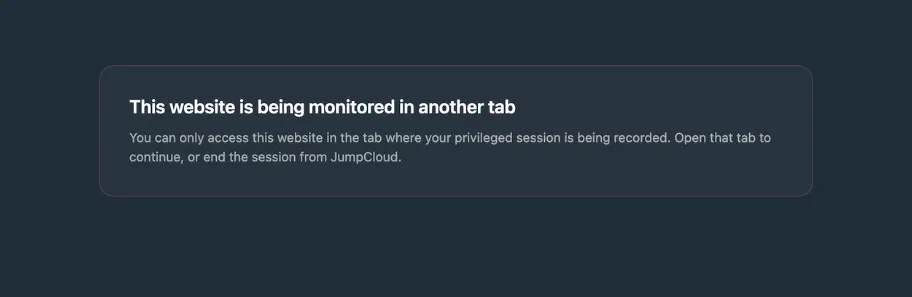
Only the tab where the session is being recorded can use the website. If the User opens the same website in another tab, they see this message:
This website is being monitored in another tab
You can only access this website in the tab where your privileged session is being recorded. Open that tab to continue, or end the session from JumpCloud.
The User can go back to the recorded tab, or close it and use the new one. This stops Users from skipping the recording.
Watching the Recording in Session History
- Log in to the JumpCloud Admin Portal.
- Go to Access > PAM.
- Click the Session History tab. A table with all sessions opens.
- Find the session. For these sessions, Resource Type shows Privileged Websites and the Jump Server column shows a dash.
- In the Actions column, click the video icon to open the session.
- (Optional) In the Actions column, click the download icon to download the recording.
In the session details, you can:
- Watch the session video under Session recording.
- Read the Key Logs panel. It lists what the User typed, with the time of each key.
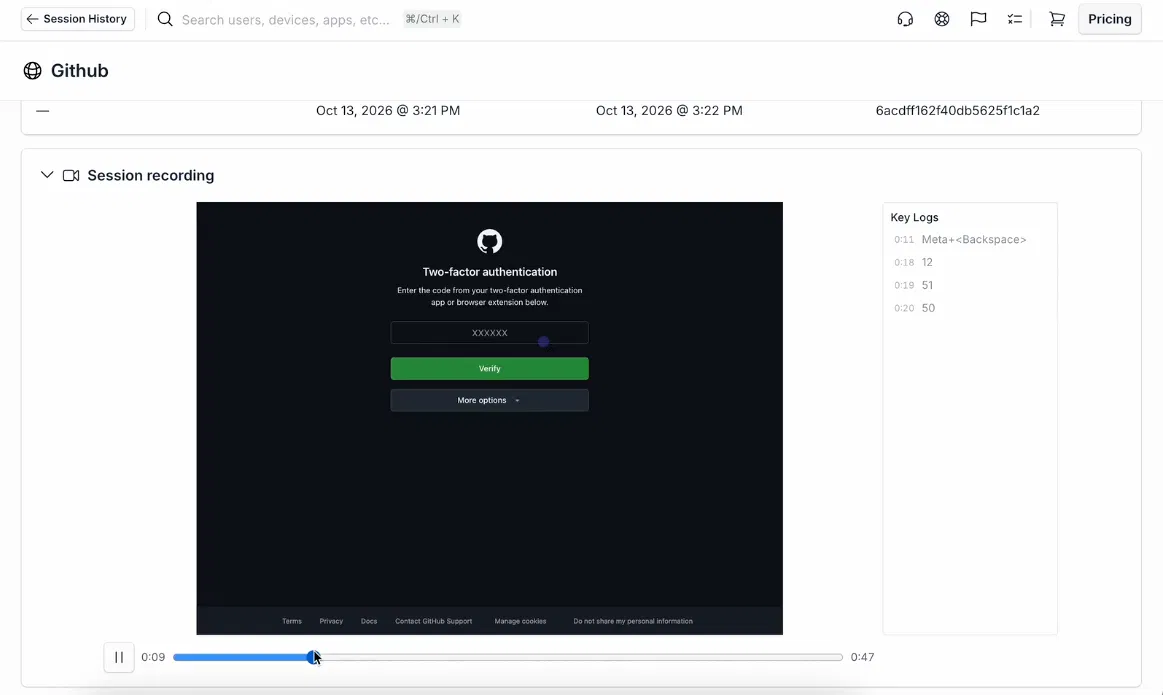
The recording is ready after the session ends.
Was this information helpful?