Migrating to Password Vault from JumpCloud Legacy Password Manager
Legacy Password Manager is in maintenance mode and receives critical fixes only. New features ship in Password Vault. Both run side by side during migration, and we'll give advance notice before the legacy product is retired. See the Migration FAQ for details.
Overview
This document applies to existing legacy JumpCloud Password Manager customers wanting to migrate to Password Vault.
Both products can work simultaneously together. Use the Legacy Password Manager button to interchange between the two interfaces in the admin portal.

Prerequisites for Migration
- Password Vault must be enabled.
- Enable Cloud Backup in legacy JumpCloud Password Manager.
- Save the private key file on your computer. This key should be uploaded during the seamless migration process.
Background
Data Storage & Encryption
In the legacy password manager, sensitive data remained entirely decentralized. Our backend services had no visibility into user secrets.
- Locality: All items (passwords, secrets, and metadata) existed exclusively on user devices, local backups, and encrypted cloud backups.
- Zero-Knowledge Access: Cloud backups were not accessible by our backend. They are encrypted using a Private Key owned and managed solely by the Org Admin.
- Key Sovereignty: We do not store or have access to this private key; the responsibility for its safety rests with the org.
The Migration Process
The main aspects of the migration process to facilitate a seamless transition:
- Key Provisioning: The Admin uploads the private key to the migration service.
- Decryption: The service uses this key to decrypt the cloud backup files. This mirrors the standard recovery protocol used when an Admin restores a cloud backup for an individual user.
- Admins can choose to migrate specific user groups (ideal for testing) or the entire organization at once.
Duration
Depending on size and the queue, most migrations finish in minutes. For context, 11,000 credentials across 8 users were migrated in under 10 minutes. The process runs in the background, so you can stay productive while it completes the background process allowing admins to do other tasks during migration.
The Process
Data migrates instantly if a cloud backup exists. If not, the migration triggers as soon as the user opens their current Password Manager Desktop App.
Migration Visibility
Admins can track real-time status (Yet-to-be, Pending, In-Progress, Partially Migrated or Completed) and re-trigger attempts if needed. Migration Statuses Include:
| Migration Status | Definition | Recommended Action |
|---|---|---|
| Yet to Migrate | Migration has not been initiated for this group. | Select the group and click Start Migration. |
| In Progress | Data is currently being transferred. | No action required; monitoring status. |
| Partially Migrated | Some users' data migration failed but was enrolled in Password Vault (usually due to missing cloud backups). | Click Check Failed Users for the details; ask those users to trigger a backup. |
| Failed | All users’ migration within the group has failed. | Click Check Failed Users for the details; ask those users to trigger a backup. |
| Completed | Migration successful for all users in the group. | No further action required. |
Simultaneous Functioning of Legacy Password Manager and Password Vault
Both the legacy app and the new Vault can work simultaneously during the migration process allowing the users to utilize both the desktop app and Password Vault web app. There is no synchronization of these credentials between the products post migration.
Legacy Password Manager Deactivation
Once the organization is fully migrated, admins can deactivate the legacy password manager ceasing the function of all password manager desktop, browser extensions, and mobile app.
All the data within the legacy password manager desktop app will be erased post deactivation.
How to Migrate Data
Admins can perform seamless migration of user groups using cloud backup by performing the following steps:
- Log in to the JumpCloud Admin Portal.
- Go to Access > Password Vault.
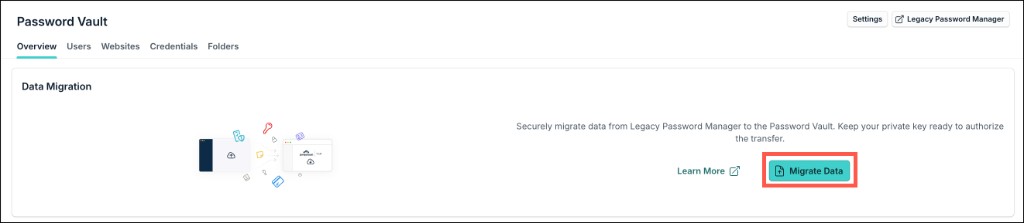
- In the Overview tab, click the Migrate Data button in the Data Migration tile.
If Cloud backup is not enabled, you’ll be prompted to enable Cloud backups in the legacy JumpCloud Password Manager. See Enable JumpCloud Password Manager Cloud Backups to learn more.
- Select which user groups to migrate. You can choose specific user groups or migrate all groups at once.
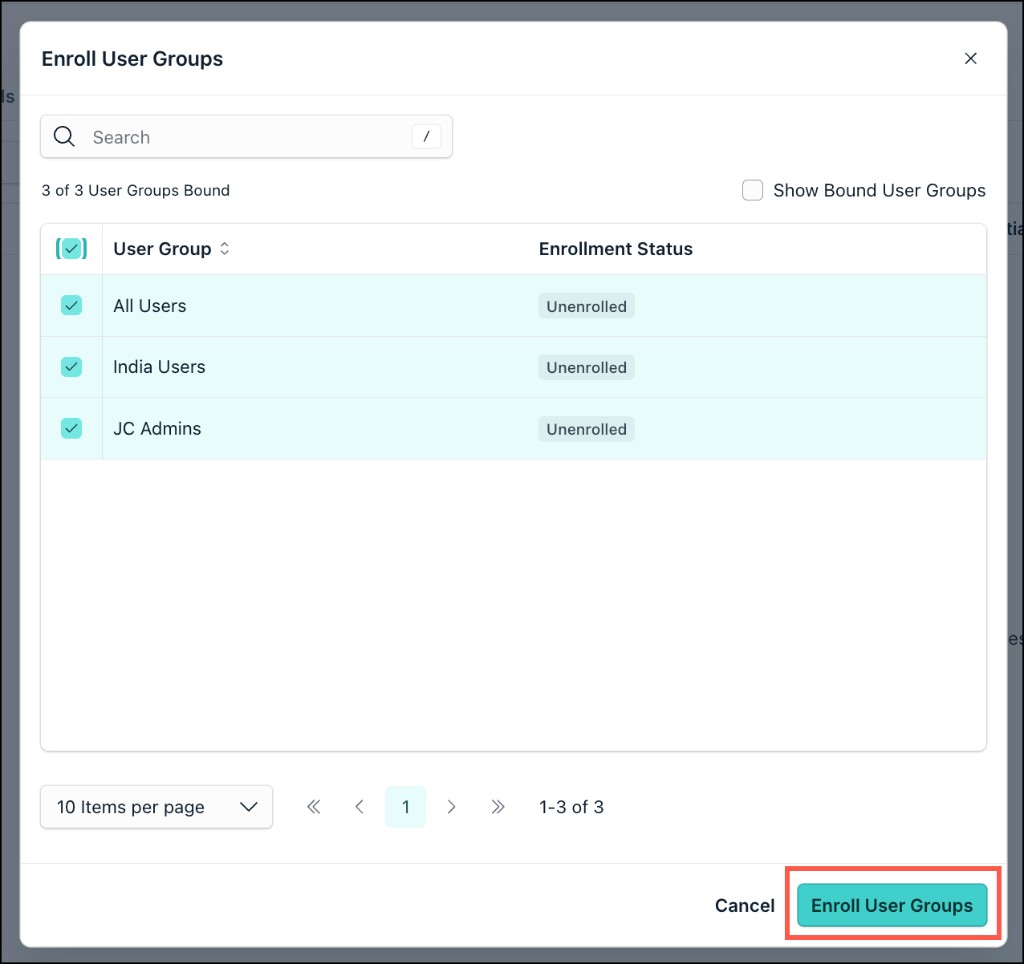
We recommend migrating specific groups first for testing to ensure passwords and sharing preferences are correctly retained. Once you have verified the results, proceed with migrating the remaining groups. Utilize the Migration of Test User Group Announcement email template to notify users. During actual migration, utilize the Org. Wide Announcement for Migration template to notify the entire organization.
- Next, upload the Private Key file from the Legacy Password Manager to facilitate the migration and click Start Migration to begin.
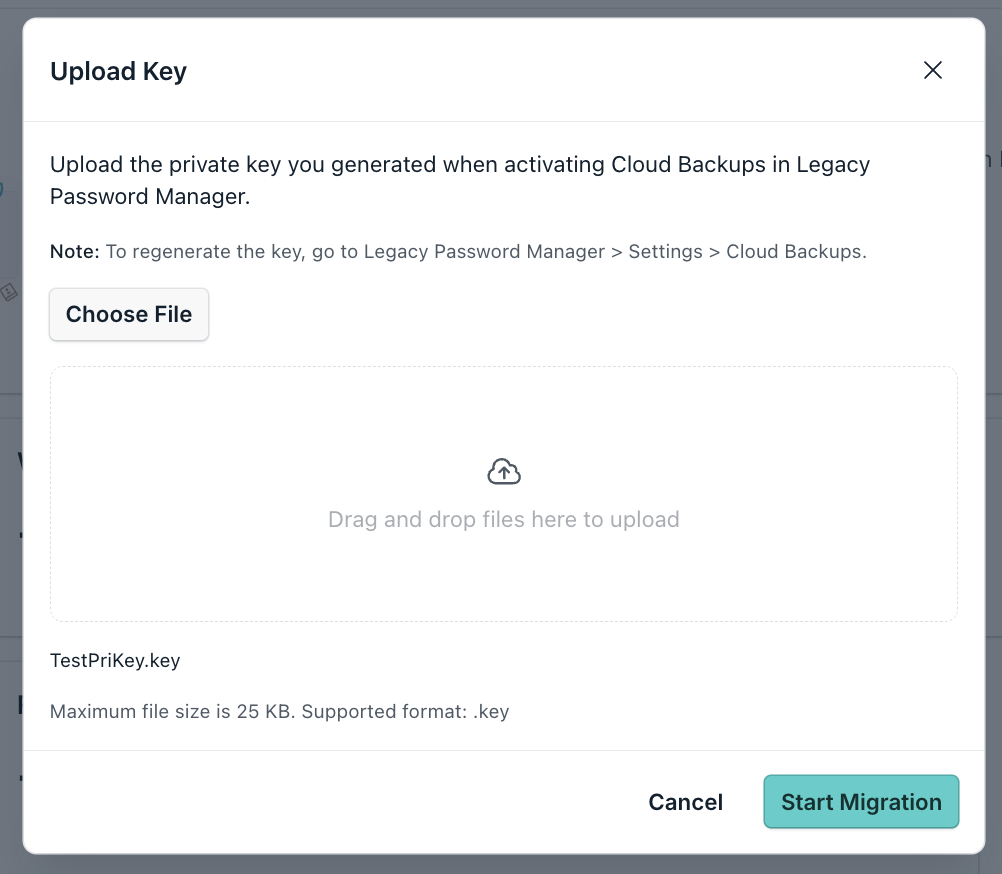
Admins can check the status in the Data Migration tile.

Check User Status
You can view user status by clicking the Check User Status button.
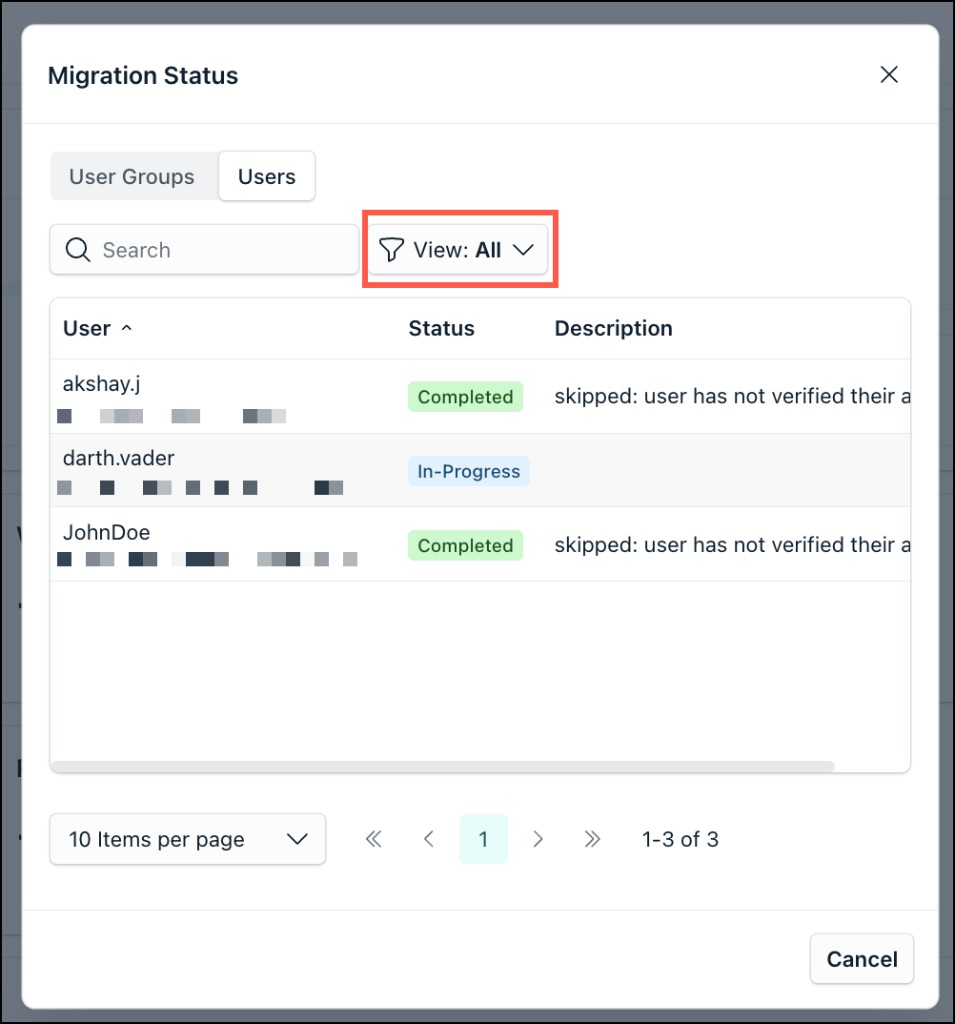
Admins can use the Filter button to view the status of migrated users.
- If a user group’s migration status is Partially Migrated, the migration status of users whose migration failed are displayed as Failed under the Users tab.
- If a user group’s migration status is shown as Failed, all users in the group failed to migrate.
The migration process may fail but this may likely be due to the lack of a cloud backup copy for the user. You can check failed users and the appropriate reason by clicking on the Failed Users tab or by applying the Failed filter in the Users tab of the Migration status Dialog.
Addressing Failed Migration
Please communicate with the users to open their password manager desktop app to create a cloud backup copy. End-users can manually trigger a cloud backup copy by going to Legacy Password Manager Desktop App > Settings > Backup Center > Create a Backup.
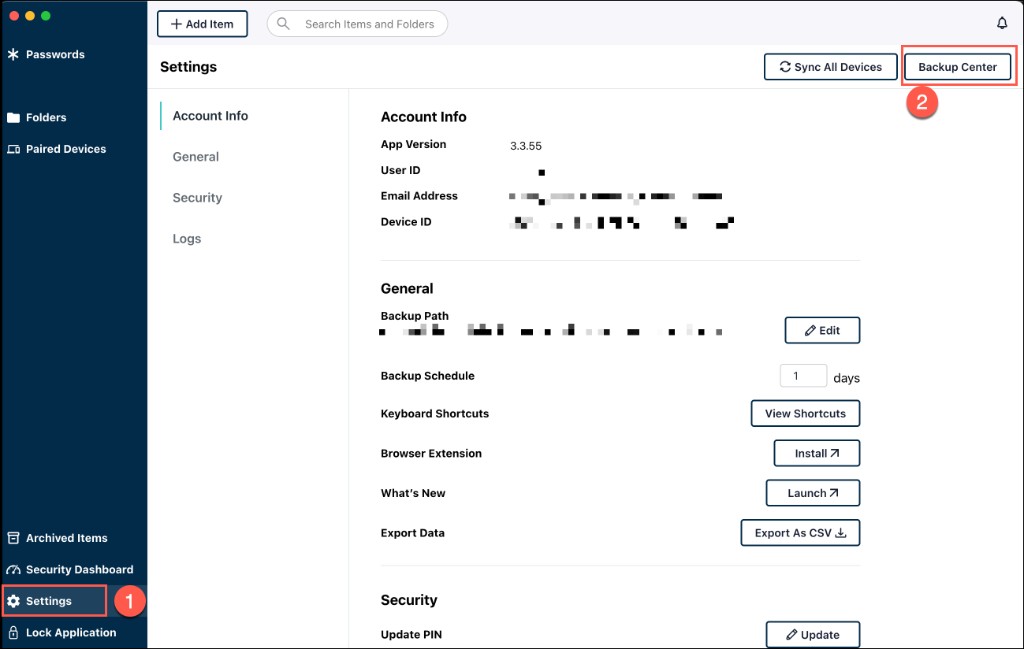
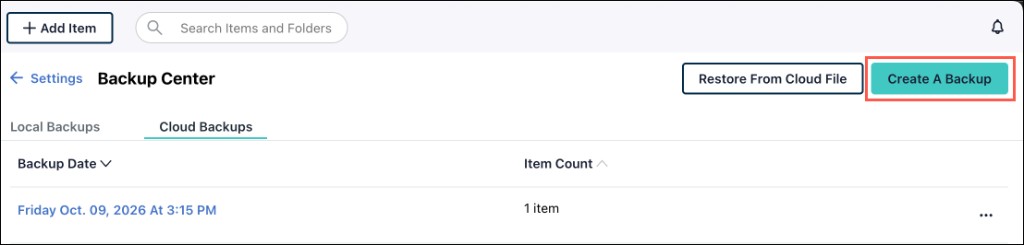
Utilize the Follow-up for Migration Issues email template to reach out to users in case the migration process fails.
Restarting Migration
Once cloud backup is created, you can re-trigger migration for any user groups for which migration has failed or is partially migrated. In the User Groups tab, you can see the migration status of the user groups and decide which groups need to be migrated again.
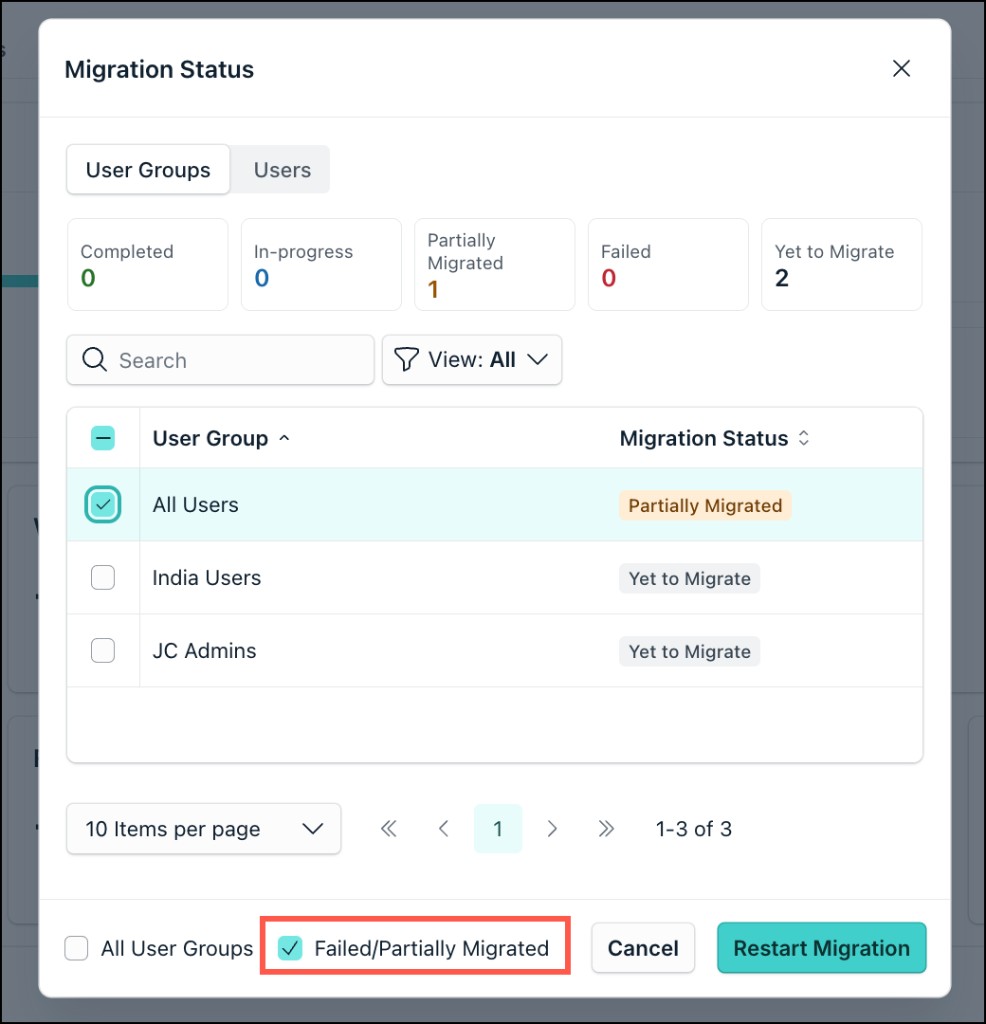
You can exclusively migrate only the failed or partially migrated users by selecting the Failed/Partially Migrated checkbox and then clicking Restart Migration.
This process captures the latest cloud backup, including any data added to the Legacy Password Manager Desktop App since the previous migration attempt.
Deactivating Legacy Password Manager
After the migration is complete, Admins can proceed to deactivate the legacy password manager.
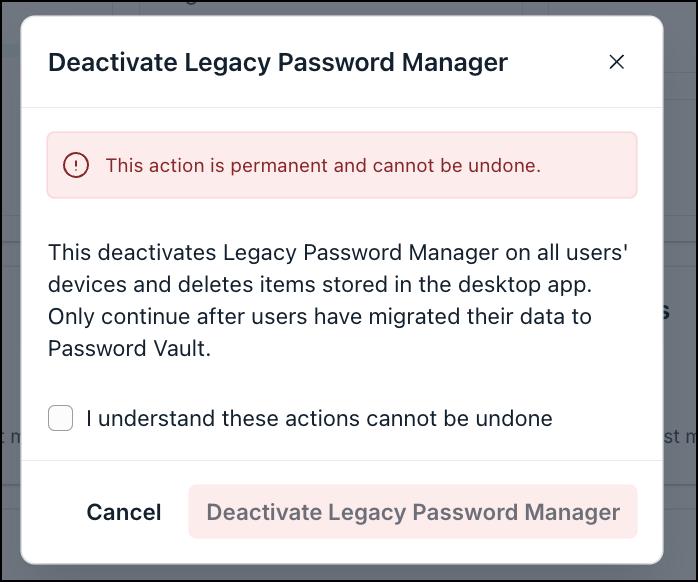
Deactivating the legacy password manager will remove all your data and credentials from the password manager desktop app making it inaccessible. These can’t be restored. Make sure all data has been successfully migrated before deactivation.
Manual Migration from Legacy Password Manager
Users can perform the following steps to manually import credentials from Legacy JumpCloud Password Manager to Password Vault.
To import credentials from the existing JumpCloud Password Manager:
- Open your existing JumpCloud Password Manager.
- Go to Settings > General and click Export as CSV option. Each .csv file corresponds to an item type/folder.
- Open the Password Vault.
- Go to Credentials.
- Click Import.
- Upload the CSV file containing credentials for each credential type. Alternatively, leverage the pre-loaded template by clicking Download Template and organize your credentials accordingly.
- Map the appropriate columns corresponding to Password Vault's credential fields.
- Select sharing preferences/shared folder as required and click Import.
Upon mapping selection of the “website URL” for a field, a check-box option is presented to “Create a single website for passwords with the same URL”. This option is selected by default.
Migrated Data in Password Vault
Folders and Access Permission post migration will be retained within Password Vault. A comparison of Access Permission level and its respective mapping post migration from Legacy Password Manager to Password Vault is summarized in the table below.
| Password Vault Access Permission | Legacy Password Access Permission | Description |
|---|---|---|
| Connect | Folder Member | Only allows users to auto-login on to the websites without exposing the passwords. This option is available only for credentials. |
| View Secret | - | New Access Permission, unavailable in Legacy Password Manager. Users can view the secret and autofill credentials on website forms. |
| Edit | Item Manager | Users can add, edit, delete credentials and websites present in the folders. Users can view the secret and autofill credentials on website forms. |
| Manage | Folder Manager | Provides users with complete ownership of the websites/credential. Users can view, edit, share, and delete the websites/credentials and folder. |
With the introduction of new View Secret access permission, Password Vault standardizes permission behavior to resolve inconsistencies found in the legacy application.
Previously, folder members could view secrets for secure notes but not for password credentials. Password Vault introduces a consistent model:
- Connect: Permits autofill without revealing sensitive data (applies to passwords).
- View Secret: Grants permission to view secrets for all credential types.
Grant the View Secret permission for that shared folder for folder members.
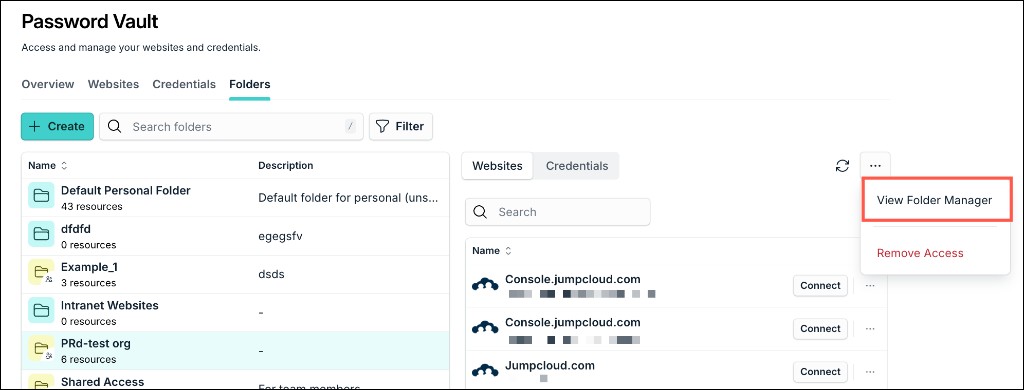
To View Folder Manager, go to Password Vault > Folders > Select Folder > View Folder Manager.
2FA Codes in Password Vault
Post migration, 2FA codes that were linked to existing credentials become part of the password in Password Vault.
Consider the following example:
A user had 15 2FA codes saved in the legacy password manager out of which 10 were linked to existing passwords. After migration, only 5 2FA codes will be listed as standalone 2FA codes in password vault while the remaining ones will be part of the existing passwords to which they were linked to.
Automatic Linking of Websites and Credentials
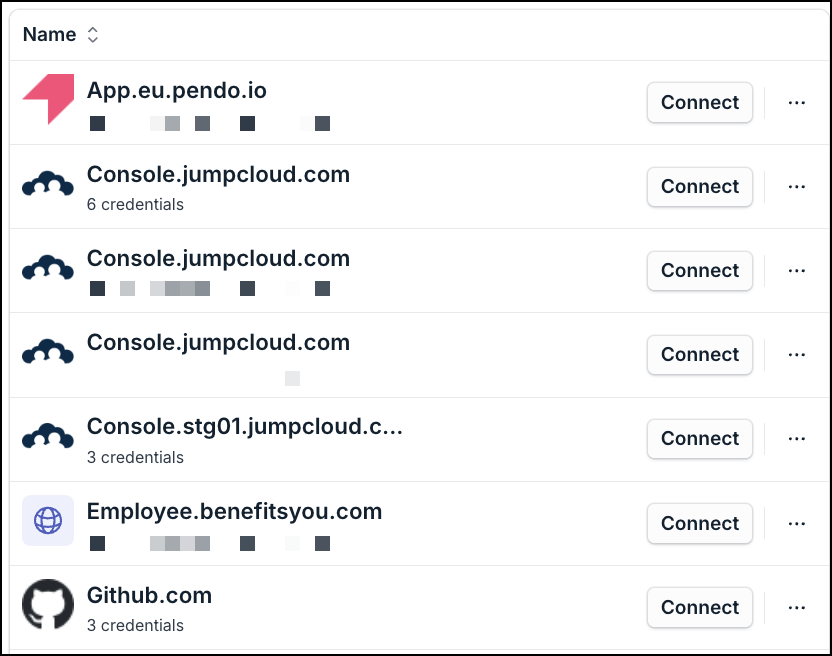
In Password Vault, multiple credentials in a folder belonging to the same website are grouped together.
Post migration, the credentials in the same folder that have the same website URL will be linked to the same website.
Was this information helpful?