Manage Administrator Roles and Access in the Enterprise Portal (Preview)
As a Super Admin (Administrator with Billing or equivalent), you can manage user access in the Enterprise Portal by assigning a custom role and specifying the organizations the user can access. This determines precisely what resources a user can manage and where.
Prerequisites:
We recommend creating the custom role first, so you can assign it immediately when granting the user Administrator access. The user must already exist in your Enterprise Portal. See Manage Users in the Enterprise Portal to learn more.
Considerations:
- Admins can create, edit, and delete custom roles with unique names, safe characters (letters, numbers, spaces, and hyphens), and permission rules that don’t exactly match pre-defined or existing custom roles. These capabilities are available in the Enterprise Configuration (Primary Organization) and API.
- Each organization can have up to 20 custom roles.
- Whichever scope has been customized as the highest permission level is considered the Super Admin (Administrator with Billing or equivalent).
Creating a Custom Role in Your Primary Organization
To create a custom role:
- Log in to the Enterprise Portal.
- In the upper-right corner, click Enterprise to open the enterprise-level configuration.
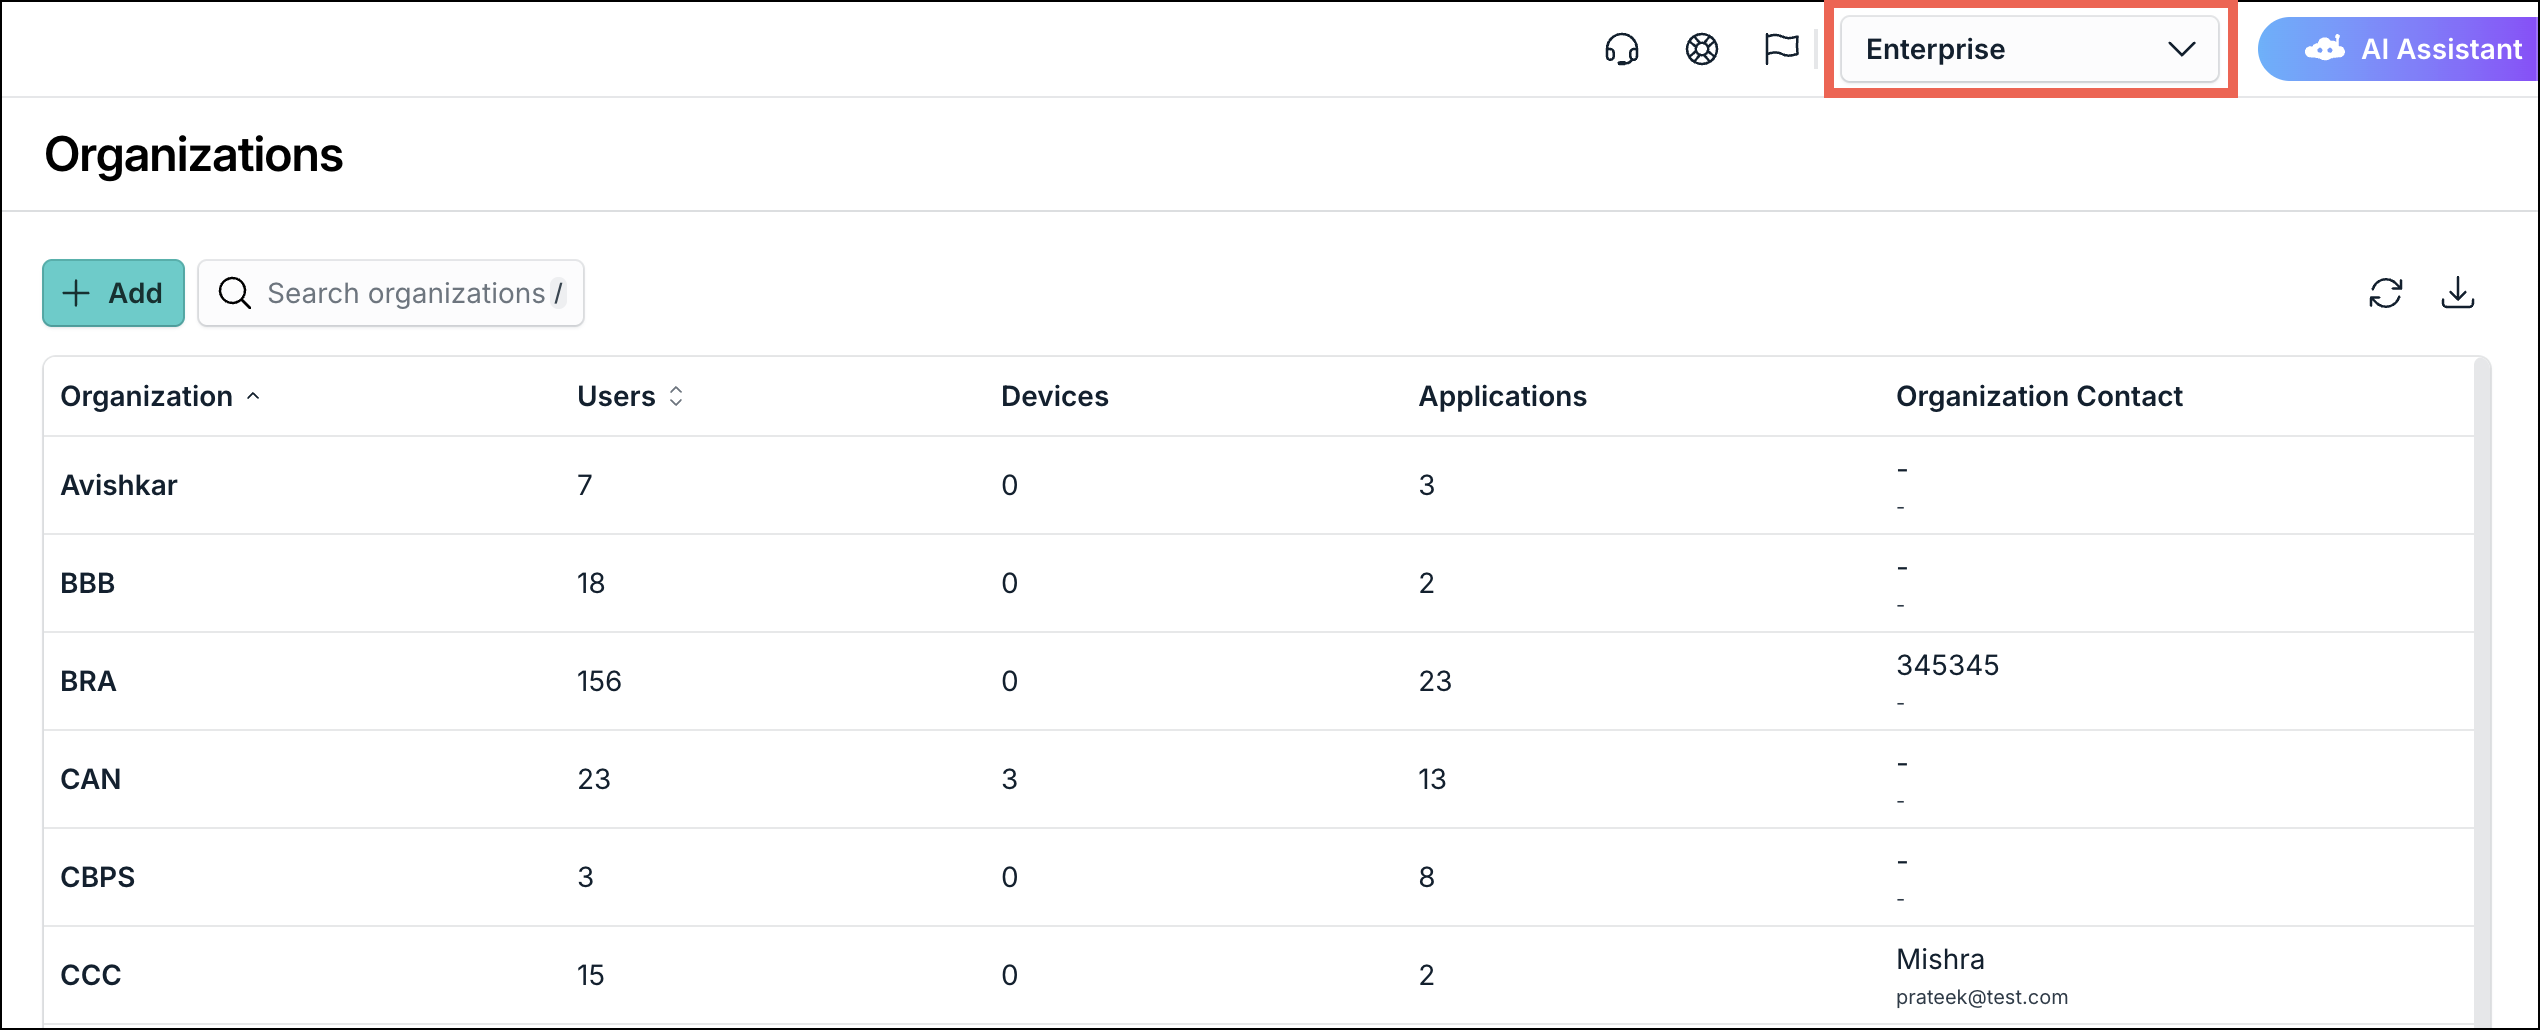
- Then in the left navigation, go to Settings > Custom Roles.
- Click + Add Custom Role.
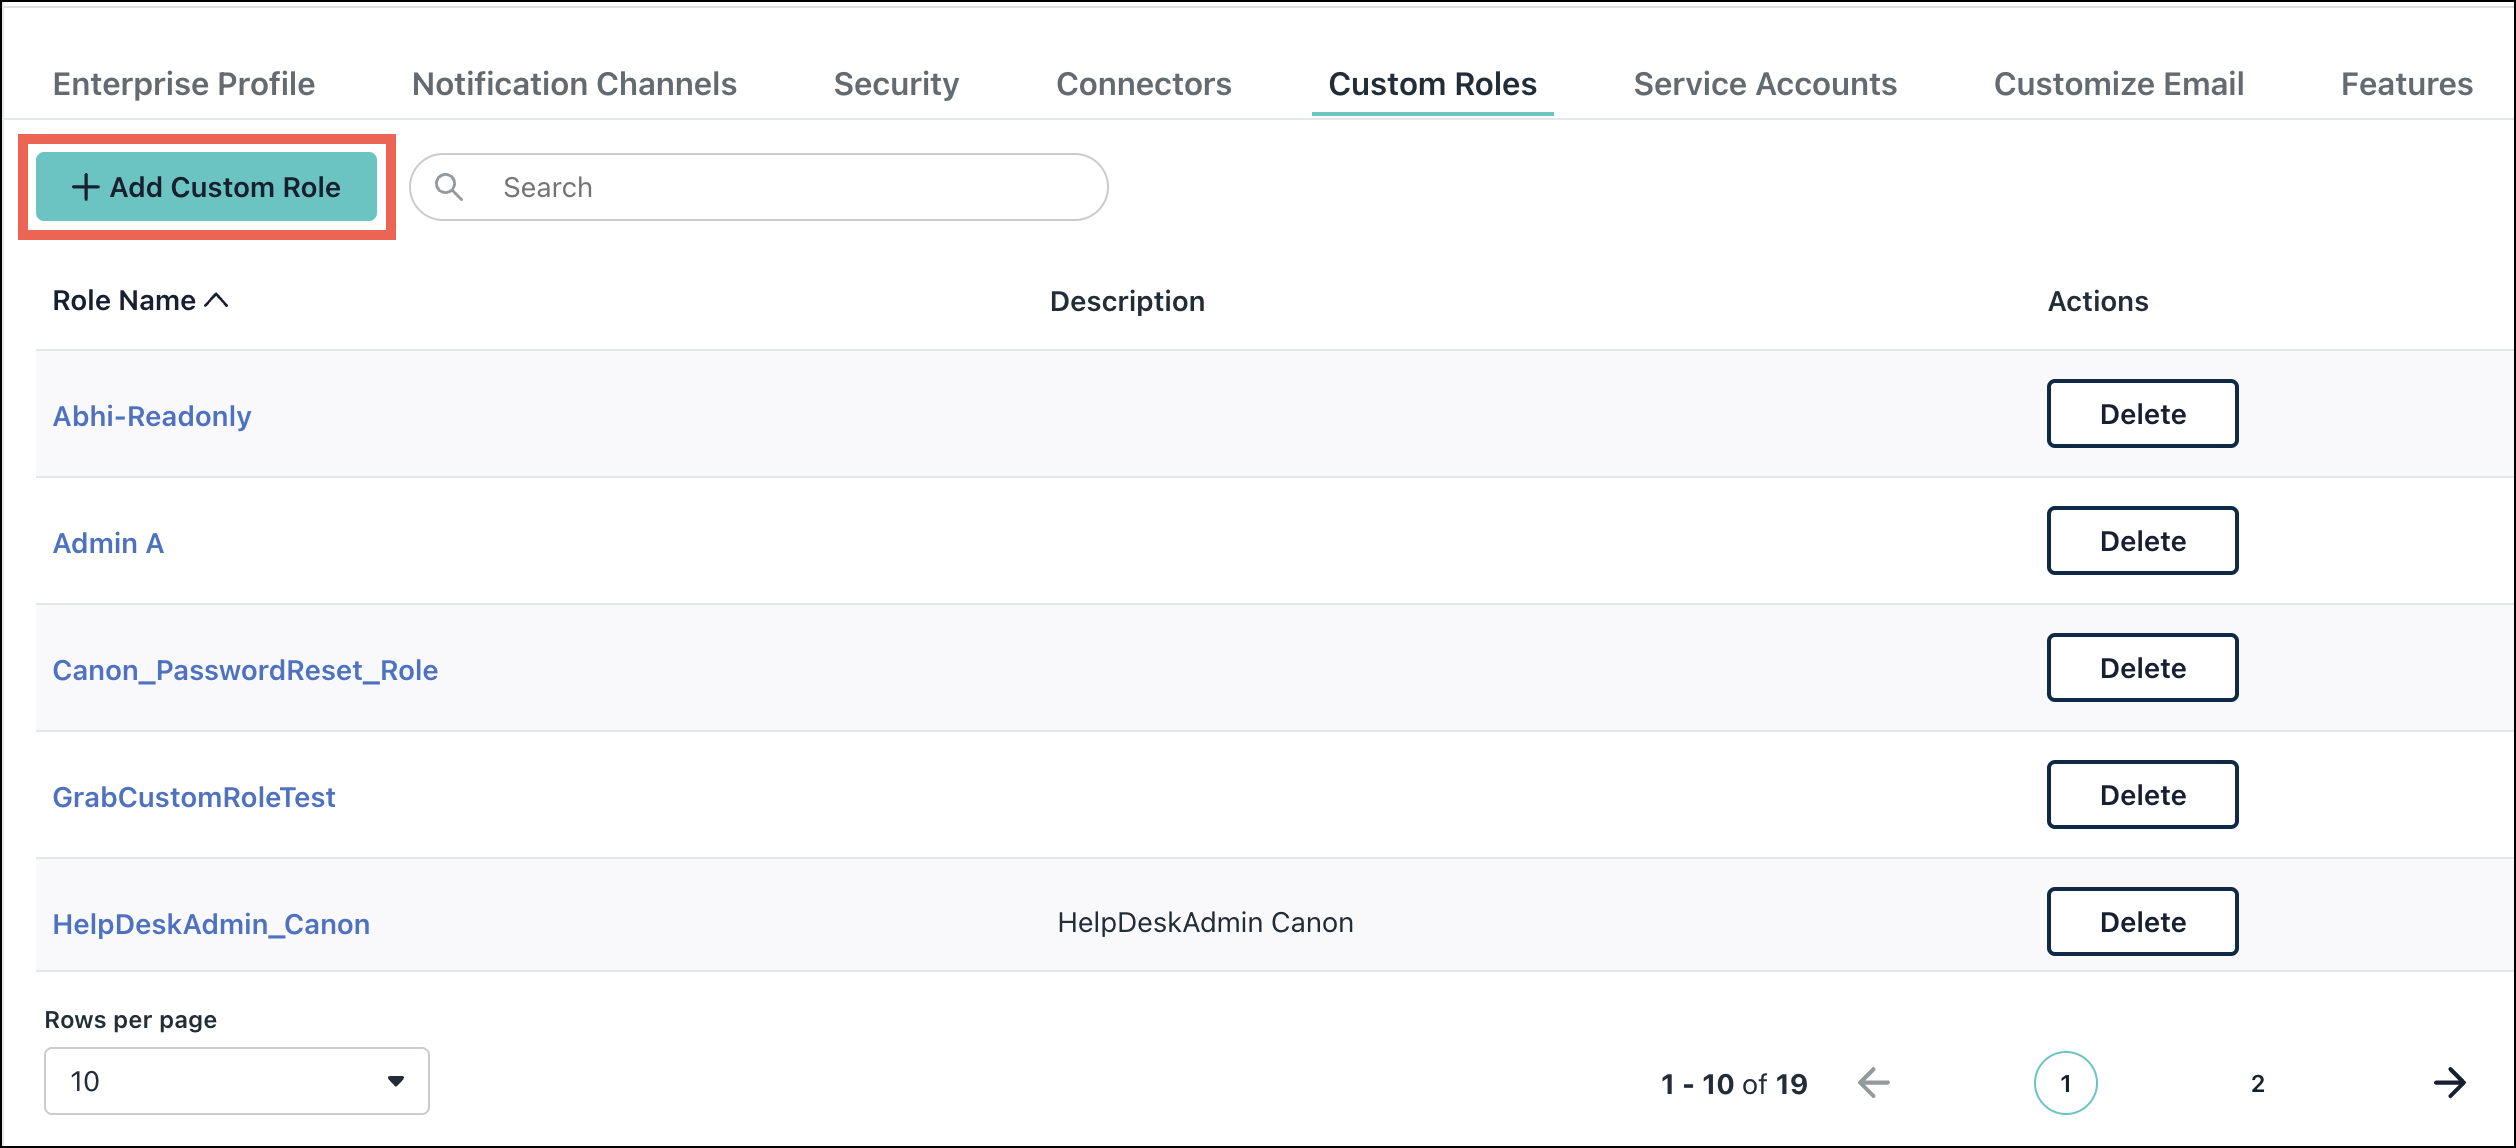
- Enter a Custom Role Name.
- The role name can be up to 64 characters, or 128 characters if supported.
- Only letters, numbers, hyphens, and underscores are allowed; spaces, @, and other special characters are not supported.
- Add an optional description.
- Select a Default Role as Template from the dropdown menu to use as a starting point for the role customization.
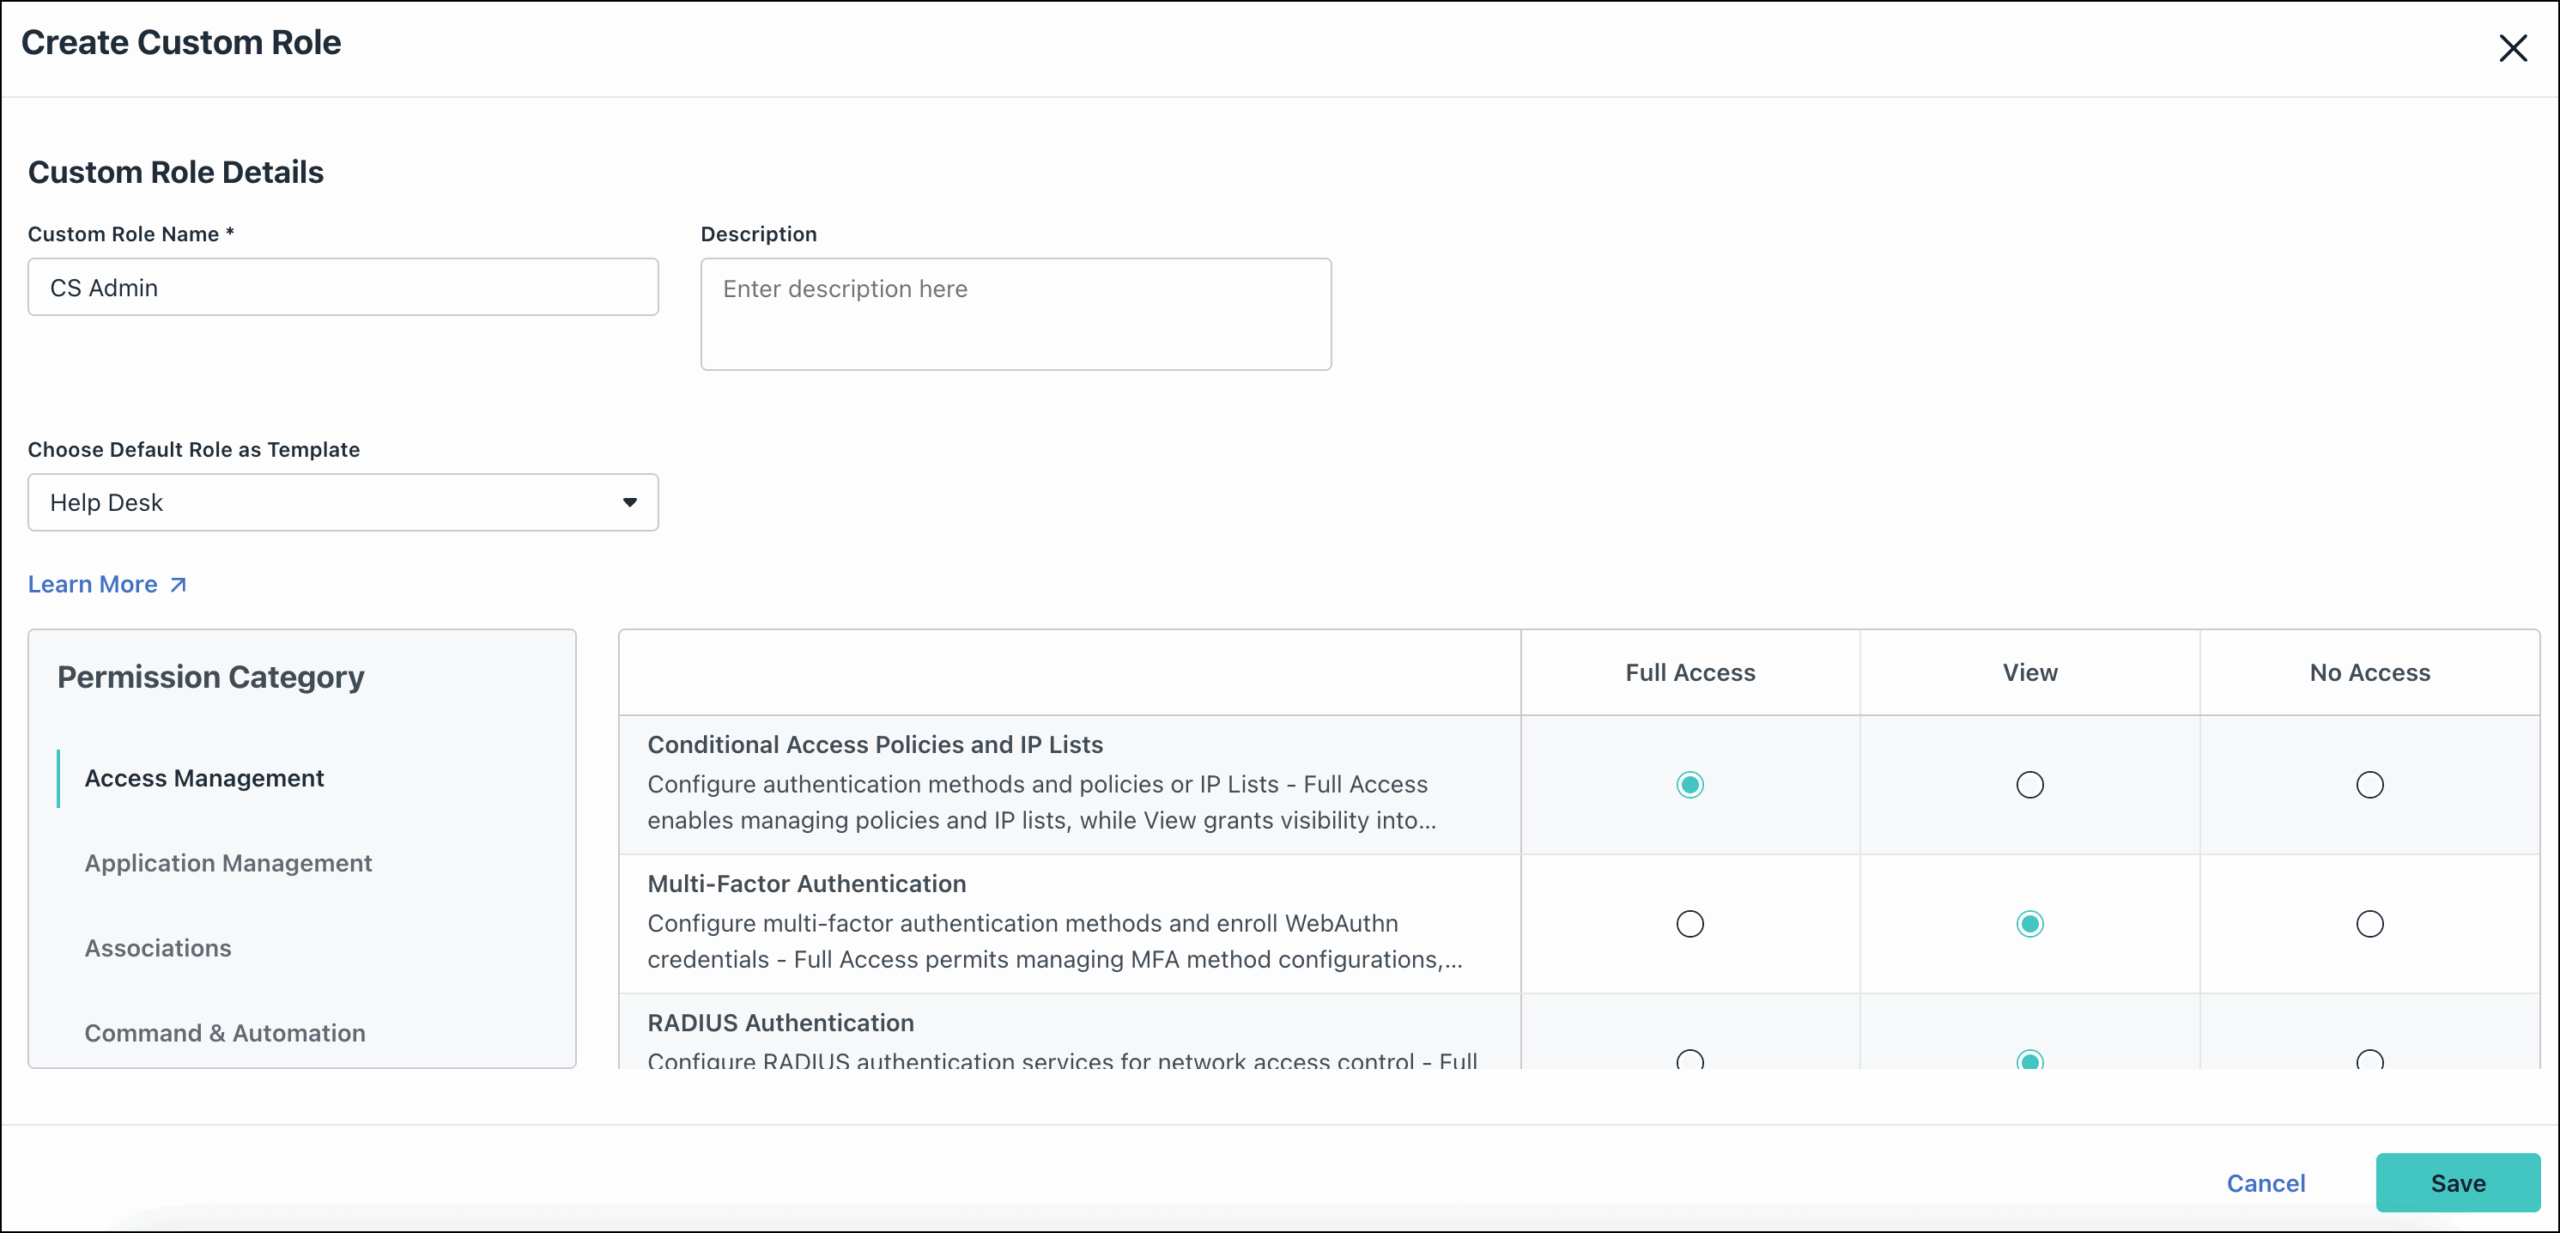
- There are 12 different Permission Categories to customize permissions for Full Access, View, or No Access.
- Access Management
- Application Management
- You can select access to Create, Update, Delete, and/or View
- Associations
- Command & Automation
- You can select a checkbox for scheduling commands.
- Core Administration
- Device Management
- Directory Integration Management
- Groups Management
- Monitoring & Analytics
- Provider Management
- SaaS & Asset Management
- User Management
- You can select access to Create, Update, Delete, and/or View.
- Admins can also assign user support permissions like MFA requirements, reset password permissions, etc.
- Once your customizations are complete, click Save.
- The new role will appear in the list of Custom Roles.
- If you need to, you can edit the role by clicking on its name. Or, you can delete the role entirely by clicking Delete.
Assigning Administrator Access to an Existing User
To assign Administrator access to an existing user:
-
Log in to the Enterprise Portal.
-
Go to Identity Management > Users.
-
Select the user you want to assign as an Administrator, then click the Actions dropdown menu on the right.
-
Click Assign Administrator Access.
-
Under Permissions, select an Admin Role from the dropdown menu.
-
Under Organization Access, select the organizations that you want the user to have access to in the Enterprise Portal.
-
Click Save.
-
The user will now appear under the Administrators tab.
Logging into the Enterprise Portal as a User with Administrator Access
After assigning the user to Administrator access, the user can log in to the Enterprise Portal as an Admin using their user credentials. On the first log in, the user will be asked to enroll in Multi-Factor Authentication (MFA) if not already enrolled.
Logging into the Enterprise Portal as an Administrator requires MFA.
Editing an Administrator
To edit an Administrator:
- Log in to the Enterprise Portal.
- Go to Identity Management > Users > Administrators tab.
- Click on the Administrator’s Name in the list. The Edit Administrator popup appears.
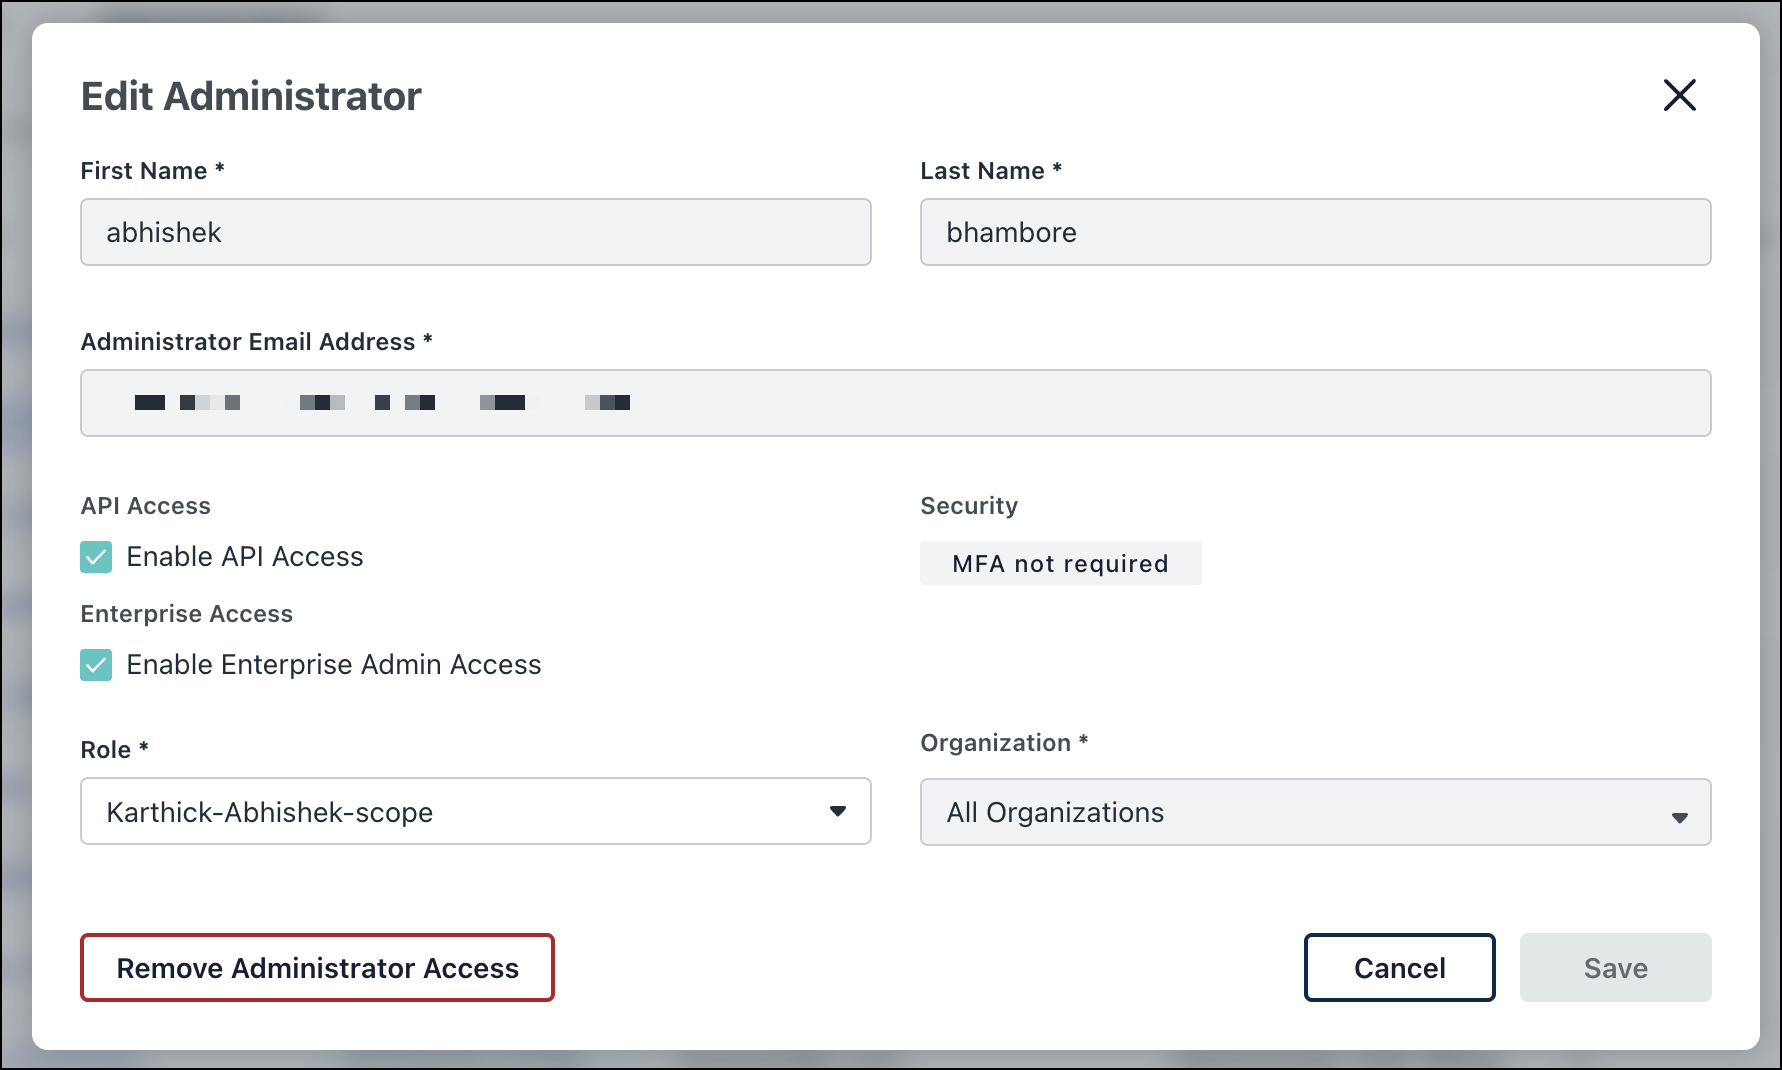
- Modify the Administrator’s information:
- First Name - The Admin's first name.
- Last Name - The Admin's first name.
- Administrator Email Address - The Admin's email address. This field is required.
- If you want to give the admin API access, select the checkbox next to Enable API access. If it's enabled and the Admin has generated a key, you'll see the first four characters of the Admin’s API key, and the date it was created as well. See JumpCloud API’s to learn more.
- If the Administrator has Enterprise access, clear the Enterprise Access checkbox if needed.
- Edit the Role and Organization of the Administrator from the respective drop-down. The Organization dropdown displays only the organizations the admin has access to.
- Click Remove Administrator Access to remove their access to all organizations they have access to.
- Once done, click Save.
Removing Administrator Access from Users
A Super Administrator (Administrator with Billing or equivalent) can remove Administrator access from users in two ways.
From the Administrator Tab
To remove Administrator access from an Administrator:
- Go to the Identity Management > Users > Administrators tab.
- Click the name of any Administrator.
- In the Edit Administrator dialog, click Remove Administrator Access.
A Remove Admin Role dialog is displayed warning the Administrator.
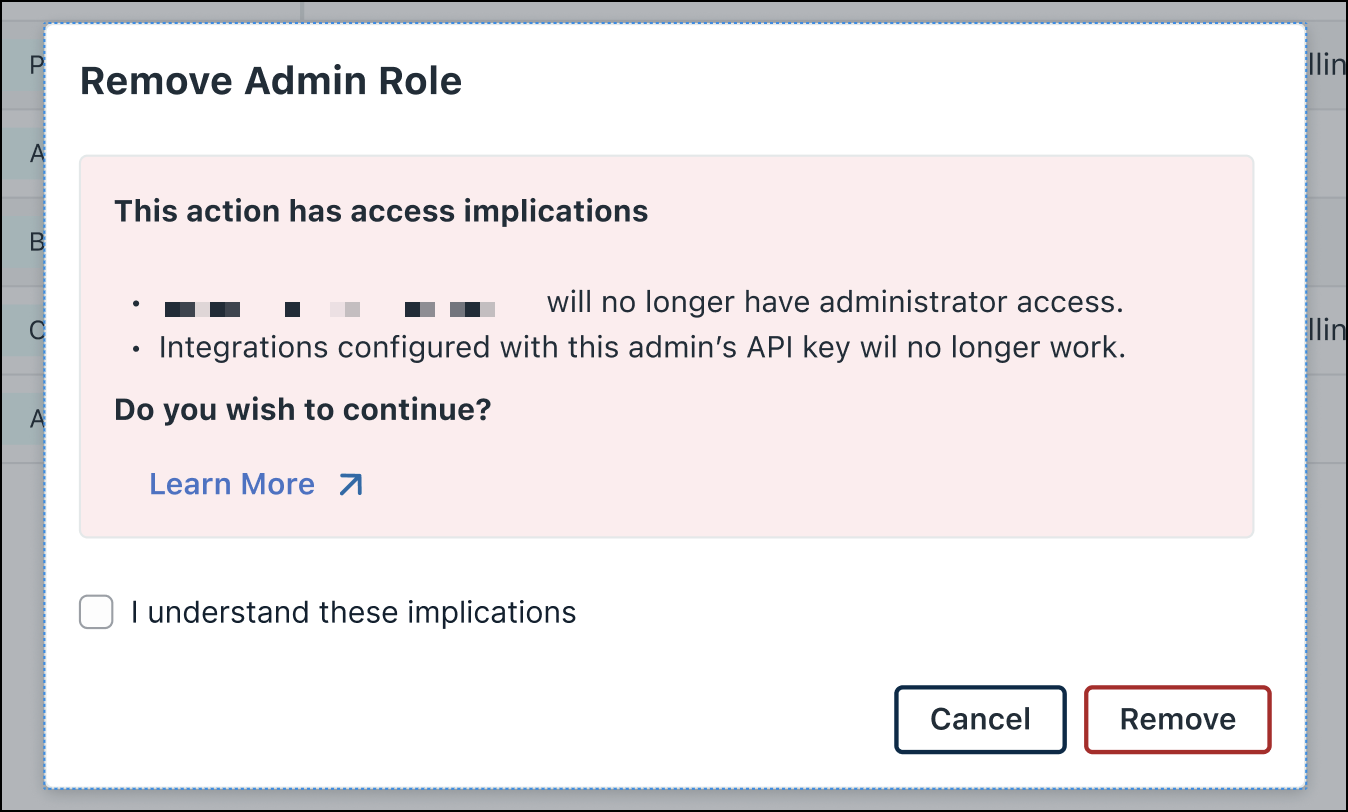
- Select the checkbox and click Remove.
You have successfully removed the Administrator access for the selected Administrator.
From the Users page
To remove Administrator access from the Users page:
- Go to the Identity Management > Users page.
- Select the checkbox next to an Administrator.
- From the Actions dropdown, click Remove Administrator Access.
The Remove Admin Role dialog is displayed warning the Administrator.
- Select the checkbox and click Remove.
You have successfully removed the Administrator access for the selected Administrator.
Was this information helpful?