Implement PKIaaS with RADIUS for Certificate-Based Wi-Fi
Public Key Infrastructure as a Service (PKIaaS) in JumpCloud issues user certificates from a JumpCloud-managed Certificate Authority (CA). Pair it with JumpCloud Remote Authentication Dial-In User Service (RADIUS) to authenticate Wi-Fi with certificates over Extensible Authentication Protocol Transport Layer Security (EAP-TLS) instead of passwords.
Prerequisites
- Admin Portal access to Certificate Authority, RADIUS, and Policy Management.
- A JumpCloud-managed Client Certificate Authority under Security > Certificate Authority > Root Certificates. See Certificate Authority Management to learn more.
- A RADIUS server under Access > RADIUS configured with Passwordless authentication and the same CA root uploaded. See RADIUS Configuration and Authentication to learn more.
- Windows 10 or Windows 11 devices enrolled in JumpCloud MDM.
- A WAP or router that supports RADIUS and EAP-TLS.
Considerations
- Passwordless RADIUS requires EAP-TLS. MFA applies to password-based RADIUS only, not certificate auth.
- The SCEP challenge password is shown once at endpoint creation. Copy it before you click Close.
- Deploy the root CA through an Install Certificate policy or through SCEP, not both. This article uses a separate Install Root Certificate policy.
- Windows user-scoped MDM policies are in Private Preview. Confirm your tenant has access.
- SCEP and RADIUS hostnames are region-specific. See JumpCloud Data Centers for your tenant.
Create a JumpCloud-Managed Root Certificate
JumpCloud provisions a Client Certificate Authority instantly from the Admin Portal. You use this root in your RADIUS server and in every certificate delivery path below. See Certificate Authority Management to learn more.
Configure RADIUS for Passwordless Authentication
Do the following to configure RADIUS:
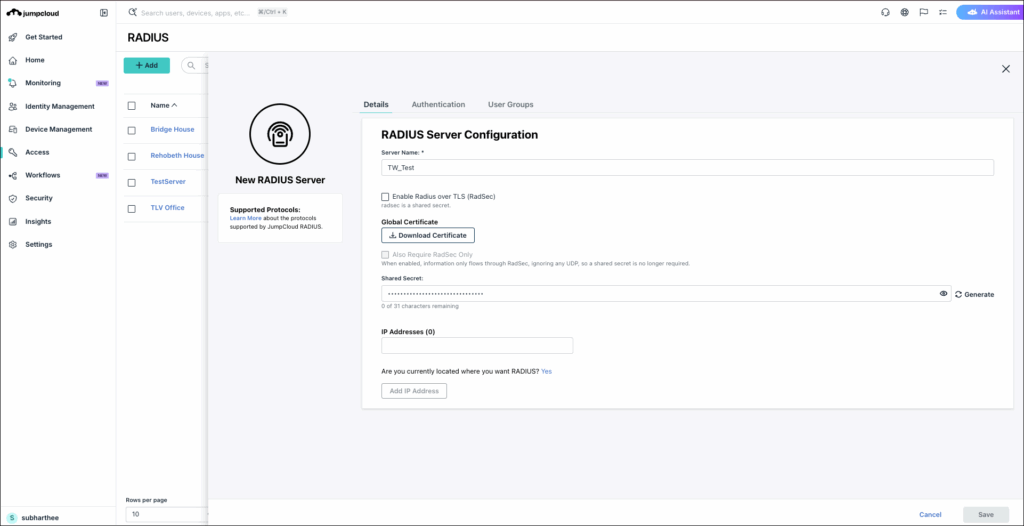
- Go to Access > RADIUS and click (+ Add).
- On the Details tab, enter Server Name, Shared Secret, and IP Addresses. Click Save.
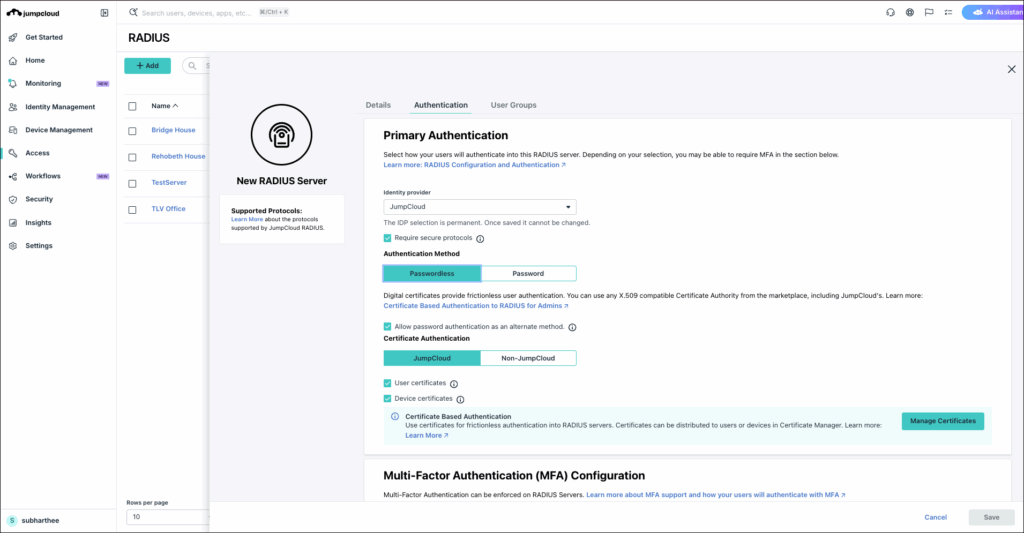
- On the Authentication tab, select JumpCloud and Passwordless.
- Upload the CA root certificate file.
- Click Save. A Certificate badge appears in the RADIUS list.
- On the User Groups tab, select the groups that should use this server. Click Save.
Create a JumpCloud PKI SCEP Endpoint
- Log in to theJumpCloud Admin Portal.
If your data is stored outside of the US, check which login URL you should be using depending on your region. If your organization uses LDAP, RADIUS, or requires firewall allow list configuration, the Fully Qualified Domain Names (FQDNs) will also be region specific. See JumpCloud Data Centers for the URLs, FQDNs, and IP addresses.
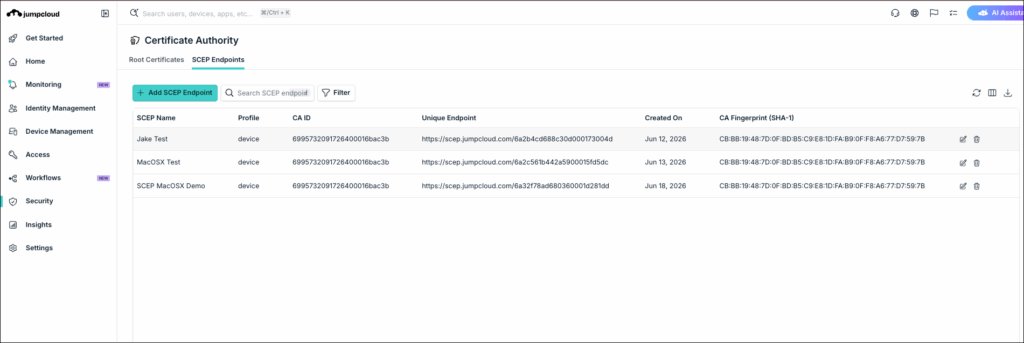
- Go to Security > Certificate Authority > SCEP Endpoints.
- Click + Add SCEP Endpoint.
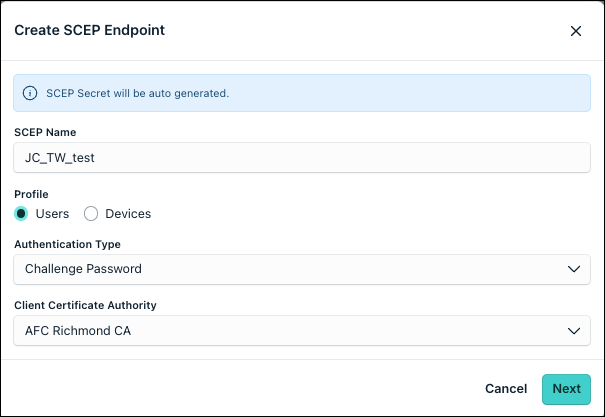
- Enter a SCEP Name, select profile Users, and choose the Client Certificate Authority.
- Click Next.
- Copy the Challenge Password.
- Click Create.
The challenge password is not shown again after the Create SCEP Endpoint pop-up window is closed. Regenerate it from the endpoint row if lost, then update every SCEP policy that uses this endpoint.
See Manage SCEP Endpoints to learn more.
Distributing Certificates
Choose one or more paths depending on how your users and devices are managed.
Path A: Automate with MDM Policies
Use this path for Windows devices enrolled in JumpCloud MDM. JumpCloud pushes the root CA, issues a user certificate through SCEP, and deploys a Wi-Fi profile that automatically selects the certificate present on the device.
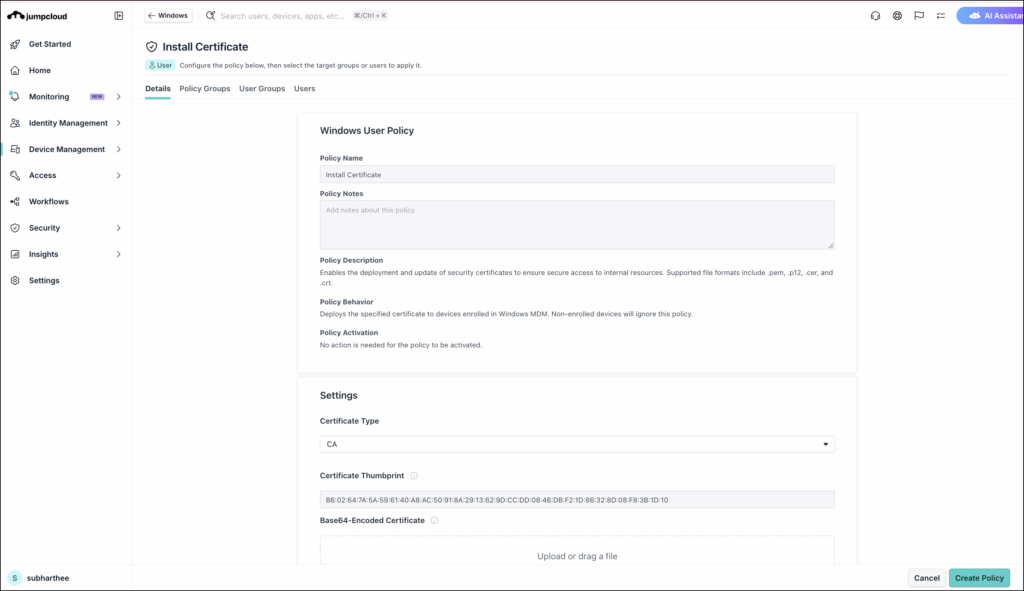
- Create an Install Root Certificate Policy - Deploy the CA root to the user certificate store before SCEP enrollment. See Create a User Level Windows Install Certificate Policy or Create a Device Level Windows Install Certificate Policy to learn more.
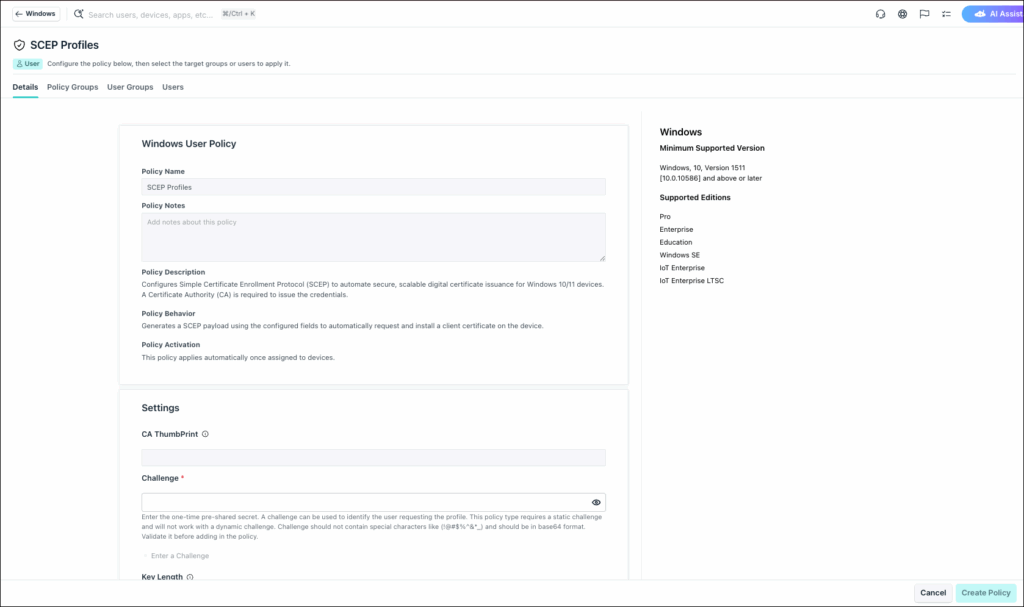
- Create a User Certificate Issuance Policy - This step runs after the SCEP endpoint and Install Root Certificate policy. When a user signs in, JumpCloud pushes a user-scoped SCEP profile and the device stores the certificate in the Current User store. See Create a User Level Windows SCEP Profile Policy and Create a Device Level Windows SCEP Profiles Policy to learn more.
- Validate Device and User Association - Confirm the user, device, and policies are aligned before you deploy Wi-Fi:
- Verify the target user is Active in JumpCloud and belongs to the user groups assigned while creating a Install Root Certificate and User Certificate Issuance policies.
- Verify the target Windows device is enrolled in JumpCloud MDM and has the JumpCloud Agent running.
- Have the user sign in to the managed Windows device. The Agent detects the session and pushes user-scoped policies.
- On each Install Root Certificate policy and User Certificate Issuance policy, open the Status tab and confirm Exit Status is 0 for the target device.
User-scoped policies apply only when a user logs into a supported Windows device that is enrolled in MDM. For user groups with multiple OS member types, the policy applies only on supported Windows devices.
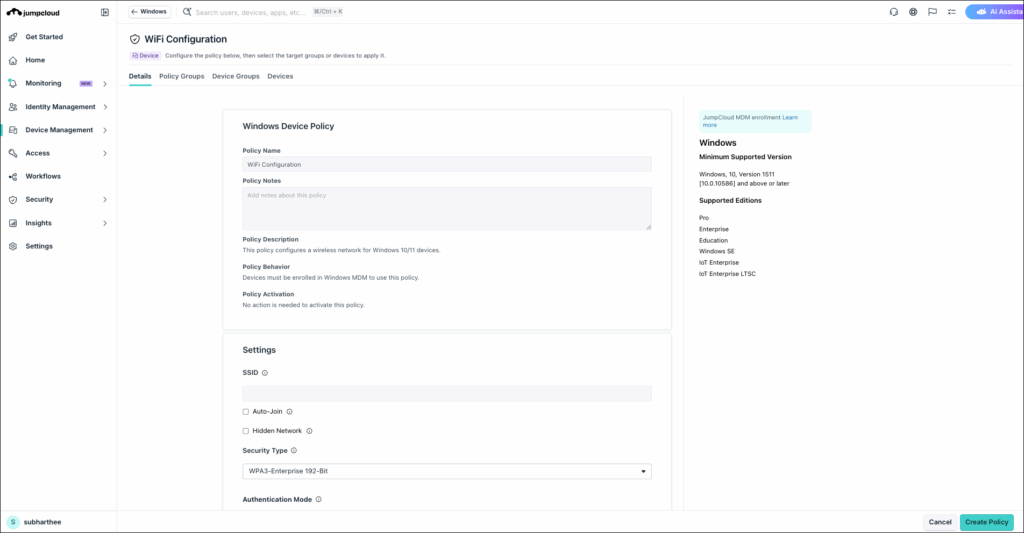
- Create a Wi-Fi Policy - Deploy the Wi-Fi profile after the user certificate is issued. The device uses EAP-TLS and the SCEP-issued certificate to connect to your RADIUS-protected SSID. See Create a User Level Windows WiFi Configuration Policy and Create a Device Level Windows WiFi Configuration Policy to learn more.
Path B: Manually Distribute Certificates (Non-MDM Devices)
Use this path for devices that JumpCloud MDM cannot reach. The admin downloads the certificate from the Admin Portal and distributes it manually.
- Go to Security > Certificate Authority.
- Locate the issued user or device certificate.
- Download the certificate.
- Install the certificate on the target device using your operating system method.
- Configure the Wi-Fi profile on the device to use EAP-TLS with that certificate and the SSID protected by your JumpCloud RADIUS server.
Path C: Enable User Portal Certificate Download
Use this path when you want users to download and install their own certificates without MDM enrollment.
- Enable User Portal certificate generation for your organization or user group.
- Direct users to the User Portal.
- Users download their certificate from the User Portal.
- Users install the certificate and connect to the RADIUS-protected SSID using EAP-TLS.
See User-Initiated Certificate Generation to learn more.
Configure Your WAP
On your WAP or router:
- Point RADIUS at JumpCloud (radius.jumpcloud.com or your region FQDN) on port 1812/UDP.
- Enter the Shared Secret from your RADIUS Details tab.
- Set the SSID to WPA2-Enterprise or WPA3-Enterprise with EAP-TLS.
See Configure a WAP, VPN, or Router for RADIUS to learn more.
Once you have followed all the above mentioned steps, you will be able to implement PKIaaS with RADIUS for Certificate-Based Wi-Fi.
Was this information helpful?