Get Started: User Portal Folders
Use Folders in the JumpCloud User Portal to group your assigned applications into personal folders. Organizing applications this way helps you group and find the applications you need in the User Portal.
Folders are personal to you. Other users in your organization cannot see your folders, and your IT admin does not configure folders for you. Applications you add to a folder remain available on All Applications.
Considerations
- You can create up to 20 folders.
- The same application can be in more than one folder.
- Deleting a folder does not remove your access to the applications in it. Those applications remain on All Applications.
- Folder names must be unique and can contain only letters, numbers, and spaces.
- Folder names cannot match a User Portal tab name (All Applications, Favorites, Folders, or Security).
Accessing Folders
The Folders tab is on the All Applications page. Use it to view and manage your personal folders.
- Log in to the JumpCloud User Portal.
- Click All Applications.
- Click the Folders tab.
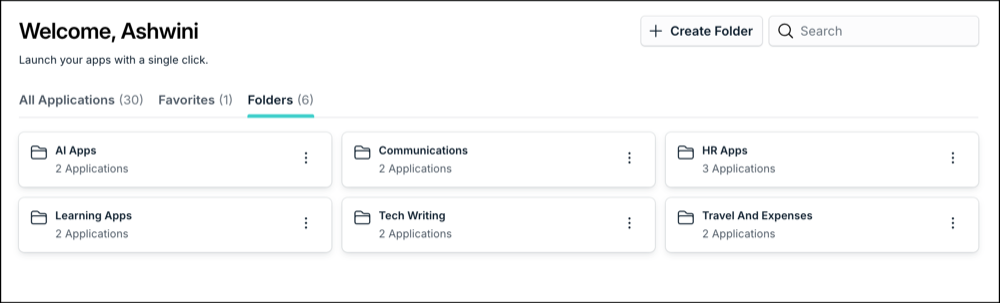
Your folders appear on the Folders tab. If you have not created any folders yet, click Create Folder to get started.
Creating a Folder
Create a folder to group related applications together. You can add applications when you create the folder or add them later.
- On the Folders tab, click Create Folder.
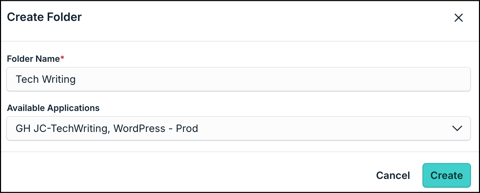
- In the Folder Name field, enter a name for the folder.
- (Optional) In Available Applications, select one or more applications to add to the folder.
- Click Create.
The new folder appears on the Folders tab.
Adding Applications to a Folder
Add applications to a folder from the Folders tab.
- Open the folder, or on a folder card, click the 'three-dot' menu and select Add Applications.
- In Available Applications, select the applications you want to add.
- Click Add to Folder.
The applications you selected appear in the folder. They remain available on All Applications.
Opening and Using a Folder
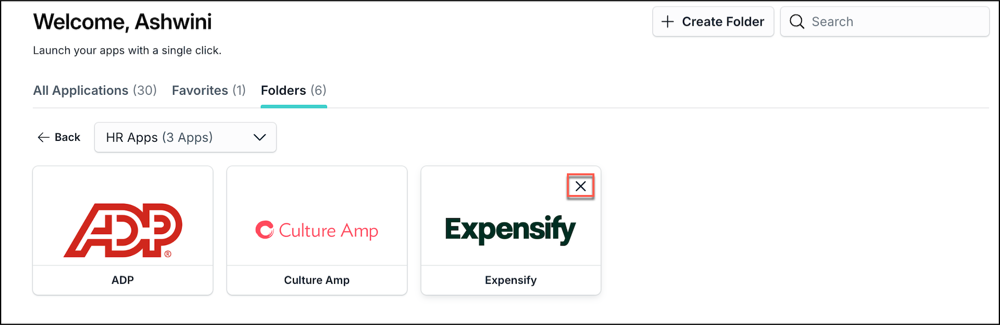
Open a folder to view and launch the applications inside it.
- On the Folders tab, on a folder card, click the 'three-dot' menu and select Open Folder.
- Click an application tile to launch it.
To remove an application from a folder, click the X on the application tile and click Remove. The application remains on All Applications.
Renaming or Deleting a Folder
Rename a folder to keep your organization up to date, or delete a folder you no longer need. Deleting a folder does not remove your access to the applications in it.
To rename a folder:
- On the Folders tab, on a folder card, click the 'three-dot' menu and select Rename.
- Enter a new name and click Save.
To delete a folder:
- On the Folders tab, on a folder card, click the 'three-dot' menu and select Delete Folder.
- Confirm that you want to delete the folder. Applications in the folder remain available on All Applications.
- Click Delete.
Adding an Application from All Applications
You can add an application to a folder directly from All Applications.
- Click All Applications.
- On an application card, click Add to folder.
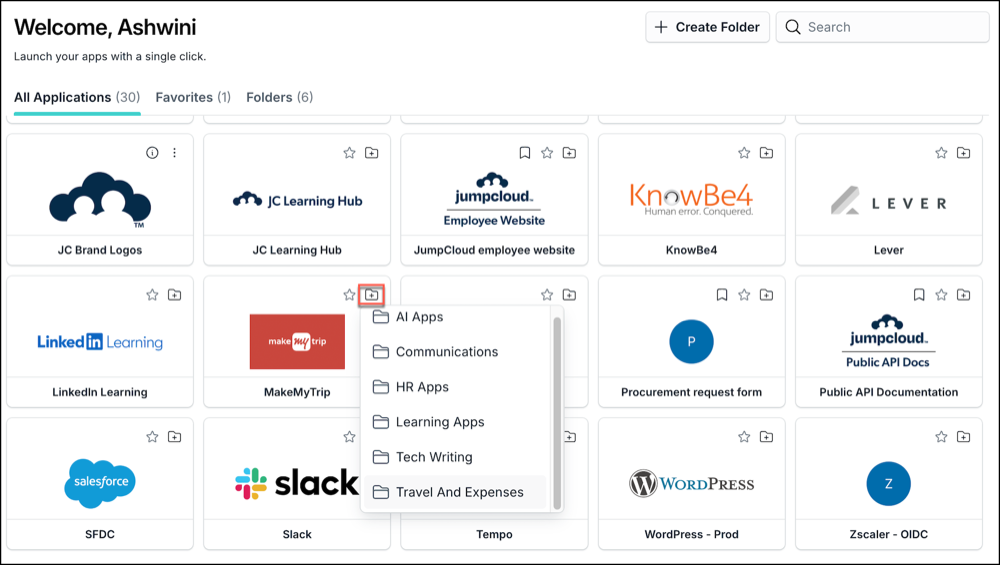
- Select the folder you want to add the application to.
You can add the same application to multiple folders, one folder at a time.
Searching in the Folders Tab
Use the search field on the Folders tab to quickly find an application across your folders. Enter a search term to filter matching applications.
Learn More
Was this information helpful?