Delegate Resource Management with Resource Managers
Resource Managers let you control which administrators can manage which Privileged Resources. You group administrators in a Resource Manager, share resources with the group once, and choose what the group can do. You do not need to open resource by resource to add each administrator.
This article is for administrators who need to give lower-level admins, such as an intern or a help desk team, access to only some Privileged Resources in JumpCloud Privileged Access Management (PAM).
With Resource Managers you can:
-
Group administrators in a single place.
-
Share Privileged Websites, Servers, Databases, and Privileged Credentials with the group.
-
Choose what the group can do with each resource: manage it, view its details and, for credentials, view the secret.
-
Change the permissions of the group at any time.
Resource Managers control the administration of resources. They define which administrators can manage or view a resource in the Admin Portal. They do not define which users can connect to the resource.
How Administrators Get Access to Resources
An administrator can work with the Privileged Resources in two ways.
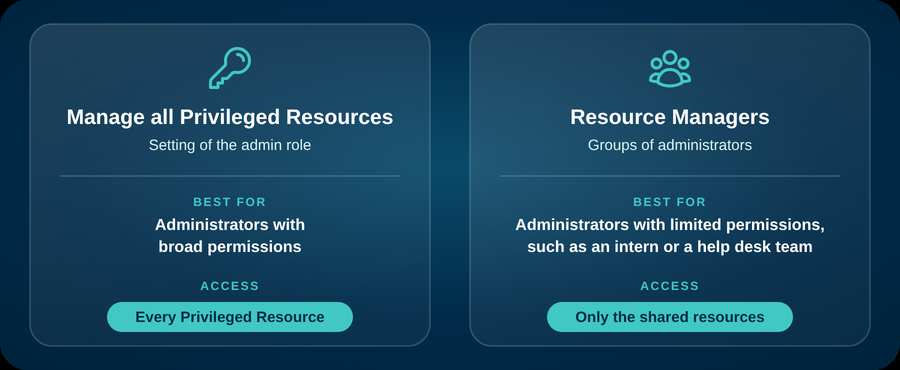
| Way | Best for | How it works |
|---|---|---|
| The Manage all Privileged Resources setting of the admin role | Administrators with broad permissions | The administrator can manage every Privileged Resource, even when the administrator is not listed as a manager of the resource. The Administrator With Billing role includes this setting. |
| Resource Managers | Administrators with limited permissions, such as an intern or a help desk team | The administrator can work only with the resources that were shared with the Resource Manager of the administrator. |
To turn on the first way, open the admin role, go to the PAM permission category and select Manage all Privileged Resources in Settings.

The role of the administrator needs permission for Resource Managers in the PAM category to open this area. When no permission is selected, the administrator has no access to Resource Managers.
Open Resource Managers
-
Log in to the JumpCloud Admin Portal.
-
Go to Access > PAM > Resource Managers.
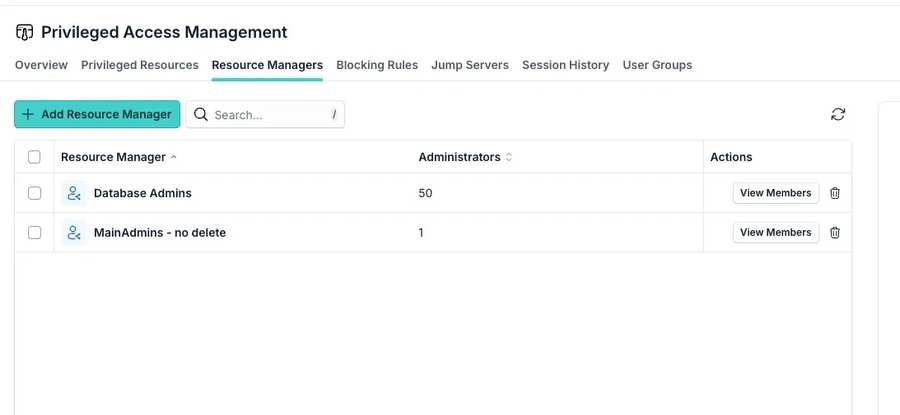
The list shows these columns:
| Column | What it shows |
|---|---|
| Resource Manager | The name of the group. |
| Administrators | How many administrators belong to the group. |
| Actions | View Members and the delete icon. |
Use the search box to find a Resource Manager and the refresh icon to update the list.
Create a Resource Manager
-
In Resource Managers, select Add Resource Manager.
-
In Name, enter a name that describes the group, for example Database Admins.
-
Select Add Administrators and choose the administrators that belong to the group.
-
Save the Resource Manager.
The new Resource Manager appears in the list. It has no resources yet. The next step is to share resources with it.
Share Resources with a Resource Manager
-
In Resource Managers, select the row of the Resource Manager. A panel opens on the right with the name of the group.
-
Select the type of resource: Privileged Websites, Servers, Databases, or Privileged Credentials.
-
Select Add.
-
Select the resources that the group will work with. You can use the search box to find them.
-
In Permissions, select what the group can do with the resources.
-
Select Save.
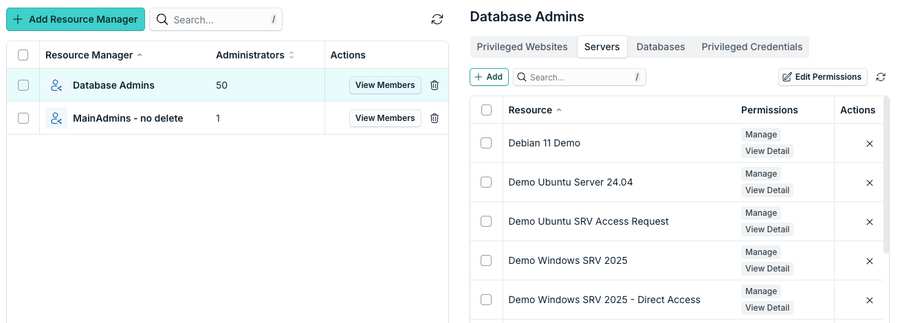
Select the row, not the name. Selecting the row opens the panel to share resources. Selecting the name opens the page to edit the Resource Manager.
These are the permissions that you can give:
| Permission | What administrators can do | Available for |
|---|---|---|
| Manage | Manage and edit the resource. | Privileged Websites, Servers, Databases, and Privileged Credentials |
| View Details | View the details of the resource. | Privileged Websites, Servers, Databases, and Privileged Credentials |
| View Secret | Reveal and copy the secret of the credential. | Privileged Credentials only |
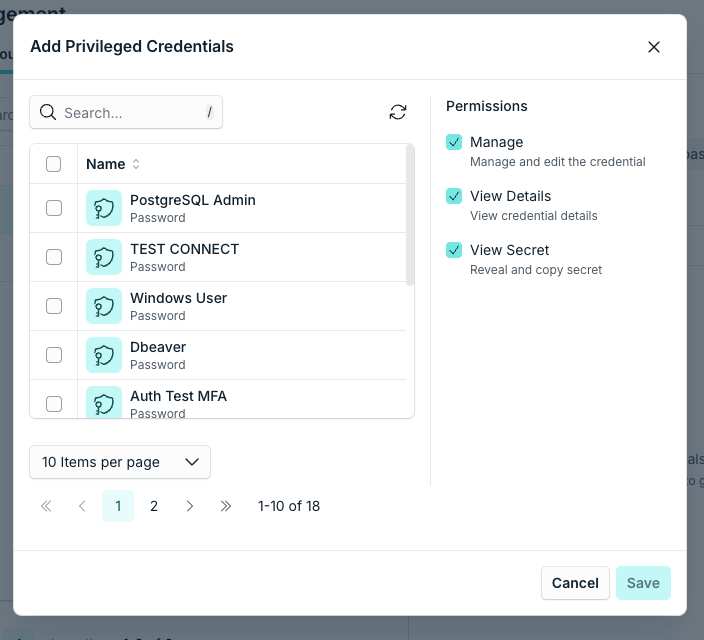
Credentials have one more permission. Administrators can reveal the secret of a credential in the Admin Portal, so View Secret is a separate permission. Give it only to the administrators who need it.
After you save, the resources appear in the panel with the permissions of the group.
Change the Permissions of a Resource Manager
You can change what a group can do with the resources that you already shared. For example, you can remove Manage and keep only View Details.
-
In Resource Managers, select the row of the Resource Manager.
-
Select the type of resource.
-
Select Edit Permissions at the top right of the panel.
-
Select the resources that you want to change.
-
In Permissions, select or clear the permissions.
-
Select Save.
The Permissions column is updated. In this example, the two selected resources now show only View Detail, and the group cannot manage them anymore.
Review, Remove, and Delete
-
View Members: Select View Members in the Actions column. To change the group, select the name of the Resource Manager and use the page to add or remove administrators.
-
Remove a resource from a group: In the panel, select the X in the Actions column of the resource, or select the checkboxes and remove several resources at once. The resource is not deleted. The group only loses access to it.
-
Delete a Resource Manager: In the list, select the delete icon of the Resource Manager, or select the checkboxes to delete several. The administrators and the resources are not deleted. The administrators lose the access that came from the group.
Add Resource Managers from a Resource
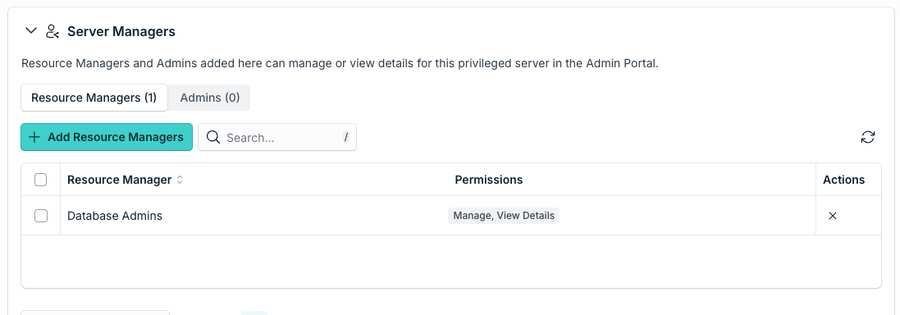
You can also define the administrators of a single resource. When you add or edit a Privileged Website, Server, Database, or Privileged Credential, the form has a card called Managers, for example Server Managers.
The card has two tabs:
-
Resource Managers: Add the groups that can manage or view the resource.
-
Admins: Add individual administrators.
Use the card when you need to adjust one resource. Use Resource Managers when you want to share many resources with the same group of administrators.
Example: a Help Desk Team
-
Create a Resource Manager called Help Desk and add the administrators of the team.
-
Share the Servers of the support team with View Details only.
-
Share the Privileged Websites that the team administers with Manage and View Details.
-
Later, if the team needs to manage a server, use Edit Permissions to add Manage for that server.
Was this information helpful?