Connect to a Resource Using SSH Direct to a Jump Server
You can start an SSH session from your own terminal, or another SSH app on your device, directly to a Jump Server.
You do not select the target resource in the first command. You connect to the Jump Server first. After you approve the connection in the browser, the Jump Server displays the servers you can access. Then you choose a resource from that list.
This method differs from Direct Access in the JumpCloud User Portal. In the User Portal flow, you select the resource first. In this flow, you open the Jump Server first, then choose the resource in the terminal.
Prerequisites
- A Jump Server is installed and online in your environment.
- You know the Jump Server DNS name or IP address, and its Shell Port.
- Your device can reach that Jump Server on the Shell Port. Your company network rules may allow DNS, IP, or both.
- You have access to at least one server resource in JumpCloud Privileged Access Management (PAM).
- You can log in to the JumpCloud User Portal when the approval page opens.
Considerations
- Use this method when you want to start from your local SSH app and reach the Jump Server directly.
- If you prefer to select the resource in the JumpCloud User Portal first, use Direct Access on that resource instead.
- JumpCloud is updating Jump Server DNS names. This article uses the current format:
<jump_server_id>.connect.vault.jumpcloud.com. Use the value shown for your Jump Server in the JumpCloud Admin Portal.
Finding Jump Server Details
Each Jump Server has its own DNS name. The current DNS format is:
<jump_server_id>.connect.vault.jumpcloud.com
You can also connect using the Jump Server IP address, if your company network allows it.
You also need the Shell Port set for that Jump Server during install. The default is often 2222, but your Admin can set a different port.
An Admin can find the Jump Server details in the JumpCloud Admin Portal:
- Log in to the JumpCloud Admin Portal.
- Go to Access > PAM.
- Click the Jump Servers tab.
- Find the Jump Server and open the Health Check icon or the Installation icon so you can see the Jump Server Details.
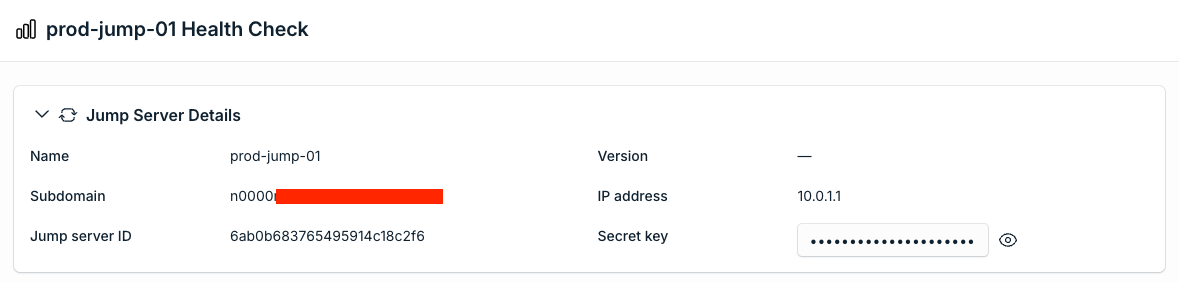
JumpCloud is updating Jump Server DNS names. Use the value shown for your Jump Server in the JumpCloud Admin Portal.
Connecting to the Jump Server from Your SSH App
Open your SSH app or Terminal and connect to the Jump Server on its Shell Port.
Using DNS:
ssh <jump_server_id>.connect.vault.jumpcloud.com -p <shell_port>
For example:
ssh w00hbhfu8korg3c6aw96wzdo.connect.vault.jumpcloud.com -p 2222
Using IP address:
ssh <jump_server_ip> -p <shell_port>
For example:
ssh 10.144.22.249 -p 2222

Use DNS or IP based on what your company network allows.
Approving the Connection in Your Browser
Your terminal displays a link and waits. Open that link and approve the connection before the session continues.
For example:
Please open the following link in your browser to authenticate:
https://console.jumpcloud.com/login/device?code=XXXX-XXXX
Waiting for authentication...
This SSH path runs outside the browser. The approval page links the terminal session to your JumpCloud account. JumpCloud verifies that you are logged in and that you started this connection. The terminal session does not continue until you approve.
To approve the connection, do the following:
- Open the link from the terminal. Prefer the browser where you are already logged in to JumpCloud.
- On the Approve Connection page, confirm that the Authorization Code matches the code from your connection request.
- Click Approve to continue, or click Deny if you did not start this connection.
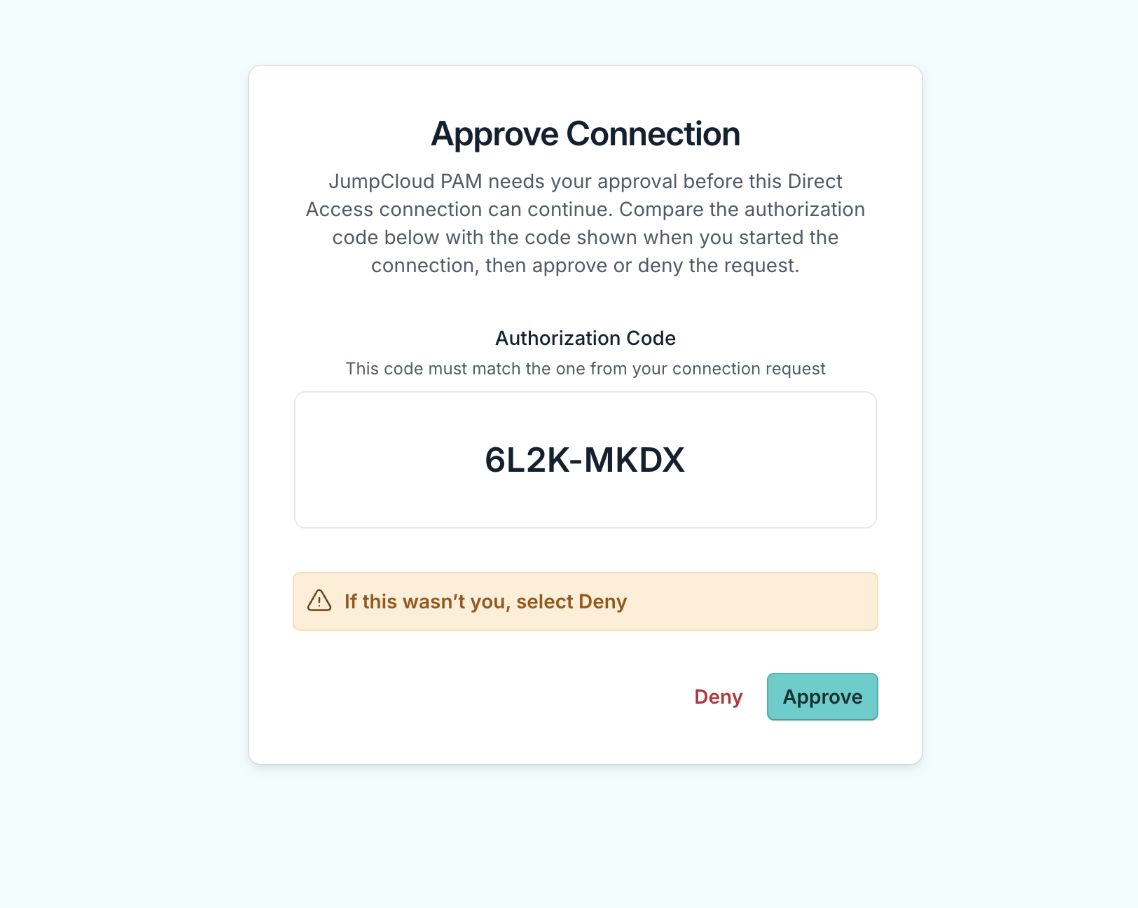
If you did not start this connection, click Deny, then contact your Admin. Do not approve a code you do not recognize.
Choosing a Resource from the Servers List
After you approve, return to your terminal.
The Jump Server displays the Servers List. This list includes the servers you can connect to.
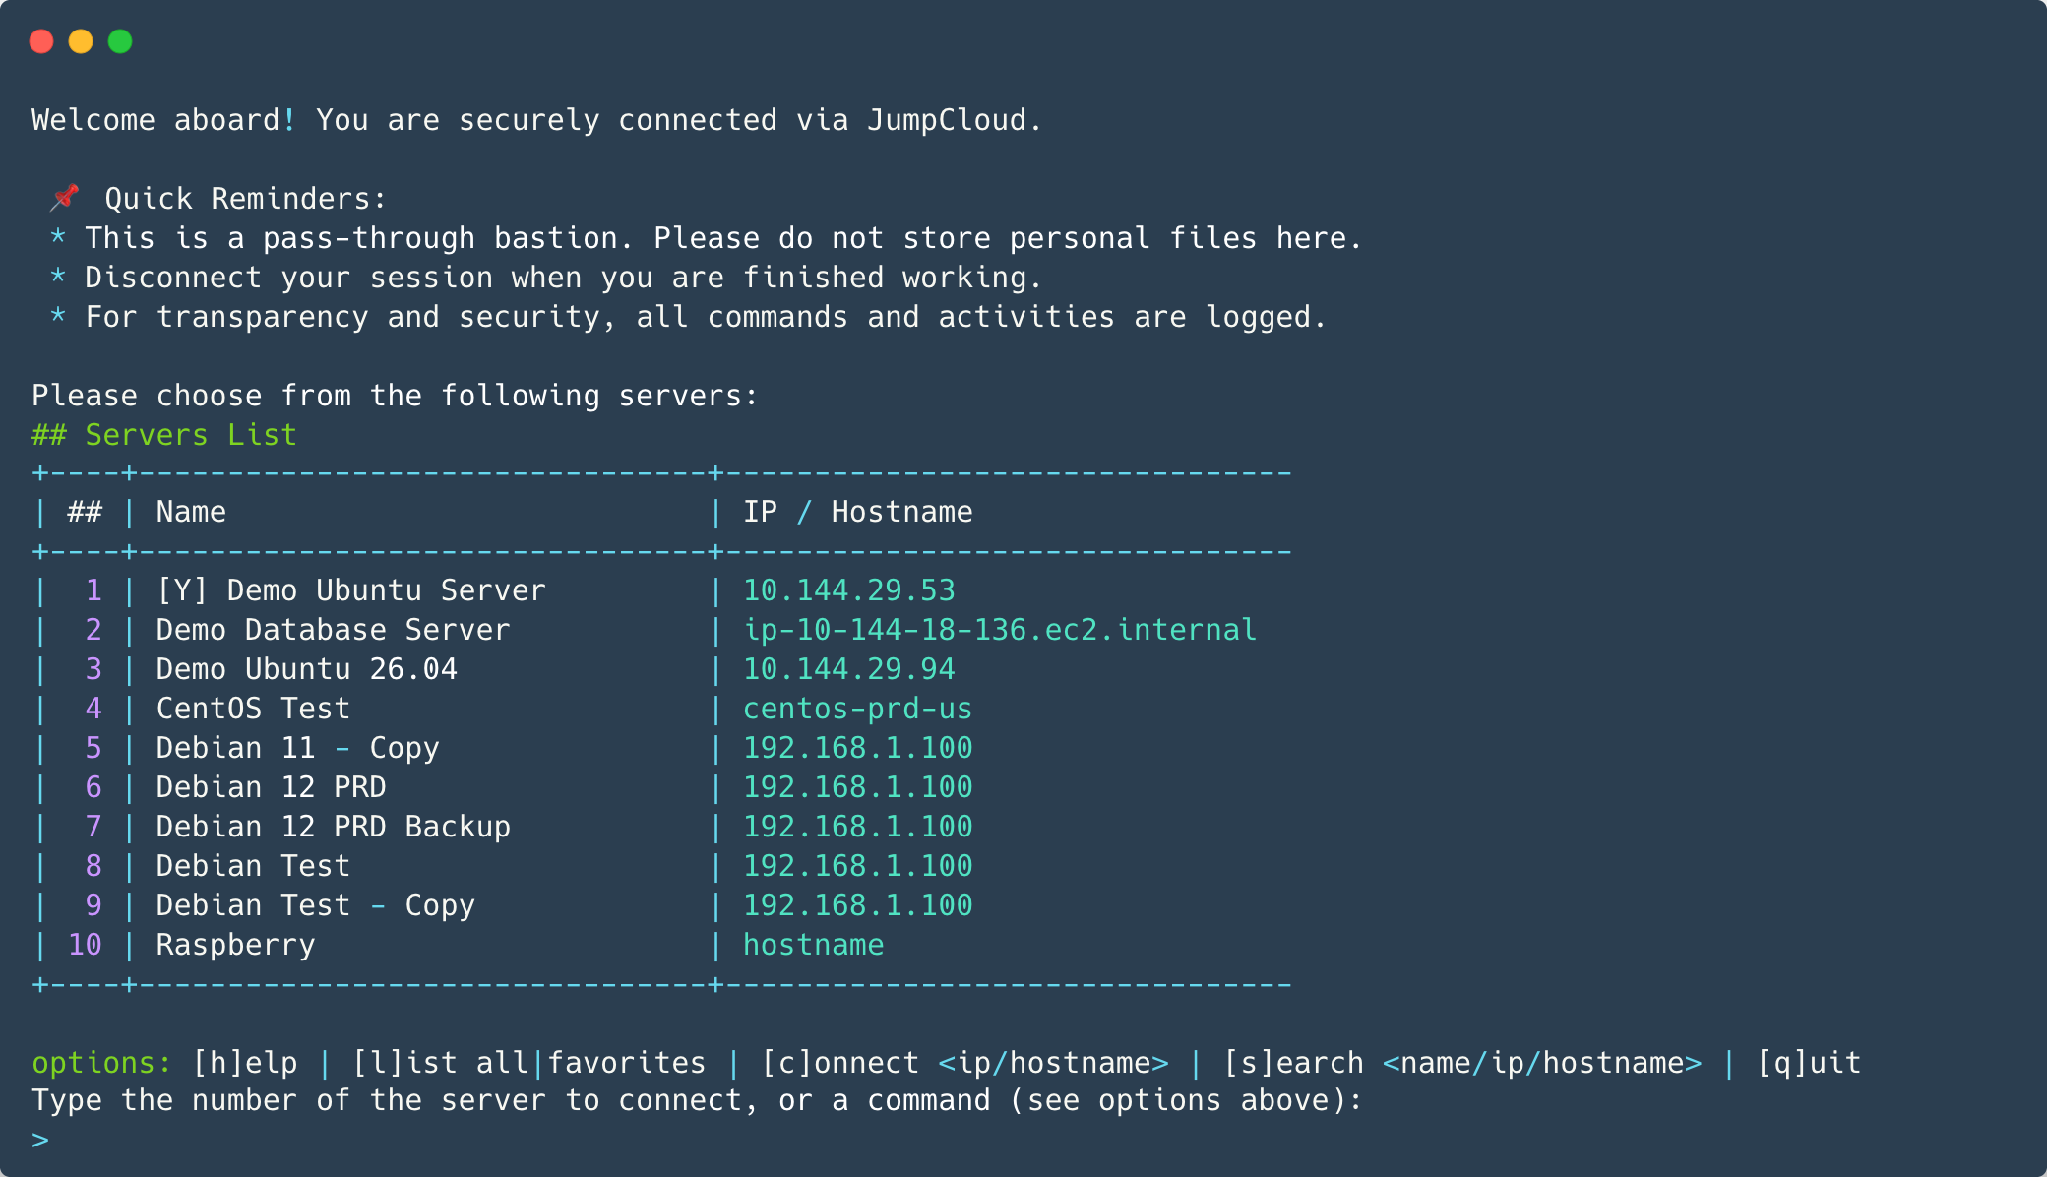
Available commands include:
| Command | What it does |
|---|---|
| h or help | Shows help |
| l or list all | Shows the full Servers List |
| c or connect | Connects to a resource by IP or hostname |
| s or search | Searches by name, IP, or hostname |
| q or quit | Ends the Jump Server session |
To connect, type the server number from the list, or use c / connect with the IP or hostname.
For example:
c 10.144.29.53
connect 10.144.29.53

When you leave the resource, you return to the Servers List. From there, you can connect to another resource or quit.
You are in the Jump Server session. Use the Servers List to open a resource. When you finish that resource session, you return to the list.
Troubleshooting Tips
- If the SSH command fails at connection time, confirm that your device can reach the Jump Server on the Shell Port. Try the other address type if needed (DNS or IP), based on your company network rules.
- If you do not know the DNS name, IP address, or port, in the JumpCloud Admin Portal go to Access > PAM > Jump Servers, then confirm the Jump Server details and Shell Port.
- If the approval page reports that the code is invalid or expired, run the SSH command again and use the new link.
- If you approved, but the terminal continues to wait, return to the same terminal window that displayed the link. If the terminal still waits, click Deny on any open approval page, close that terminal prompt, and run the command again.
- If the Servers List is empty or missing a resource, ask your Admin to confirm that the resource is shared with you and linked to that Jump Server.
Was this information helpful?