Configure Autofill Field Selectors for a Privileged Website
When a user connects to a Privileged Website, JumpCloud Go™ signs in for the user. It fills in the email or username and the password, and it clicks the Next, Continue and Login buttons. Every website is built in a different way. On some websites, JumpCloud Go™ cannot find a field or a button, and the login is not completed.
If this happens, you can tell JumpCloud Go™ where each field and button is. To do this, you copy the selector of the element from the developer tools of your browser and paste it in the Privileged Website.
Prerequisites
- A Privileged Website in PAM with a linked credential.
- The Administrator with Billing role, or being listed as a manager of the Privileged Website.
- A browser with developer tools. The steps below use Google Chrome.
When to Use This Configuration
Use it when, during a session, JumpCloud Go™ does one of these:
- Does not fill in the email or username.
- Does not fill in the password.
- Does not click the Next, Continue or Login button.
There are many possible reasons, and they depend on how the website was built. Configuring the field selectors is a reliable way to solve the problem. Configure only the fields and buttons that JumpCloud Go™ does not find.
Step 1: Copy the Selector of Each Element
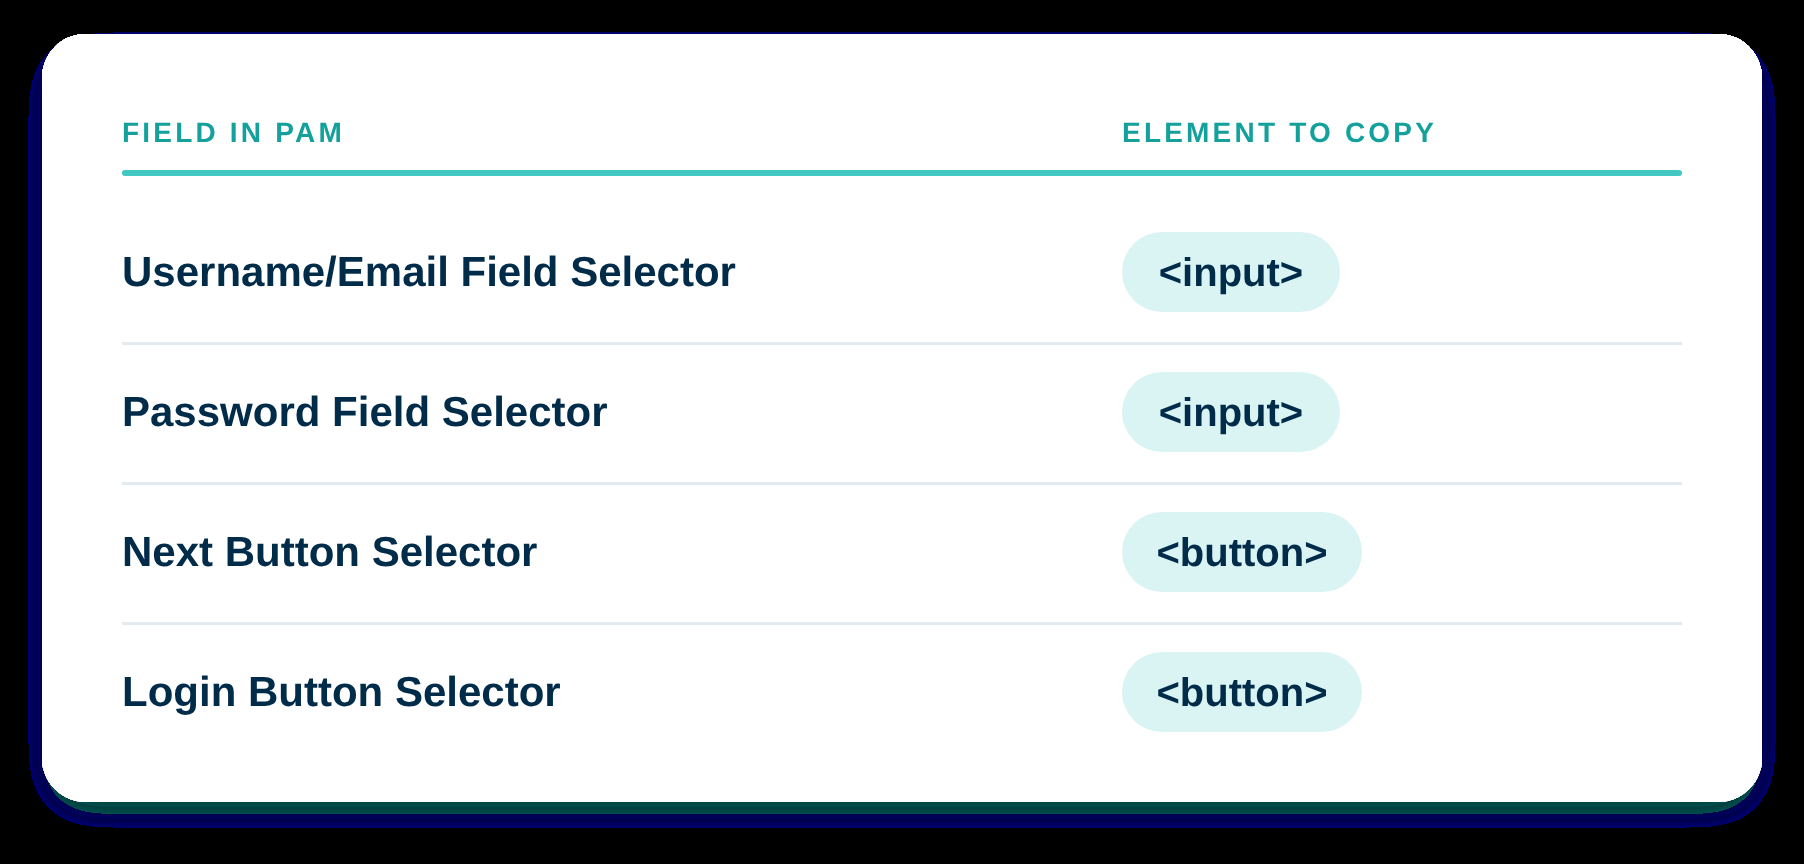
The selector identifies the element in the HTML of the page. For each element, copy the selector of the correct type of HTML element:
- In your browser, open the login page of the website.
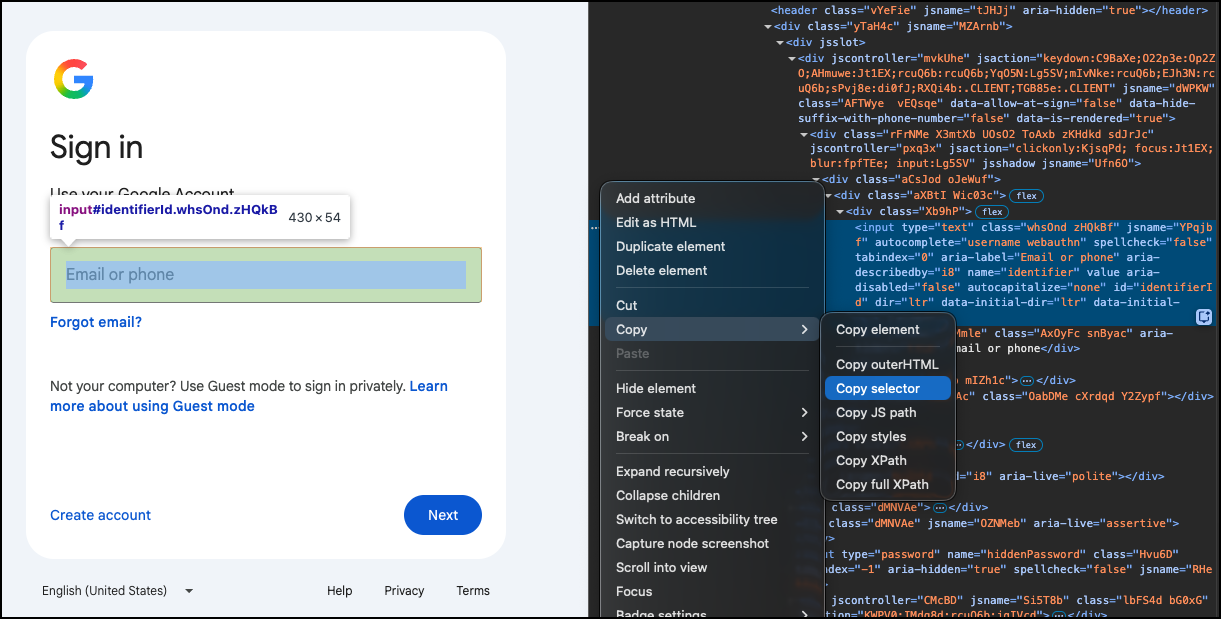
- Right-click the element and click Inspect. The developer tools open with the HTML of the element selected.
- Check the tag of the selected HTML element. If it is not the expected one, see the warning below.
- Right-click the HTML element and click Copy > Copy selector.
- Repeat for each field and button that you need to configure. Keep the selectors, because you paste them in PAM in the next step.
Websites with Next and Login Buttons
Websites sign in in different ways:
- Some websites ask for the email, show a Next or Continue button, and then ask for the password and show a Login button. Configure both buttons.
- Some websites have only a Login button. Configure only the Login button.
- Some websites use the same button for both actions. The selector can be the same for the Next and the Login buttons. This is expected. It depends on how the website was built.
Step 2: Add the Selectors to the Privileged Website
- In the JumpCloud Admin Portal, go to Access > PAM > Privileged Resources > Privileged Websites.
- Click the name of the Privileged Website.
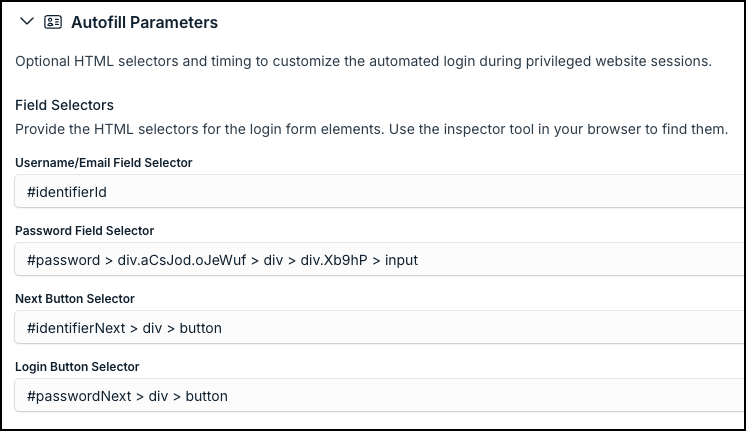
- Go to the Autofill Parameters card, the last card of the form.
- In Field Selectors, paste each selector in its field: Username/Email Field Selector, Password Field Selector, Next Button Selector and Login Button Selector.
- Save the Privileged Website.
Step 3: Check the Result
Connect to the Privileged Website from the User Portal and confirm that JumpCloud Go™ fills in the fields and clicks the buttons. If a field is still not filled in, go back to Step 1 and check that you copied the selector of an input or a button tag.
Tips
- Configure only what is needed. Leave empty the fields that JumpCloud Go™ already finds.
- If the website changes its login page, a selector can stop matching the element. Copy the selector again and replace it.
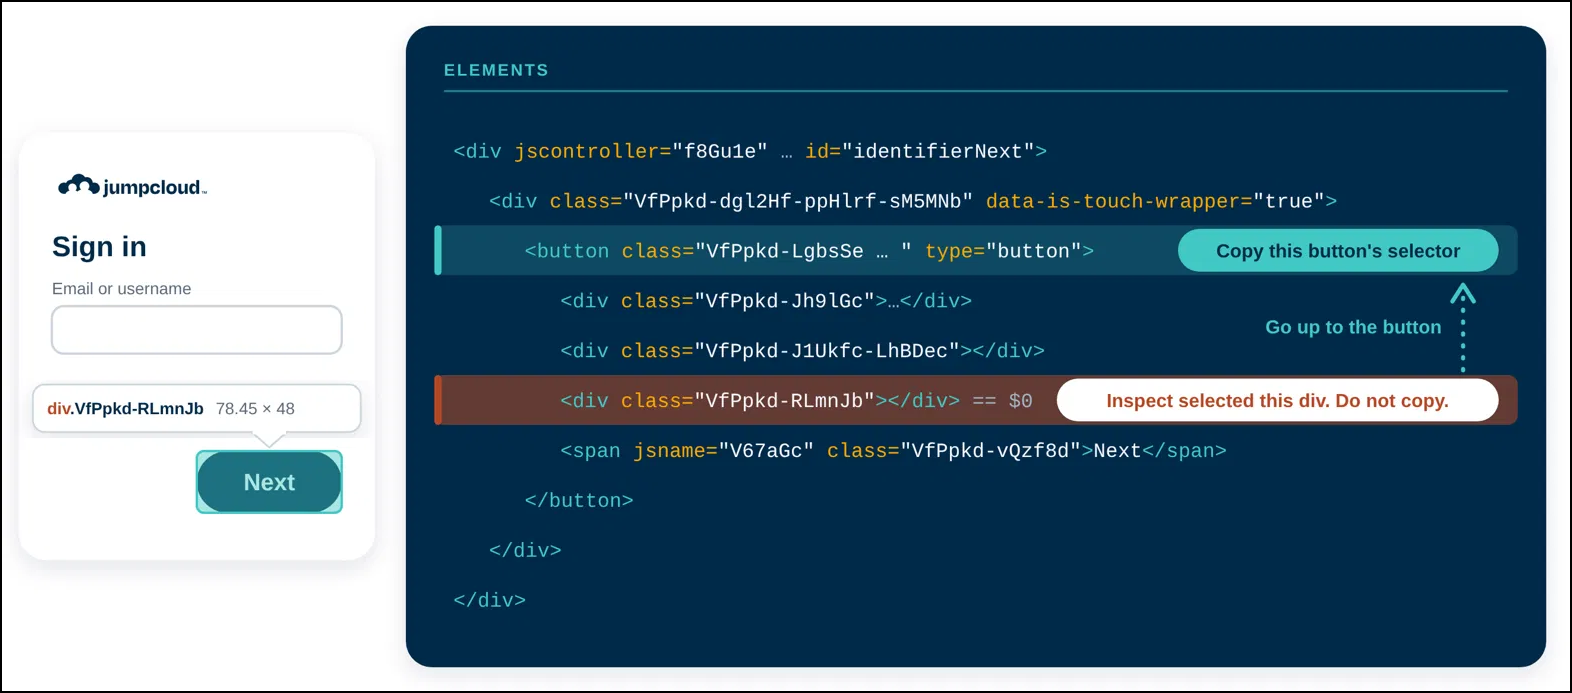
Copy the selector of the right element. When you click Inspect, the browser can select a div or another element inside or around the field or button, and not the input or the button. The selector of that element does not work. In the developer tools, look at the HTML near the selected element, usually just above it, select the input or the button tag, and copy the selector of that tag.
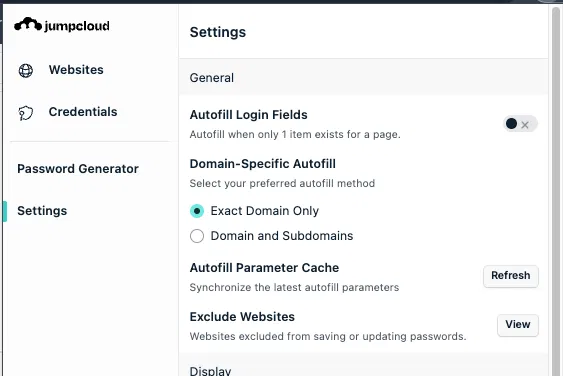
Step 4: Refresh the Autofill Parameters in the Extension
JumpCloud Go™ keeps the autofill parameters in a cache. If you save a change in the Privileged Website and test it right away, the extension can still use the previous parameters. Refresh the cache so that the extension receives the new configuration.
- In your browser, click the JumpCloud Go™ icon to open the extension. If you do not see the icon, open the Extensions menu of the browser and select JumpCloud Go™.
- Select Settings.
- In the Autofill Parameter Cache, click Refresh.
Was this information helpful?