ADI in the Enterprise Portal (Preview)
JumpCloud’s Enterprise Portal (EP) centralizes the control and management of Organizations from one dashboard. This enables admins to control all of their organizations efficiently, from a single, browser-based portal. EP Admins can view top-level data for all of their managed orgs at-a-glance. They can also securely launch full management sessions from the EP for any org they administer.
The Active Directory Integration (ADI) is JumpCloud's identity and access management directory integration that enables the syncing of users, groups, and passwords between JumpCloud and on or off-premise AD. ADI can be used to extend AD to the Cloud, minimize the number of resources managed by AD, and migrate away from AD.
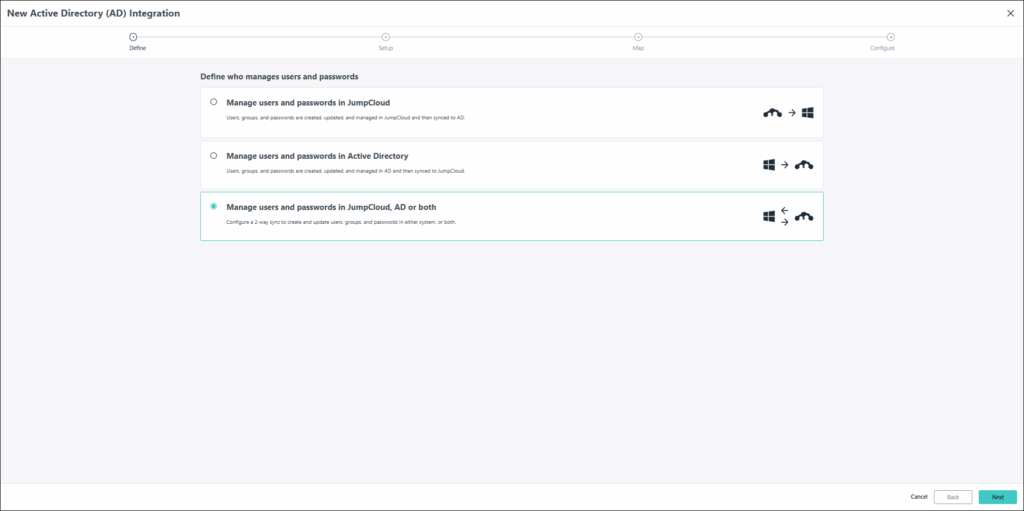
As covered in Get Started: Active Directory Integration, ADI uses two agents; an Import Agent and a Sync Agent that can be installed in three (3) configurations, referred to as deployment configurations. For the EP, Manage users and passwords in AD, JumpCloud, or both is the preferred configuration.
Prerequisites
Before getting started with ADI, JumpCloud recommends going through this list and ensuring all items have been completed before continuing.
You will need:
- AD Domain Admin credentials
- Access to all Domain Controllers (DCs) or member servers in your AD domain
- Network access to the internet from DCs or member servers and ability to communicate outbound (only) to console.jumpcloud.com over HTTPS port 443
- The JumpCloud AD Import and Sync Agent services use SSL/TLS for all communication. If no network connectivity exists to JumpCloud, ADI will fail to connect and won't work properly
- Access to the Enterprise Configuration interface
Review Configure ADI: Manage users, groups and passwords in AD, JumpCloud, or both to understand the system requirements, considerations, prerequisites, and installation steps.
Terminology:
- Global Configuration: The primary organization. This is where you manage the settings for all the organizations.
- Organizations: These are the managed sub-organizations.
ADI Configuration
To create a new enterprise-level ADI Domain
- Log in to your EP.
- Click the Enterprise Configurationbutton.
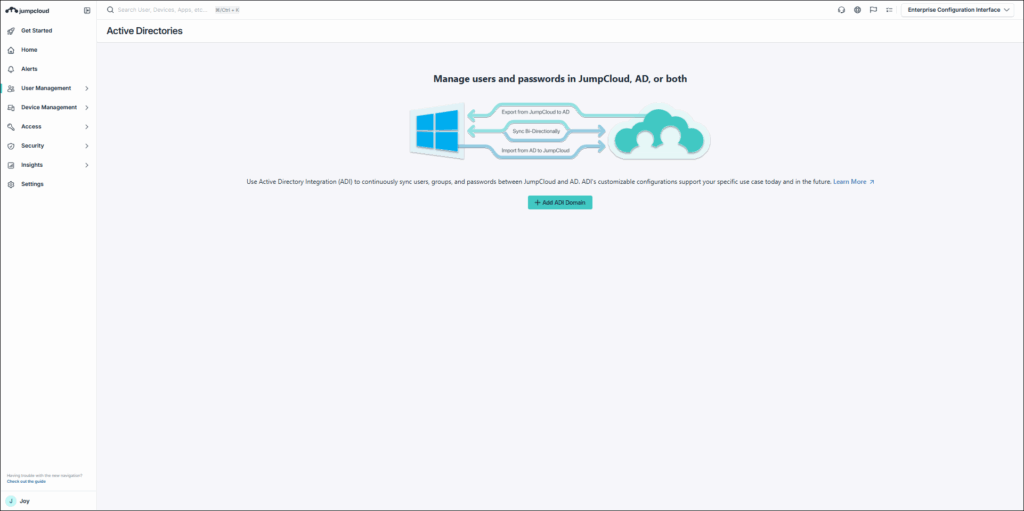
- In the Left Nav, go to Identity Management > Active Directories.
- Click ( + Add ADI Domain ).
- If you have an existing ADI instance, click (+) to add another instance
- Select Manage users and passwords in JumpCloud, AD or both and then click Next.
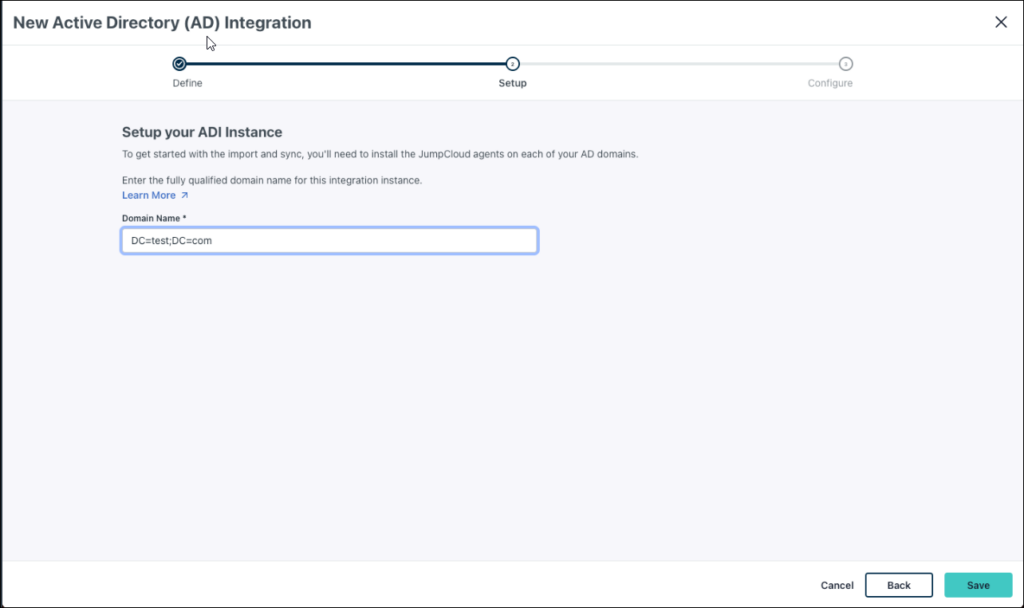
- Enter the name of an Active Directory Domain that you want to integrate with your JumpCloud tenant. For example, “
DC=example;DC=com” and then click Next.
The “DC” must be in capital letters. Each value must be separated with a semicolon (;) not a comma. There should be no spaces. The domain case must be the same as it is in the AD import configuration file.
- Review and update (if necessary) the JumpCloud Attribute values for userPrincipalName and sAMAccountName.
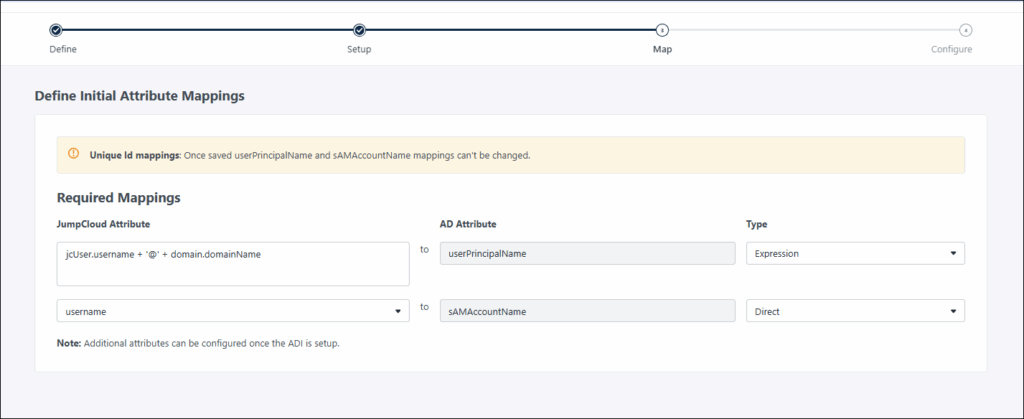
You cannot change these two mappings after clicking Save.
- Click Save.
- If you want to use delegated authentication, select the checkbox for Delegated Password Validation. You can also download your ADI agents on this screen.
- Click Close (to finish setup later) or Configure ADI.
This option may be useful when importing existing users from AD to JumpCloud. It allows them to log in to the JumpCloud User Portal using their existing AD credentials for the first time.
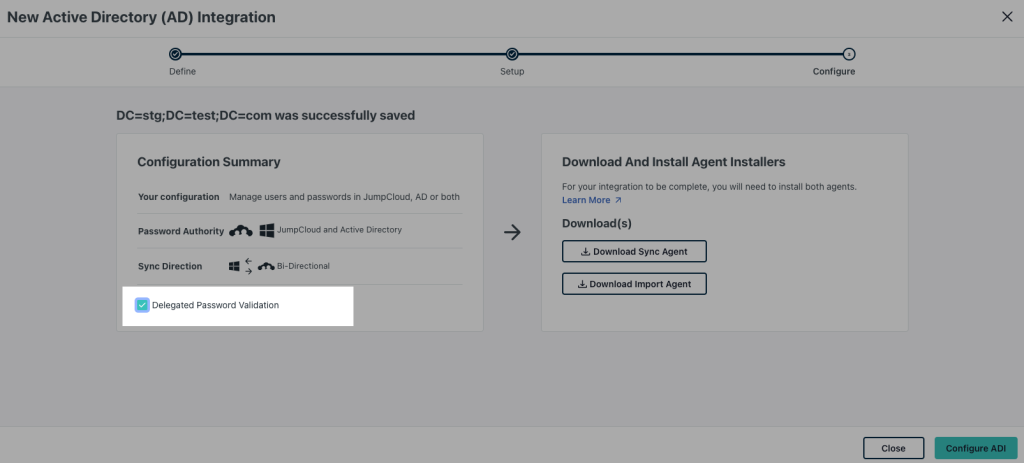
- Follow the instructions in Configure ADI: Manage users, groups and passwords in AD, JumpCloud, or both to finish setting up your AD integration.
Sharing ADI Enterprise-Level Domains
- Log in to your EP.
- Go to the Configurationstab and select the Active Directory pillbox.
- Click on the name of the ADI Domain and the Share Configuration aside will appear.
- Select the secondary organizations you would like to share the domain with.
- Click Save.
Managing Access
To manage org access to enterprise-level ADI Domains
- Log in to your EP.
- Go to the Configurations tab and select the Active Directory pillbox.
- Click on the name of the domain.
- Select the box next to the organizations where you want the ADI domain to be available.
- Deselect the box next to the organizations where the ADI domain should no longer be available.
- Click Save.
To manage end-user access to enterprise-level ADI Domains
- Log in to your EP.
- Go to the Organizations tab and then click Launch next to the organization that contains the users for whom you want to manage access to the AD domian.
- In the Left Nav, go to Identity Management > Active Directories.
- Click the name of the domain.
- Go to the User Group tab or Users tab.
- Select the checkbox next to the user groups or users you want to give access to the ADI domain.
- Deselect the checkbox next to the user groups or users you want to remove access from the ADI domain.
- Click Save.
Was this information helpful?